Page 1 of 7
1275GTi conversion
Posted: Fri Sep 03, 2010 10:13 pm
by kerryminigringo
Re: 1275GTi conversion
Posted: Fri Sep 03, 2010 10:24 pm
by kerryminigringo
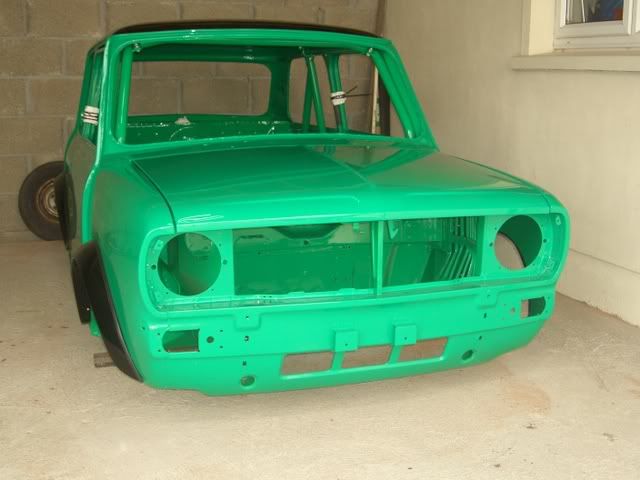
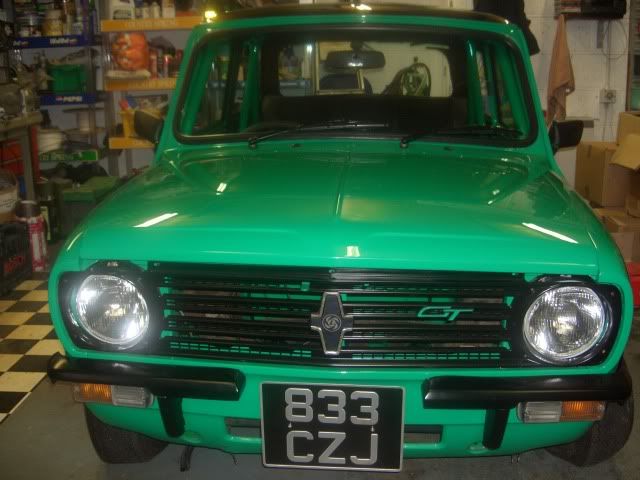
I had an idea of the way I wanted to style the car and it was to remove as much of the chrome as possible from the Mini and retain the green and black theme.I always liked Escort half bumpers so I decided to make my own.I got a solid front bumper,cut it in half and used the off cuts to make end caps for the bumpers.I then got them sand blasted along with the under-riders so that the matt black paint would stick to the chrome.
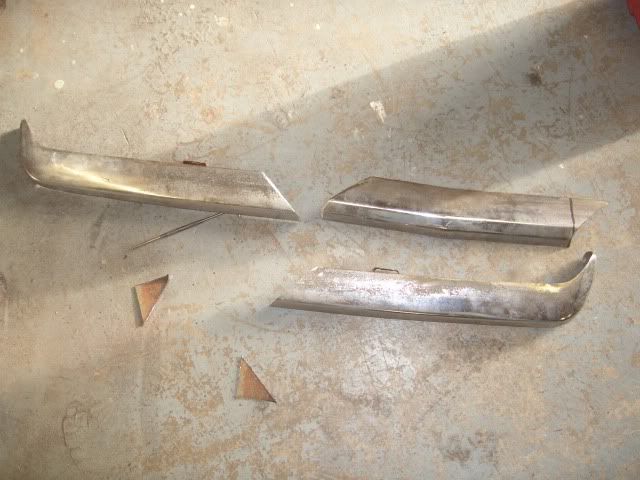
Bumpers awaiting paint.
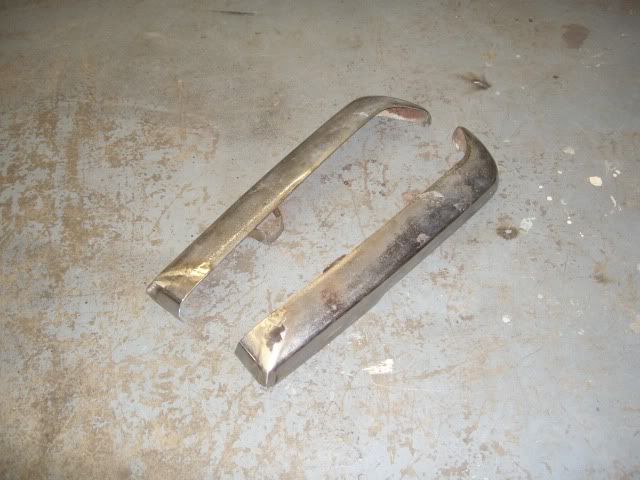
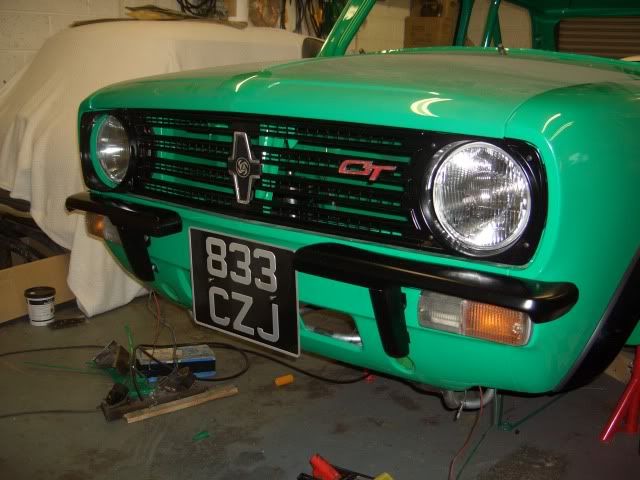
I also got the grille and rear bumpers painted at the same time to ensure they all had the same mattness.Here are the bumpers and grille on the front of the Mini.
I also treated the rear light cluster to the same treatment along with the number plate light holder.
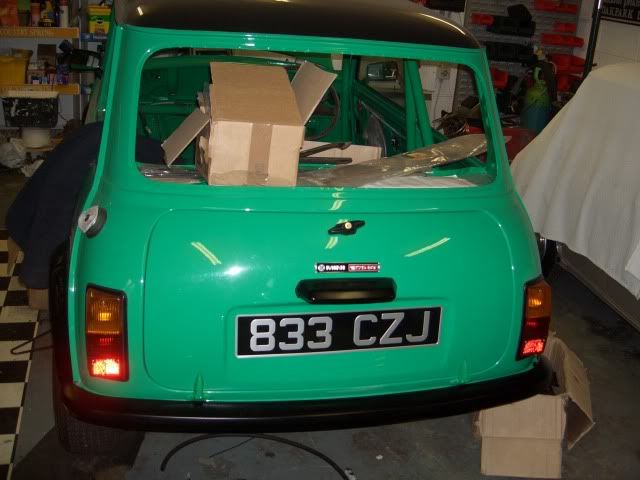
I also gave the GT badge the green and black treatment.
Re: 1275GTi conversion
Posted: Fri Sep 03, 2010 10:28 pm
by seanos
WOW!
that is one amazing looking clubbie! I love the bumpers on the front!
Re: 1275GTi conversion
Posted: Fri Sep 03, 2010 10:38 pm
by kerryminigringo
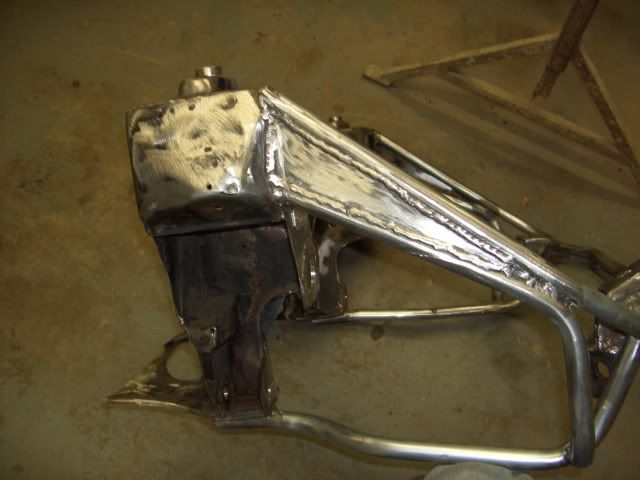
I removed all of the suspension gear from the rear subframe and along with the radius arms and back plates,I sent the whole lot off to be blasted and powdercoated in black.I built up the frame with all new copper pipes,braided hoses,Hi-Lo's,Minifin drums,adjustable camber brackets and Spax shocks.New cones will be fitted at a later stage.
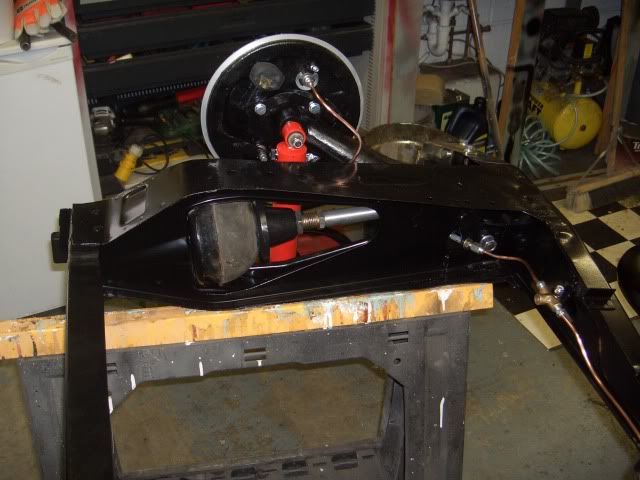
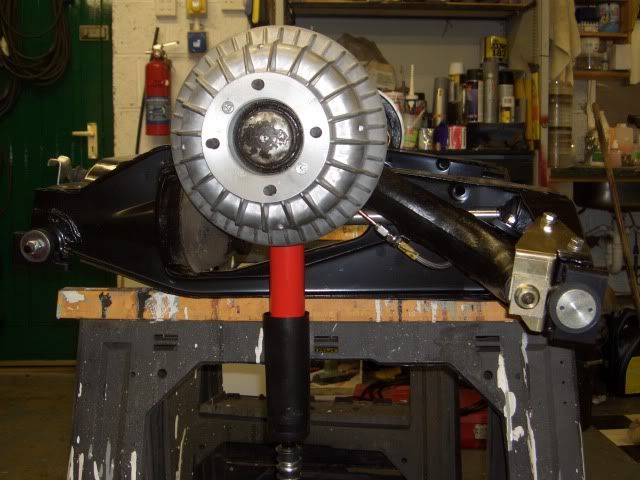
I also used DSN billet alloy subframe trunnions and handbrake quadrants just because I like the look of them

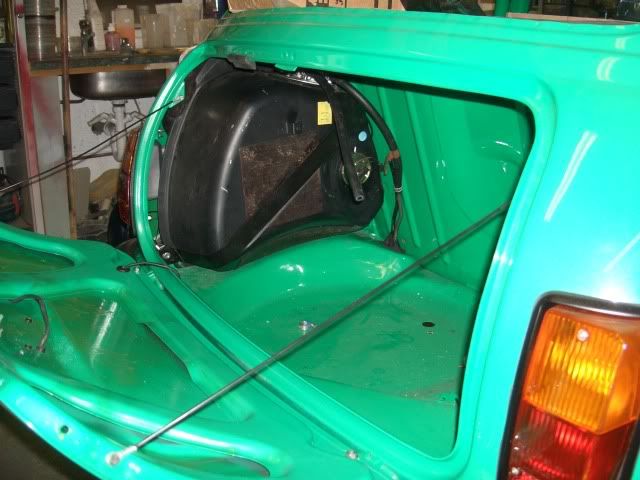
I fitted an MPI tank I picked up at the IMM in Birmingham and maybe in the future I will add a twin tank.
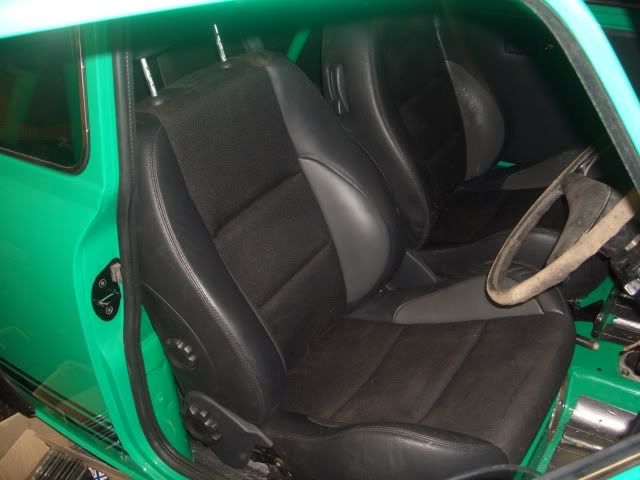
I bought a set of MG ZR seats on ebay and I got a guy in Dublin to take the cover off the rear seat and fit it to a Mini rear seat. I also got him to fit a back headcloth as well.
Plans for the weekend are to get the engine in as I need to modify the bulkhead slightly as it is a MKII set up and maybe get the gear linkage sorted.The IMM in Switzerland is what I would hope this ready for but who knows.By the way if anyone is wondering how the plastic lenses look so bright and shiny,a quick flick of laquer works wonders and covers up all those hair line cracks that the old Lucas lenses suffer from.
Re: 1275GTi conversion
Posted: Fri Sep 03, 2010 11:28 pm
by DaveC
Wow, you have been busy

The GT looks great.
What are the plans for wheels out of curiosity?
Re: 1275GTi conversion
Posted: Fri Sep 03, 2010 11:43 pm
by macker
Crackin looking Clubby!
can't wait to see this one in the tin!
Re: 1275GTi conversion
Posted: Sat Sep 04, 2010 2:22 am
by StanO'Toole
Thats savage Aidan, you can't beat the ol G13's!

Driving a G10a Swift myself and it just laughs at abuse! Well wear!
Re: 1275GTi conversion
Posted: Sat Sep 04, 2010 7:21 am
by CLUBMANGT
Re: 1275GTi conversion
Posted: Sat Sep 04, 2010 11:36 am
by niallm
God im in love
Great to see another clubby in getting top notch treatment
Lookin at these pics is giving me inspiration to get out and work on Stobart
Re: 1275GTi conversion
Posted: Sat Sep 04, 2010 1:36 pm
by Kenneth Murphy
thats lovely aiden cant wait to see it in the metal! will it be done in time for mtm next year??
Re: 1275GTi conversion
Posted: Sat Sep 04, 2010 4:18 pm
by StanO'Toole
Is the badge above the rear reg light a 1275gt badge?
Re: 1275GTi conversion
Posted: Sun Sep 05, 2010 3:17 pm
by briain
Great project love the colour scheme what green is that?
Re: 1275GTi conversion
Posted: Sun Sep 05, 2010 4:18 pm
by mustard
StanO'Toole wrote:Is the badge above the rear reg light a 1275gt badge?
looks to be ahrght...
great car aidan... cant wait to see her eat up some tarmac...

Re: 1275GTi conversion
Posted: Sun Sep 05, 2010 7:34 pm
by kerryminigringo
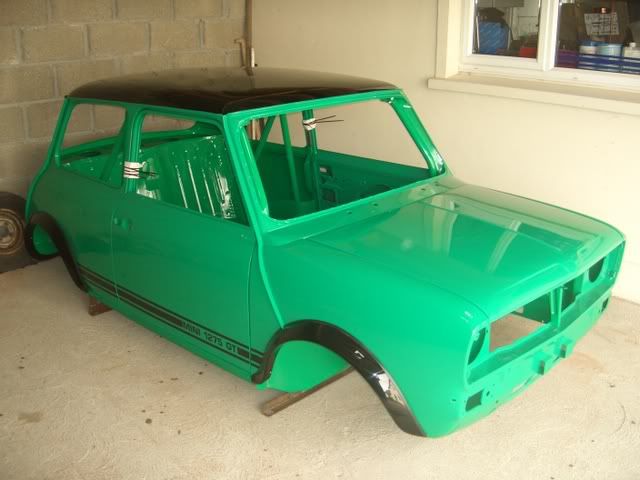
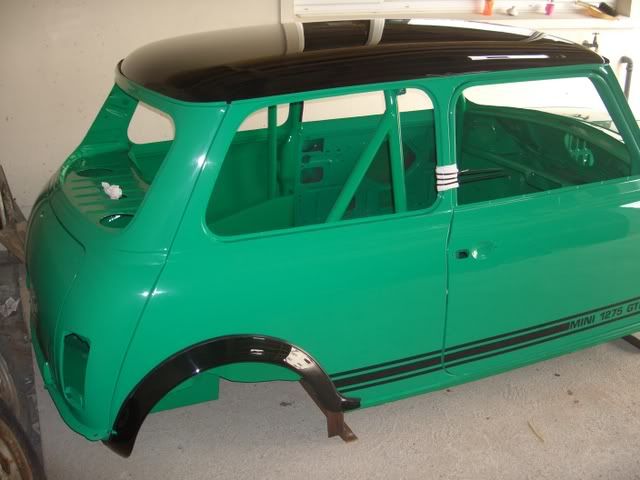
The Mini will be on 10" wheels Dave,I bought a special set way back when the celtic tiger was on the go.To answer a couple of the other questions.The badge is indeed a 1275GT badge and the colour scheme is Java Green BLVC208 and the black is the same as used on RSP Coopers.I got the side and rear windows back from the window tinters yesterday and fitted them.I went with a 50% tint on the rear and side windows and a 65% tint on the door windows.I also got the engine fitted and started on the gear linkage but I could not finish it as I am missing a bolt for the gear box end.I also started making my own interior panels.I am having problems with my camera and I will post pictures as soon as I sort it out.
Re: 1275GTi conversion
Posted: Sun Sep 05, 2010 8:01 pm
by kerryminigringo
Here is a picture of the engine in the car.It is a tight squeeze at the bulkhead but after a bit of fiddling I managed to get it into place.I am hoping to have a front mounted rad as there is room for it.

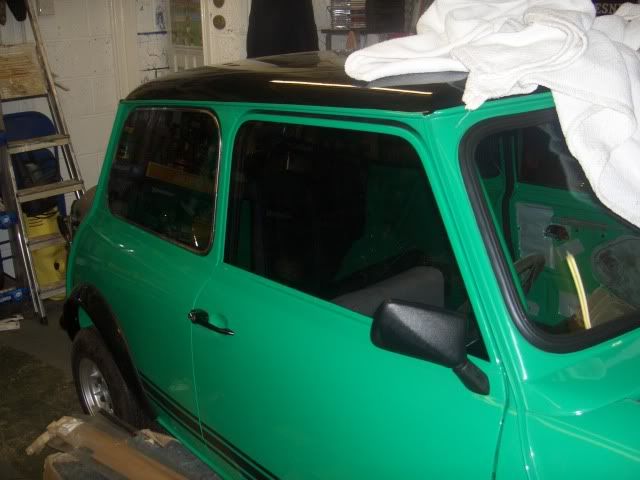
These are the windows fitted.I put on sound deadening material before I fitted the door windows.
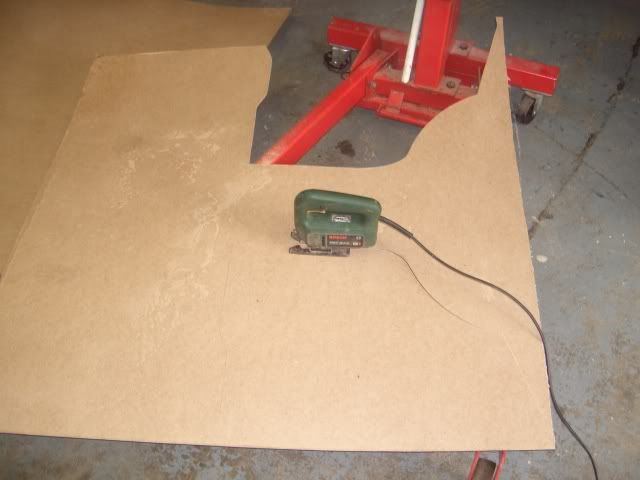
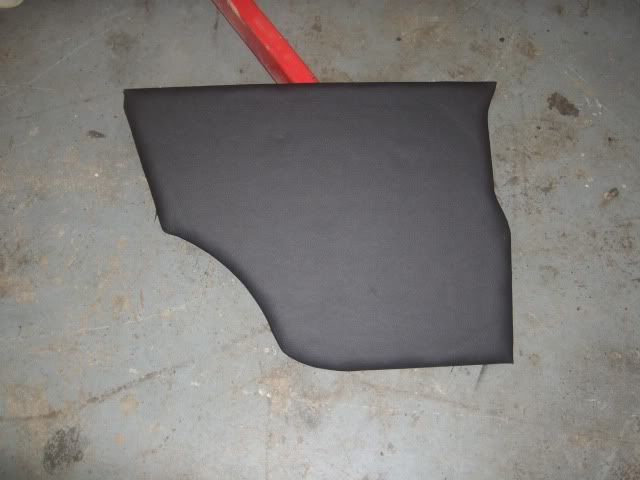
I started the interior panels as well.I got an 8x4 sheet of hard board from a local builders merchants and using old panels I cut out new ones using a jigsaw.
I then got some 1/4" foam from an upholstery shop and cut this out in the shape of the panels.
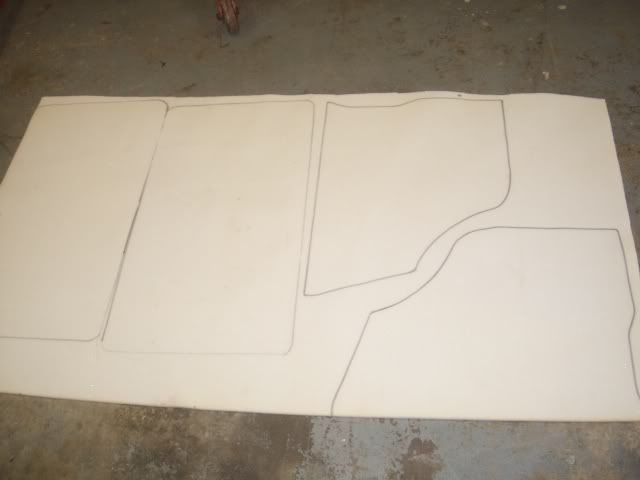
I used EvoStik 528 contact adhesive and stuck the foam to the hard board.I them got vinyl that the trimmer had given me to match the rear seat and I cut out the patterns to match the panel.I used the EvoStik adhesive to stick them to the foam and I have to say I am pretty happy with the end result.I have only finished one quarter panel but I hope to finish the rest during the week.
Re: 1275GTi conversion
Posted: Sun Sep 05, 2010 8:09 pm
by D Seven
Great project Aidan, top class work as usual , I like the standards you set.
Re: 1275GTi conversion
Posted: Sun Sep 05, 2010 9:59 pm
by Darran
Fantastic work there Aidan, its going to be a cracker when you have it finished. l love the colour with the black.
Darran.
Re: 1275GTi conversion
Posted: Mon Sep 06, 2010 9:17 am
by dayoungfella
Outstanding work Aidan, will be keeping a close eye on this!
Re: 1275GTi conversion
Posted: Mon Sep 06, 2010 9:41 am
by maxi
Wow Wow Wow!!
Was too tired to post last night, but man its an absolute beauty!!
Really love the little touches Aidan. Especially love the bumpers, smashing touch

Engine looks like it was designed to slot in there doesnt it
Re: 1275GTi conversion
Posted: Tue Sep 07, 2010 6:32 pm
by EAMOSPUD
Re: 1275GTi conversion
Posted: Tue Sep 07, 2010 8:58 pm
by scotty_1987
its a class car...good work:)
Re: 1275GTi conversion
Posted: Thu Sep 09, 2010 1:07 pm
by keith
it lives...... lying in its lair in Louth, the lovely little limousine.
Re: 1275GTi conversion
Posted: Sun Sep 26, 2010 7:57 pm
by kerryminigringo
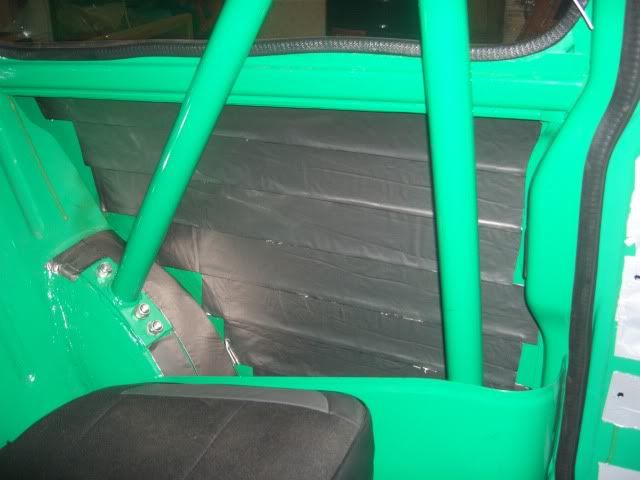
I finished the door and quarter panel cards but before I could fit them I needed to put on some sound deadening.Here is the quarter panel.I also put sound deadening material on the inner door skin and also on the door behind the door card.
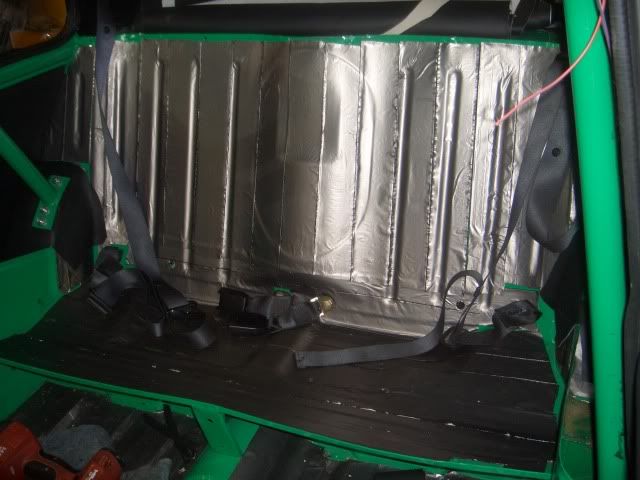
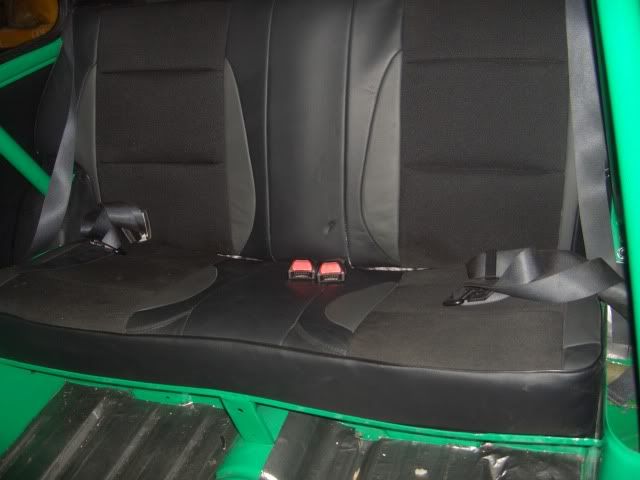
Here is the rear seat pan with sound deadening material fitted and also the rear seat belts.
This is one of the quarter panel cards fitted and I also cut and fixed some vinyl to the rear inner arch.
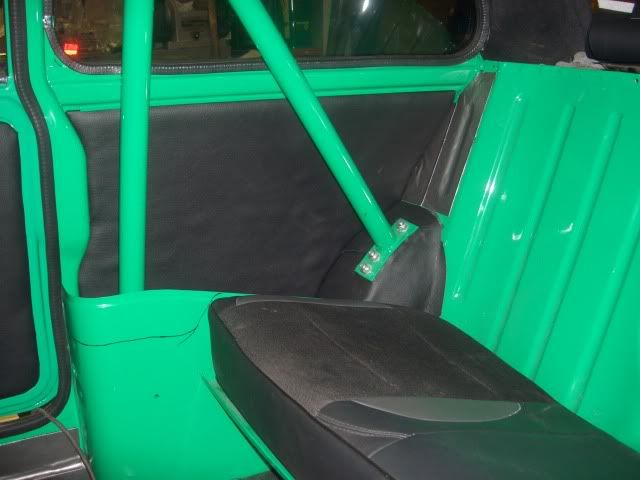
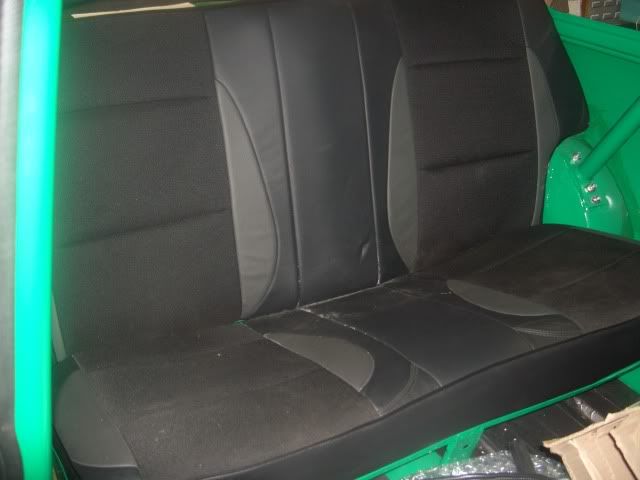
This is the back seat fitted with the belts.It is a really difficult job to get the seat back into place with the cage in place
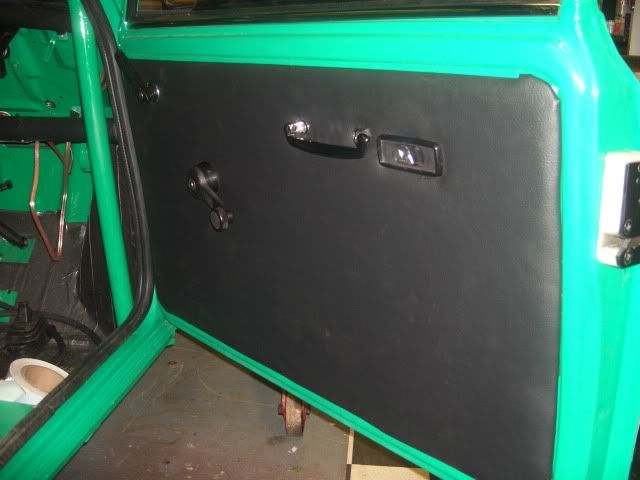
This is the drivers door with the card and the door fitting in place.I still have to put on the half lenght door pockets but with all the sound deadening material the doors close with a nice heavy thud.
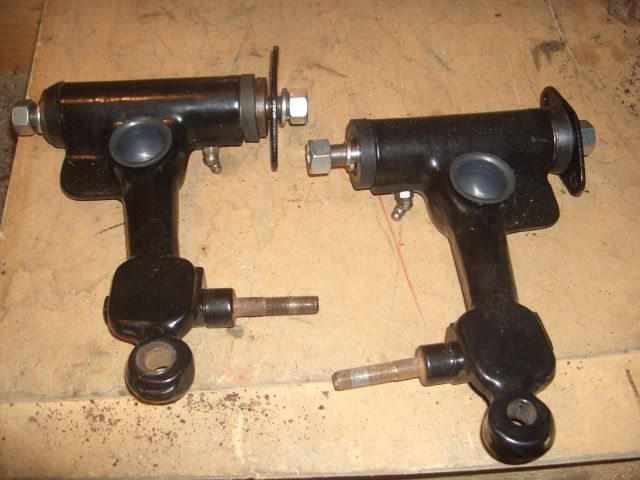
I have had the front hubs ready for a while and this is what they looked like when I stripped them off the car.
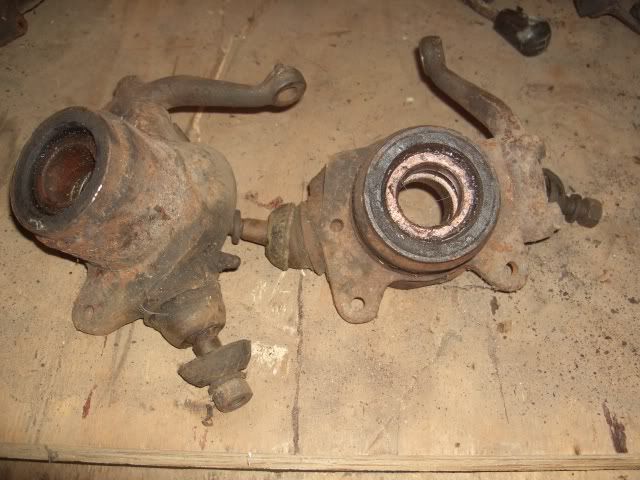
I kept the old ball joints in place and just knocked back the lock washers and I used a hole saw to cut two big washers from a sheet of steel and used threaded bar to keep them in place over where the bearings would be so that no powder coating would get into the inside of the hub and when I got them back I stripped off all the blanking stuff and rebuilt them with new bearings and ball joints.
Re: 1275GTi conversion
Posted: Sun Sep 26, 2010 8:09 pm
by kerryminigringo
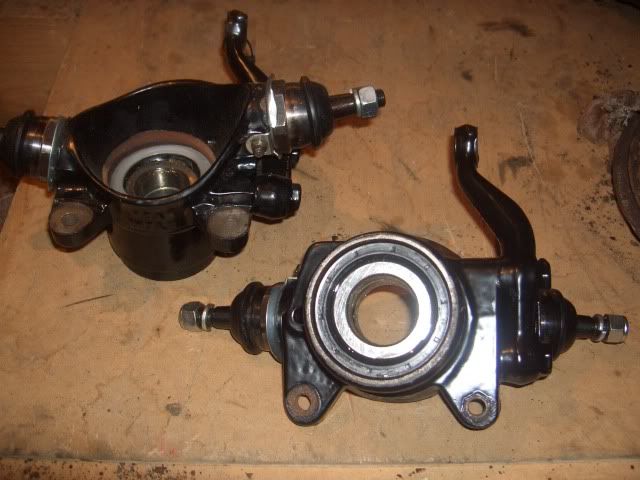
I did the same with the top arms.
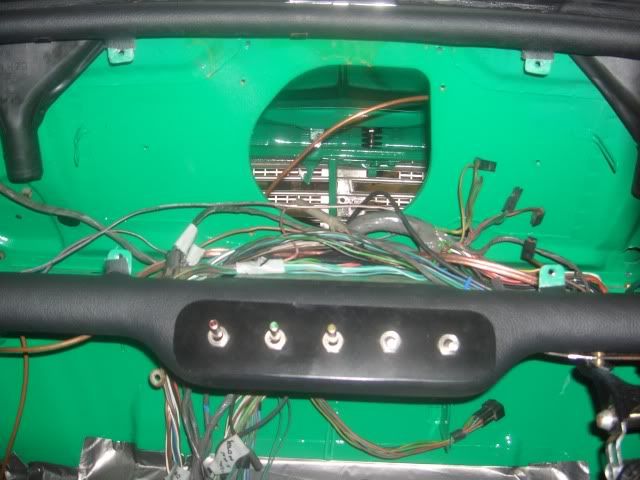
When I had the roof cloth fitted I also got Christy to fit vinyl to the top and bottom dash rail and using a piece of steel I made a plate for the toggle switches and welded on some 6mm threaded bar to that I can attach it to the rail with no fitting showing.I sprayed it matt black and fitted the toggle switches which had LED,s on the end.Here it is in place but I have yet to wire it up.
I had to fit the seats in so that I can get the pedal position right.They are MG ZR seats and I removed the height adjustment from them as they sat too high in the car.I made brackets to pick up the crossmember points and I welded in studs in the floor to pick up the back mounting points which I had to fabricate.They will need a clean when I have the interior finished.They are very comfortable and should be just the ticket for MTM and the IMM.
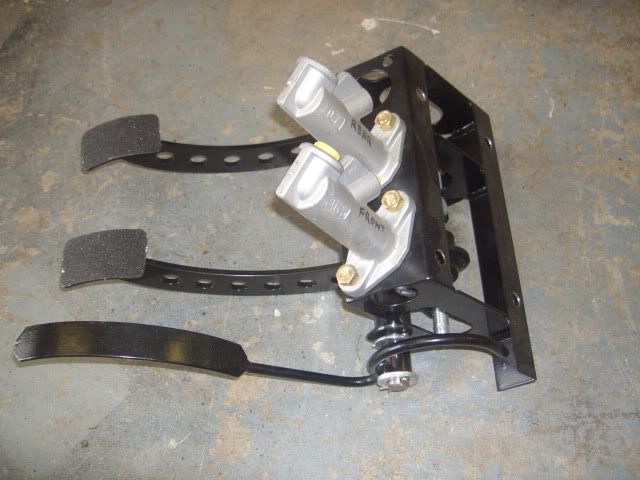
Because the inlet manifold sits so close to the bulkhead I decided to use an OBP pedal box with front to rear adjustable bias/This will be positioned under the parcel shelf and I needed to fit the seats to try and get a nice driving position.I hope to have this fitted in the next week as I want to get the accelerator cable sorted and also get the clutch working.
Re: 1275GTi conversion
Posted: Sun Sep 26, 2010 8:20 pm
by StanO'Toole
Savage! The black on green just looks king! Can't wait to see this finished!