Page 2 of 18
Re: 1983 Mini City
Posted: Sun Nov 15, 2020 1:17 pm
by colinf1
Stuck my 3d printed numbers onto the plates this evening, drew up a guide to help with keeping it all in-line.

Polyurethane adhesive on the back of printed parts, should be more than strong enough.

Then added some industrial weights. Let it set overnight.
A nice, relatively clean job to do at kitchen table rather than in a cold, breezy garden shed...
Re: 1983 Mini City
Posted: Sun Nov 15, 2020 1:18 pm
by colinf1
All fully cured, hopefully they won't fall off...

Re: 1983 Mini City
Posted: Sun Nov 15, 2020 1:21 pm
by colinf1
Sent the shell off to be media blasted today, bit of a rush job getting last few bits stripped. A bit of careful maneuvering to get it from concrete pad at bottom of garden, across the grass and down side of the house to be loaded onto a trailer at the front.


Bonnet got slightly squashed on one side when moving it, hopefully that will pull out of it
Nuts on door hinges were a bit awkward to get off, especially on passenger side where they had been covered in body filler and silicone. A few sheared, but the main thing is the doors were off.
Got to the blasters and realised I forgot to take the VIN plate and door striker plates off. I have to drop round my alloys to get done so I'll take them off then.
Both sub-frames and bumpers sent also, be a few weeks before its back, but I'm not in any rush.
Found this stamp on the rear subframe, looks like its the original subframe

Separated the old cones from the trumpets on the front, one trumpet was full of gunky water and thread on the cone was extremely corroded.

The totally opposite on the other side...it was full of bone dry sand!
Re: 1983 Mini City
Posted: Sun Nov 15, 2020 1:22 pm
by colinf1
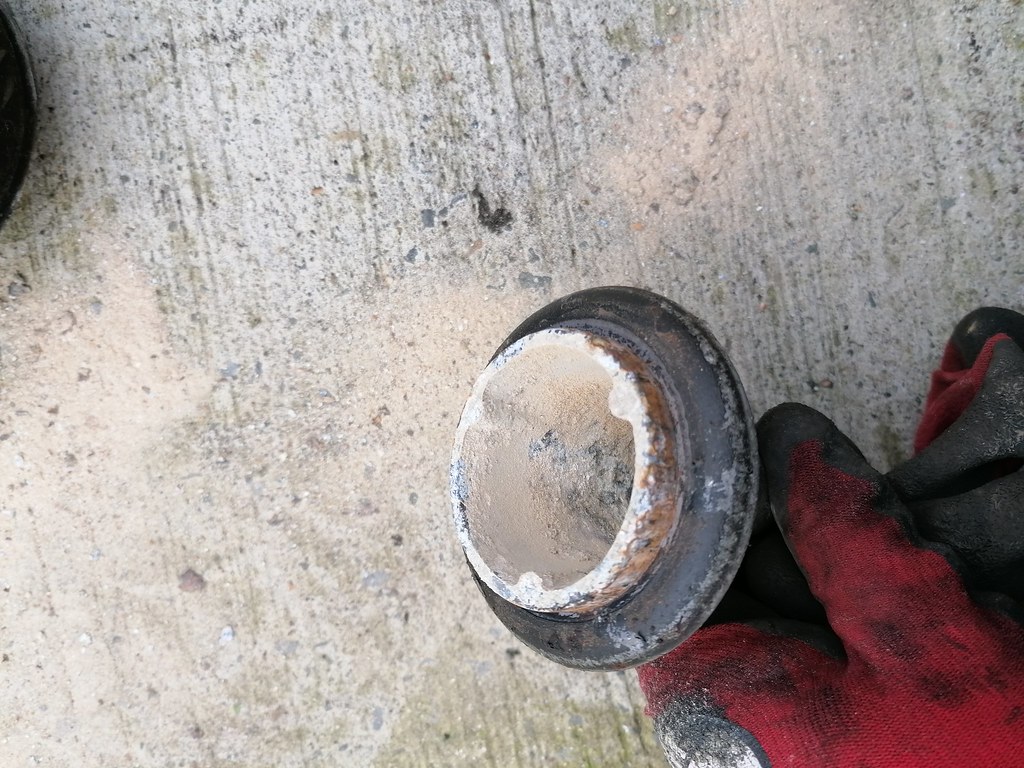
Cleaned up the backing plates for the brakes, fronts were very rough, all bent out of shape from someone prising the drums off, but apart from that they were fine.
Also cleaned up the hub flanges, have removed the short studs ready for longer ones for spaced drums.
One of the drive flanges looked to be damaged, had material squashed onto the mating face, so the drum would never sit on properly.
On closer inspection it looks like 2 cuts in a v shape, then hammered/squashed to stop the stud from spinning...hmmm...

Removed the stud then flattened down the mated surface, pressed stud back in and tested the stud for spinning, seems to be holding fine
There was also some material on the mating face of the other drive flange, but this just needed to be filed flat.
Gave them all a quick coat of rust remover ready for some satin black tomorrow.

Re: 1983 Mini City
Posted: Sun Nov 15, 2020 1:23 pm
by colinf1
Dropped off my wheels to be blasted, had a quick peek at the shell while I was there...

A few more holes, but nothing that's too bad..
Long dent on rear quarter,

Boot floor bit worse than I had initially thought..
Bit gone on corner of parcel shelf..

Passenger side rear window


Passenger step was biggest surprise...so far...

Bottom of passenger a panel

Drivers step, small hole on top of door frame


Engine bay and bulkhead looks good, even front half of inner wing looks fine..

Also got new bearings in both rear hubs, also new longer studs for the stepped drums. Didn't grease them up yet, I'll wait until I get a radius arm finished so I can bolt them up and put grease caps on.
Cleaned up and painted one of the radius arms and one lower front arm.
Was a bit of damage on lower arm mating face, just needed flattening down.
Re: 1983 Mini City
Posted: Sun Nov 15, 2020 3:42 pm
by Billy
What blast medium did you use? Were you happy with It?
Re: 1983 Mini City
Posted: Sun Nov 15, 2020 4:35 pm
by colinf1
Think he is using crushed glass, quite happy with the results so far, at least now I can see whats needed and whats been bodged over in the past.
Now my next problem is storage of the shell out of the elements, I have been using the stormforce cover, but thats fine with a proper top coat, dont think its gonna work with just primer.
Think I have to invest in a bigger shed, currently only have an 8ft x 8ft garden shed which is filled to the brim with parts!
Re: 1983 Mini City
Posted: Mon Nov 16, 2020 8:35 am
by Billy
With all the great effort (and expense) you're putting into the car, it would be a shame if you couldn't store it indoors properly. Talk nicely to Santa!
Re: 1983 Mini City
Posted: Mon Nov 16, 2020 5:39 pm
by ctwomey
colinf1 wrote: ↑Sun Nov 15, 2020 1:16 pm
Logbook recorded as 99H791PZ 134199 and engine block has 99H997P 134199. Not that it makes much difference but it would have been nice to have it matching.
Hi Colin,
Great work by the way.
From my own research, the 99H791PZ engine is one of the very first A+ Blocks (99H791P being the last of the A Blocks). It should have a coolant drain on the back. Usually mated with the DAM 2886 gearbox. This is what I would expect for an '80-'81 Mini 1000 and possibly up to '83.
The 99H997P is a much higher CR A+ engine with flat top pistons and an economically final drive (2.95). It would be interesting to see if the main cap is center locating tab or to one side, that would help even further. Given the engine numbers are identical except for the prefix, seems like too much of a coincidence to me. Is it verto or non-verto? Also what is the gearbox casing number?
Re: 1983 Mini City
Posted: Mon Nov 16, 2020 5:44 pm
by ctwomey
Hi Colin,
Sorry just seen the engine picks. That isn't a 99H791PZ engine/gearbox combo. I wonder when writing up the logbook they made a complete mess of it.
Re: 1983 Mini City
Posted: Mon Nov 16, 2020 6:11 pm
by colinf1
I've also noticed the vin plate is different to the logbook record, but again it's identical final 6 numbers, most of the SAX part is the same, just middle section is different, again I just checked the last few numbers when I got the car first...
Re: 1983 Mini City
Posted: Mon Nov 16, 2020 8:00 pm
by colinf1
ctwomey wrote: ↑Mon Nov 16, 2020 5:39 pm
colinf1 wrote: ↑Sun Nov 15, 2020 1:16 pm
Logbook recorded as 99H791PZ 134199 and engine block has 99H997P 134199. Not that it makes much difference but it would have been nice to have it matching.
Hi Colin,
Great work by the way.
From my own research, the 99H791PZ engine is one of the very first A+ Blocks (99H791P being the last of the A Blocks). It should have a coolant drain on the back. Usually mated with the DAM 2886 gearbox. This is what I would expect for an '80-'81 Mini 1000 and possibly up to '83.
The 99H997P is a much higher CR A+ engine with flat top pistons and an economically final drive (2.95). It would be interesting to see if the main cap is center locating tab or to one side, that would help even further. Given the engine numbers are identical except for the prefix, seems like too much of a coincidence to me. Is it verto or non-verto? Also what is the gearbox casing number?
Thanks ctwomey! Hope it will be worth all the effort once I get to drive it!
Gearbox casting number is DAM5626, which quick search says its from a later twinpoint/mpi model
Clutch is verto (small arm)
Pistons in this engine are flat top as I have head off to check for unleaded valve seats, but havent got that far yet!
"It would be interesting to see if the main cap is center locating tab or to one side" what or where is this lol
The rear subframe was stamped/marked 25 83, car was registered November '83
Re: 1983 Mini City
Posted: Mon Nov 16, 2020 9:17 pm
by ctwomey
The DAM5626 gearbox is the preferred casing for high powered motors. This gearbox casing only uses 3 bolts to hold in the C bracket for the main shaft bearing, while all previous casings used 4 bolts, one of which had a tendency to crack.
colinf1 wrote: ↑Mon Nov 16, 2020 8:00 pm
"It would be interesting to see if the main cap is center locating tab or to one side" what or where is this lol
The main cap is the crankshaft main bearing caps. Older engines had the slot to hold in the bearing to the side of the cap. Later ones have the slot in the center of the cap and are considered stronger.
Anyway, changing the final drive to 3.44 with the high CR pistons should make it a very usable motor. If I was changing the final drive I would also replace the diff pin with a much harder one that won't wear as fast. Even my 36K mile gearbox the pin was very badly worn.
If you do intend to rebuild the gearbox be super careful where you buy your bearings from. I would recommend Guessworks as your source and only buy either INA/Koyo, RHP or Torrington.
Re: 1983 Mini City
Posted: Sat Nov 28, 2020 8:56 pm
by colinf1
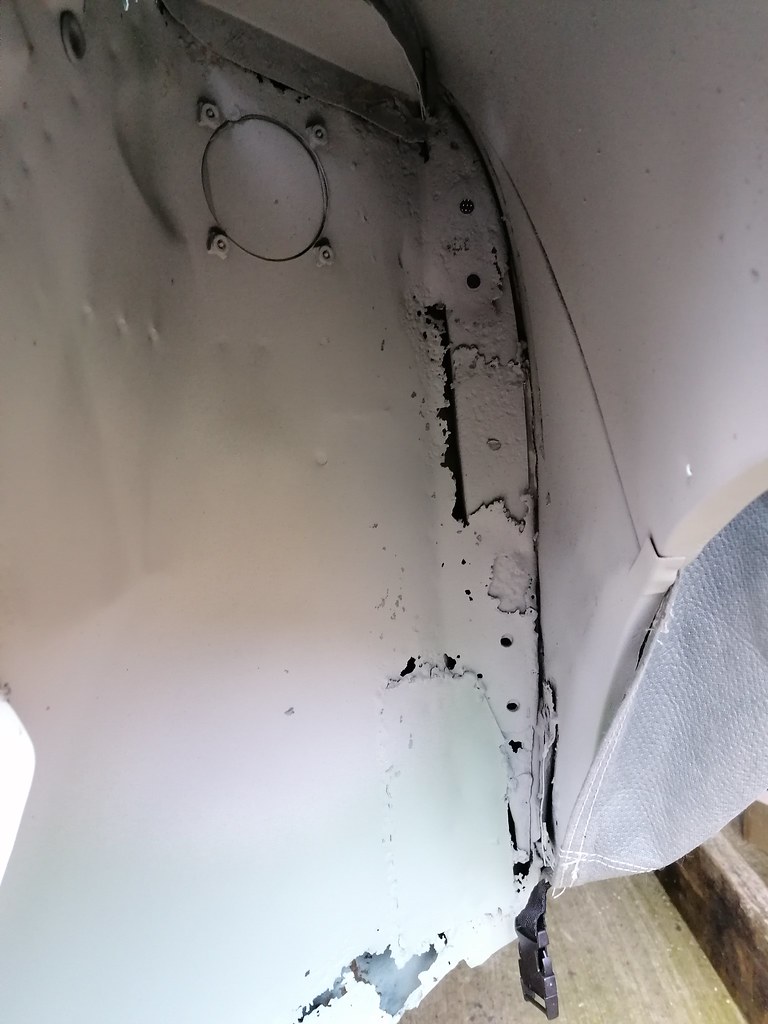
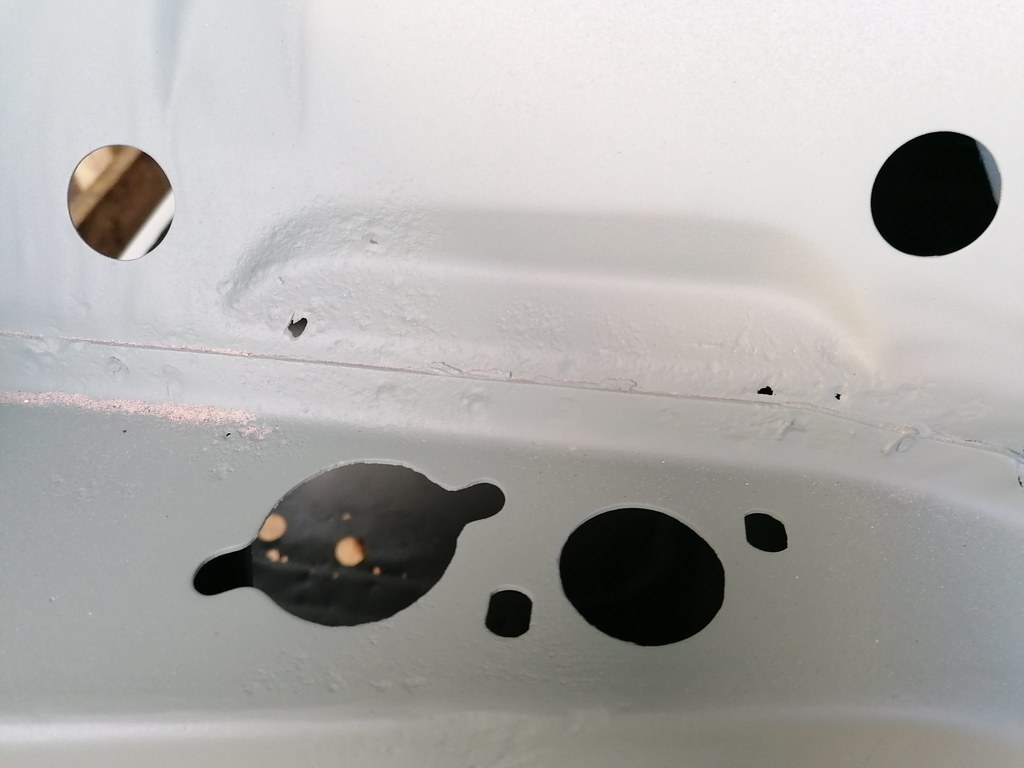
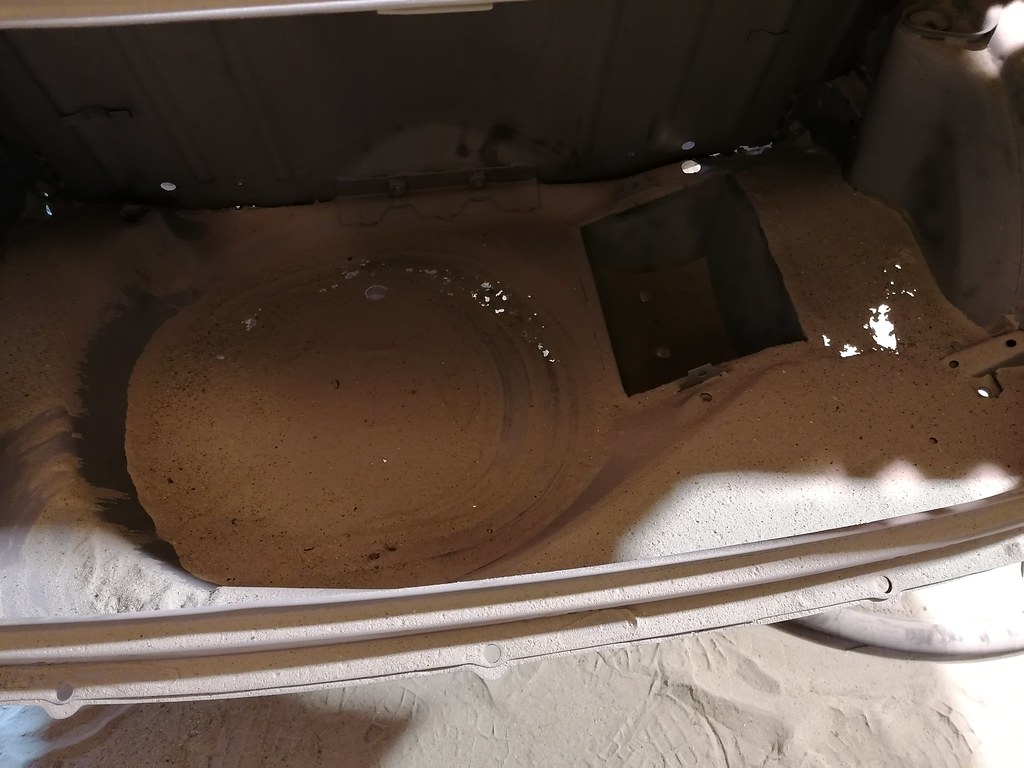
Got the car back from sandblaster today, had to build a cover to keep it somewhat dry and the majority of the rain off it.


Just a few quick pictures of some areas that need attention..
Bumpers has some pitting, so blasted them with intention of powder coating them satin black, but they have plenty of holes now...

I knew doors need attention, not as bad as what I had expected..
Rear corner of and front underside of bonnet need attention..


Wheels look mint, really looking forward to getting them painted.
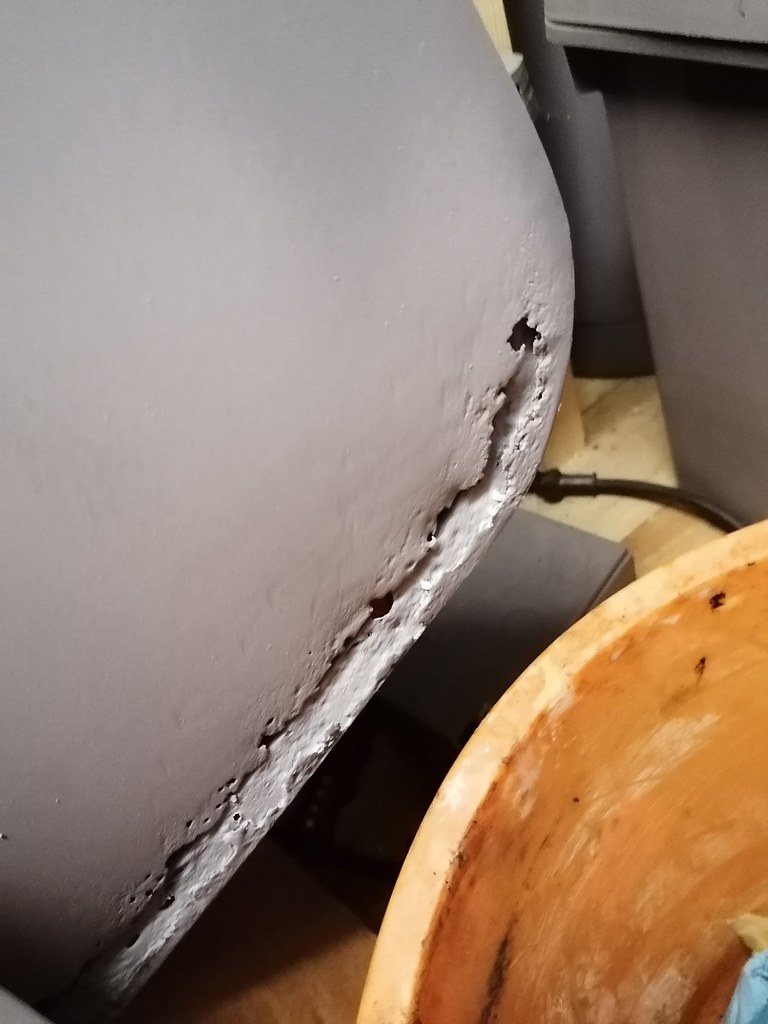
Didn't get a full inspection of shell as it was nearly dark when we got it back, but passenger sill needs doing, a few pin holes in rear floor pan, a few at bottom and rear seat panel.
I'm going to try and sheet the frame with some plywood, then maybe throw a bit of felt on the roof incase the tarp blows off..
Re: 1983 Mini City
Posted: Sun Nov 29, 2020 7:00 pm
by colinf1
Re: 1983 Mini City
Posted: Sun Nov 29, 2020 9:08 pm
by ctwomey
Colin,
You have your work cut out for you there. All I can say is slow and steady taking your time.
You will need quite a few panels. I hope that after the UK complete leaving the EU there is some arrangement on goods that is not too punitive. Imagine trying to import some of these parts from a non-EU country like the USA - a nightmare.
Re: 1983 Mini City
Posted: Sun Nov 29, 2020 9:59 pm
by woody
Never seen a number there before. Does it match any numbers in the log book or chassis plate?
Re: 1983 Mini City
Posted: Sun Nov 29, 2020 10:26 pm
by colinf1
woody wrote: ↑Sun Nov 29, 2020 9:59 pm
Never seen a number there before. Does it match any numbers in the log book or chassis plate?
No doesn't match any of those numbers...strange
ctwomey wrote: ↑Sun Nov 29, 2020 9:08 pm
Colin,
You have your work cut out for you there. All I can say is slow and steady taking your time.
You will need quite a few panels. I hope that after the UK complete leaving the EU there is some arrangement on goods that is not too punitive. Imagine trying to import some of these parts from a non-EU country like the USA - a nightmare.
Yes, I have to learn to take my time, finish one job at a time, I've a very very bad habit of starting one thing and moving onto the next thing, before getting half way through the first thing!
Hence why my shed is currently a complete mess, bits everywhere!
Plan is to move some of the spare parts into the shell in sealed boxes, give me a bit more working space.
Hopefully I can get subframes off to powder coating this week, small patch needs sorting on rear along with those broken bolts.
Is it worthwhile adding more welds to the front subframe towers? Or adding a gusset beside the tiebar mounting point?
Re: 1983 Mini City
Posted: Mon Nov 30, 2020 10:01 am
by woody
On a road car with rubber/poly bushes the subframe should be ok. The only place I have seen a few front subframes crack and split is just below the starter where the bottom engine steady bracket is welded to the frame. I would think the cause of the fracture is the engine rocking back and forth when the engine stabilizer bushes are shot. Worth checking for a crack.
Re: 1983 Mini City
Posted: Tue Dec 01, 2020 10:33 pm
by colinf1
All seemed okay with front subframe, so I've sent it off to be powder coated.
Powder coating guy has some concerns over the primer, cellulose, so we'll have to wait and see if it takes it ok...
Rear subframe had a small rust bulge, so cut out a small square and tried welding in a new piece, but welder at work is too heavy duty, so was blowing through.
It's mainly used for 10mm plate and cast steel, so even with low settings it was impossible!
Need to invest in my own mig, thinking the Clarke 135 TE turbo, should be good enough for panels?
Anyone any other suggestions?
Re: 1983 Mini City
Posted: Wed Dec 02, 2020 12:50 pm
by ctwomey
I am using an R-Tech MIG 180. Loving it so far. Great reviews and 3 year warranty. Can weld up to 6mm. So far have being welding 2-5mm with 0.8 wire. Haven’t tried 20 gauge with 0.6 yet. I installed a 16A socket too in my garage so I can use it on full power when needed. Obviously 250A would require a 32A socket. I did purchase a 20L 95%/5% tank from Stargas.ie also.
Re: 1983 Mini City
Posted: Wed Dec 02, 2020 1:28 pm
by colinf1
Re: 1983 Mini City
Posted: Wed Dec 02, 2020 3:39 pm
by ctwomey
colinf1 wrote: ↑Tue Dec 01, 2020 10:33 pm
Need to invest in my own mig, thinking the Clarke 135 TE turbo, should be good enough for panels?
The problem with the Clarke is it only has four voltage settings. An Inverter MIG welder would have a variable voltage that would offer better control on settings that will be required for body panels. Yes, the R-Tech MIG 180 is more expensive (+ €150 ish) but it has variable voltage, euro torch connector, support for MMA and a really good regulator and is built using Siemens chips in the UK.
Re: 1983 Mini City
Posted: Fri Dec 11, 2020 2:50 pm
by colinf1
Ordered the panels required to remove all the rot from the car, I'm hoping I have everything I need, as like what CTWOMEY has said, anything bought from UK will be liable for import duty from 1st January.
Thankfully the € to £ rate is quite good at the moment, so that has taken some of the sting out of the cost!
Planning on adding some doors to the "carport" this weekend, I lined it with plywood last weekend, then recovered it with a few tarpaulins, its been quite wet the past few days but looking in at the concrete under this cover, its completely dry!
Re: 1983 Mini City
Posted: Sat Dec 12, 2020 7:49 pm
by colinf1
Got my doors onto the carport/cover...
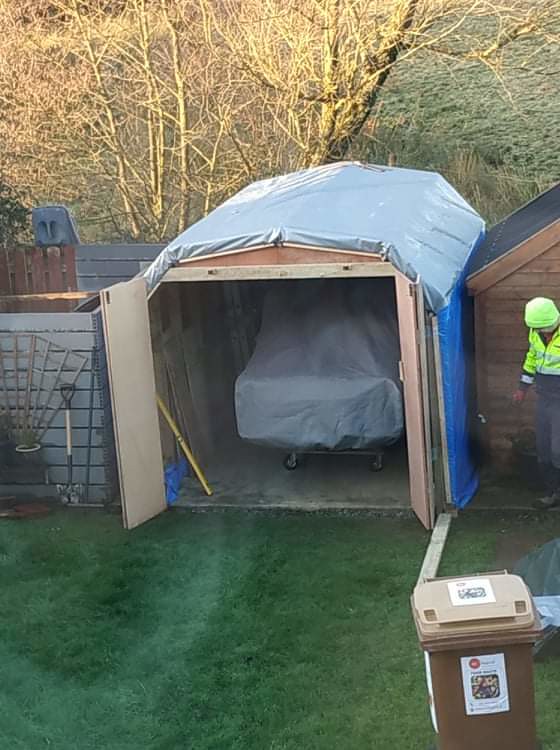

Had to do bi-folding doors as concrete base is a bit lower than the grass. Fixed up the tarpaulin on the side, pulled the excess under the side to the inside so that should stop water collecting in it.
I know it looks a bit rough, but the main thing is that the shell should now be pretty well protected from the elements...
Minispares order has been processed today, going for new wings, new rear quarters, inner sills, door skins, complete new LH inner wing, door frame repair panels, door step panels, A panels, rear valance and a new front panel.
Quite a lot more than I initially wanted to do, but better to do it right.
I'm still planning on patching boot floor, 1 - because I already have those repair panels and 2 - I just couldn't stretch the budget as it's a very expensive panel!!