
Welcome to the Irish Mini Owners Club Forum. Keep an eye out of on coming events!!!!
1983 Mini City
Moderators: spud1979, The Marcos Graveyard, Moderators
-
ctwomey
- NON Member
- Posts: 298
- Joined: Thu Jan 03, 2019 9:44 am
- Whats your location?: Ballybrittas, Co. Laois
- Region: Eastern
- What Minis have you?: I owned a 1978 Mini 850 when I was in my late teens. I owned a 1986 Mini Chelsea that I imported from the UK. Also owned a 1982 MG Metro that was bored out to 1293. Restoring a 1981 Dublin Mini City.
- Contact:

-
colinf1

- NON Member
- Posts: 427
- Joined: Mon Aug 24, 2020 10:27 am
- Whats your location?: Dundalk
- Region: Eastern
- What Minis have you?: 1983 Mini City 1000
- Contact:
Re: 1983 Mini City
Quarter panel waist rail welded in this evening, made a cardboard template of the side window just to be sure everything is in right place, thankfully it seems to be..
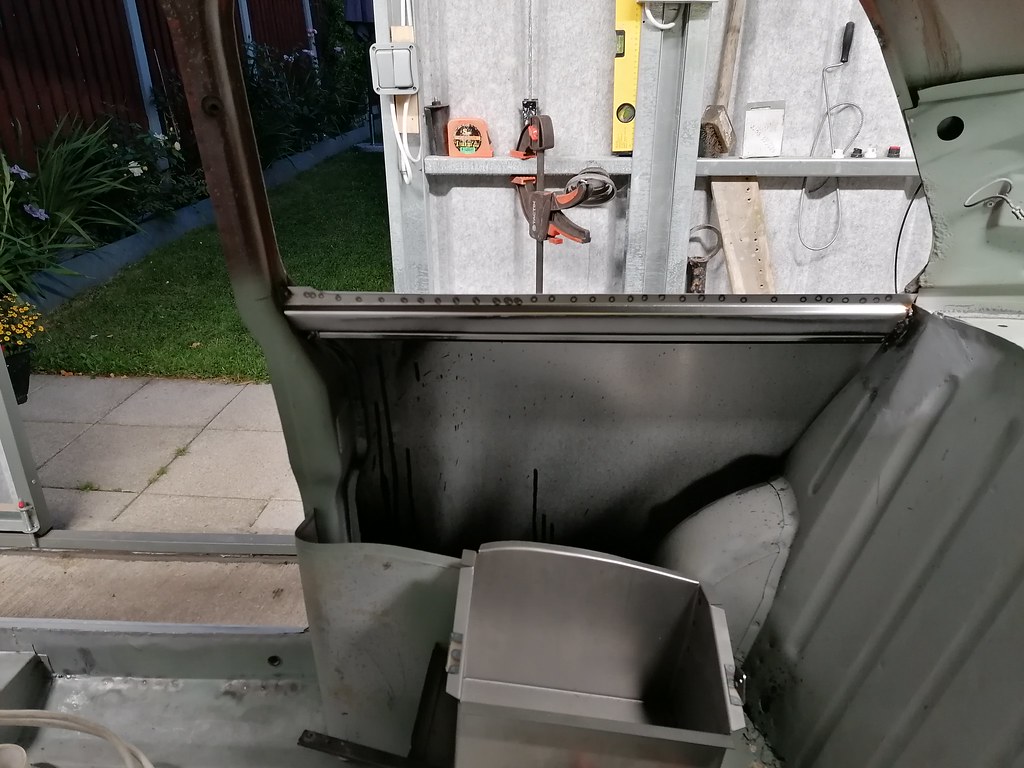
M-machine panel, so doesn't have the flange on the seat bulkhead side, so seam welded along the join. Passenger side one cut out and new one offered in. There was some rust that needed to be cut out on that side of the seat bulkhead, welded in a patch but had to hold off on linishing it back as it was getting a bit late to make noise.
M-machine panel, so doesn't have the flange on the seat bulkhead side, so seam welded along the join. Passenger side one cut out and new one offered in. There was some rust that needed to be cut out on that side of the seat bulkhead, welded in a patch but had to hold off on linishing it back as it was getting a bit late to make noise.

-
colinf1
- NON Member
- Posts: 427
- Joined: Mon Aug 24, 2020 10:27 am
- Whats your location?: Dundalk
- Region: Eastern
- What Minis have you?: 1983 Mini City 1000
- Contact:
Re: 1983 Mini City
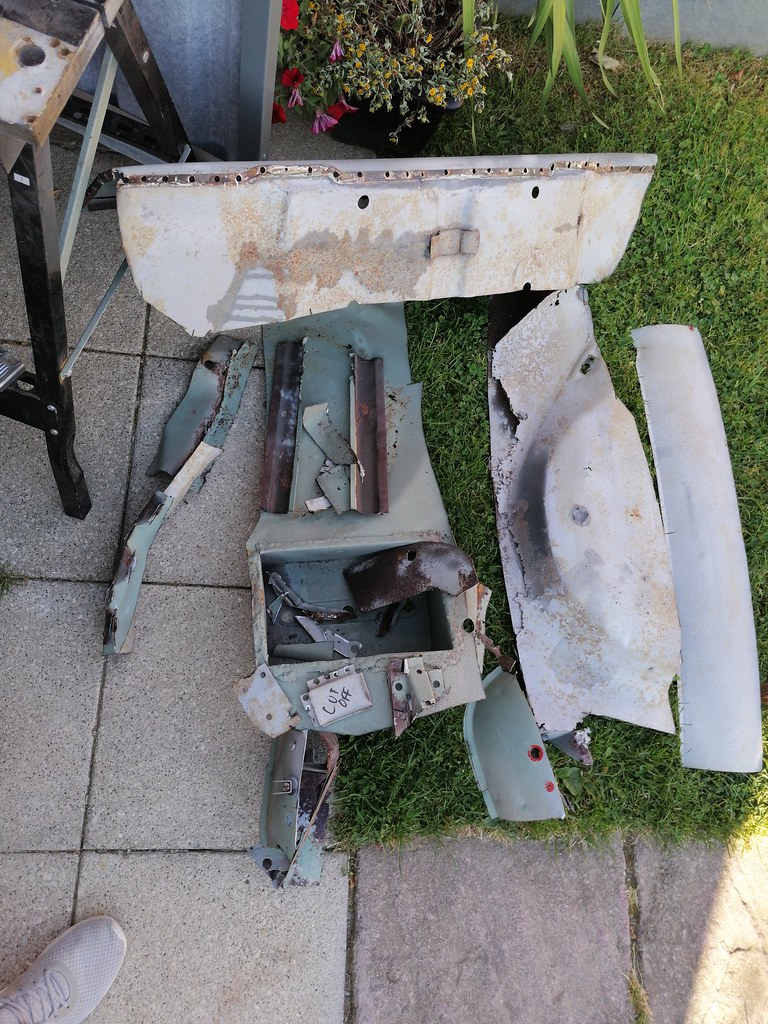
Got passenger waist rail welded in place, the made a start on the boot floor. Very hard to get the drill at a good angle along the rear bins, so sliced along the seat with cutting disc, then cut out sections of the boot floor.
Trying to cut around the brackets was taking way too long, so chopped them out and remade them.

Still have drivers side to cut out and clean up, small repair needed in middle of boot hinge panel, but should hopefully have a test fit of the panel tomorrow.
Crusty...
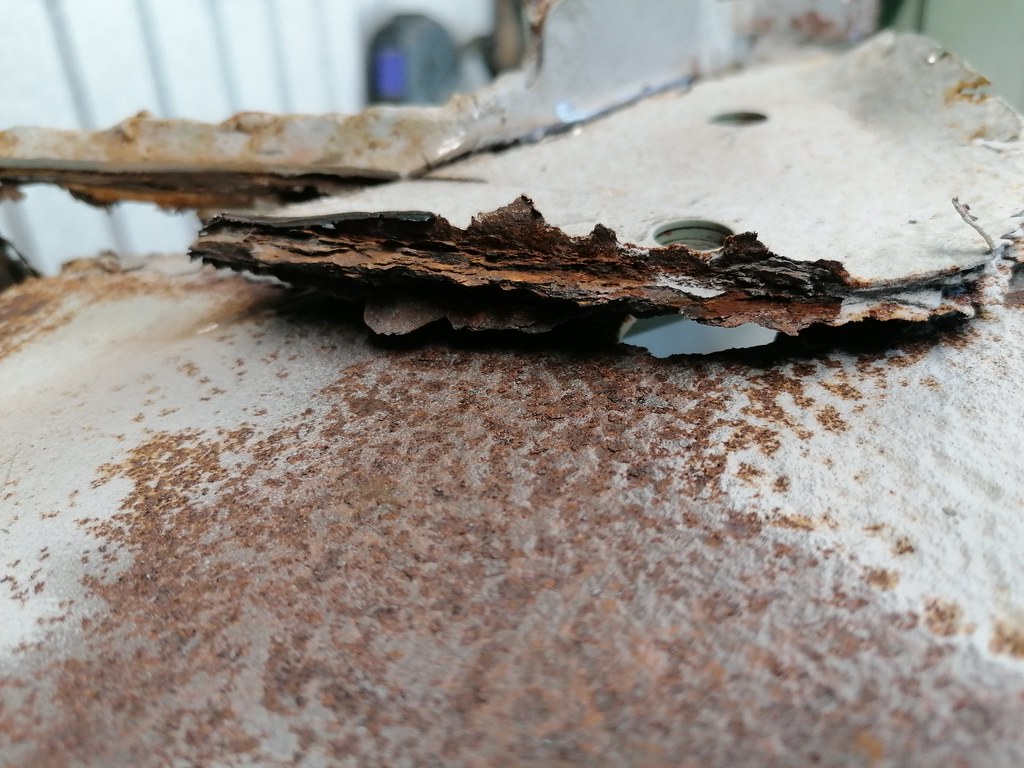
Lots of rot cut out...
A previous repair...
Using 3mm steel....

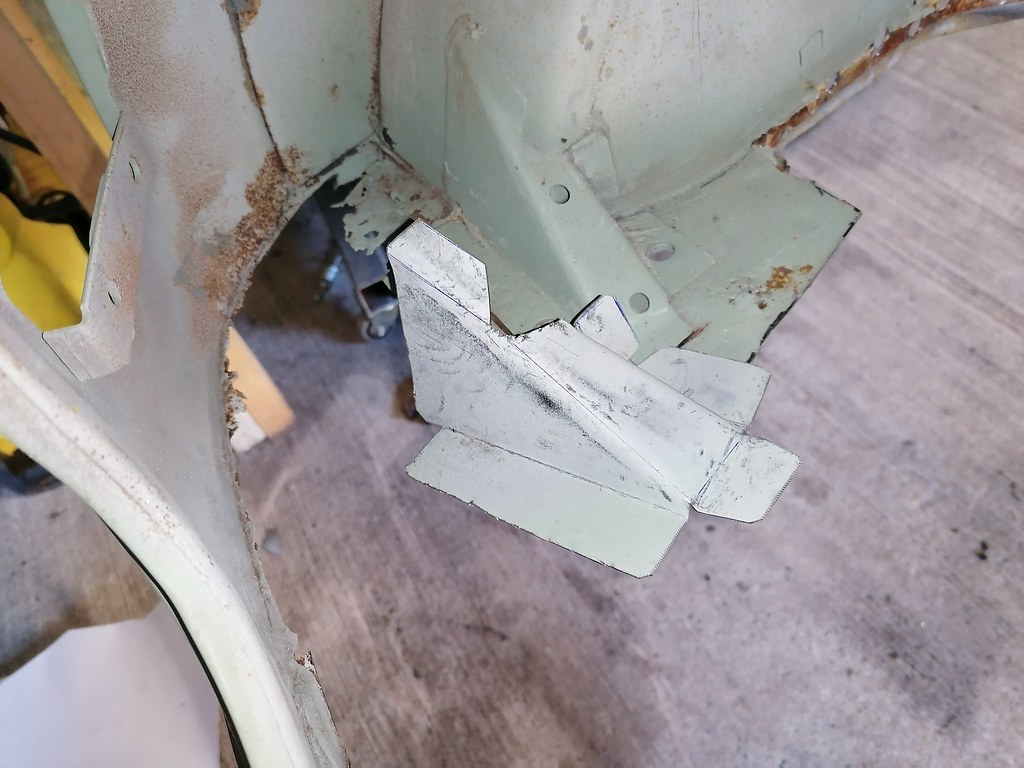
Bracket remade.. Pretty close...
Trying to cut around the brackets was taking way too long, so chopped them out and remade them.
Still have drivers side to cut out and clean up, small repair needed in middle of boot hinge panel, but should hopefully have a test fit of the panel tomorrow.
Crusty...
Lots of rot cut out...
A previous repair...
Using 3mm steel....
Bracket remade.. Pretty close...
-
colinf1
- NON Member
- Posts: 427
- Joined: Mon Aug 24, 2020 10:27 am
- Whats your location?: Dundalk
- Region: Eastern
- What Minis have you?: 1983 Mini City 1000
- Contact:
Re: 1983 Mini City
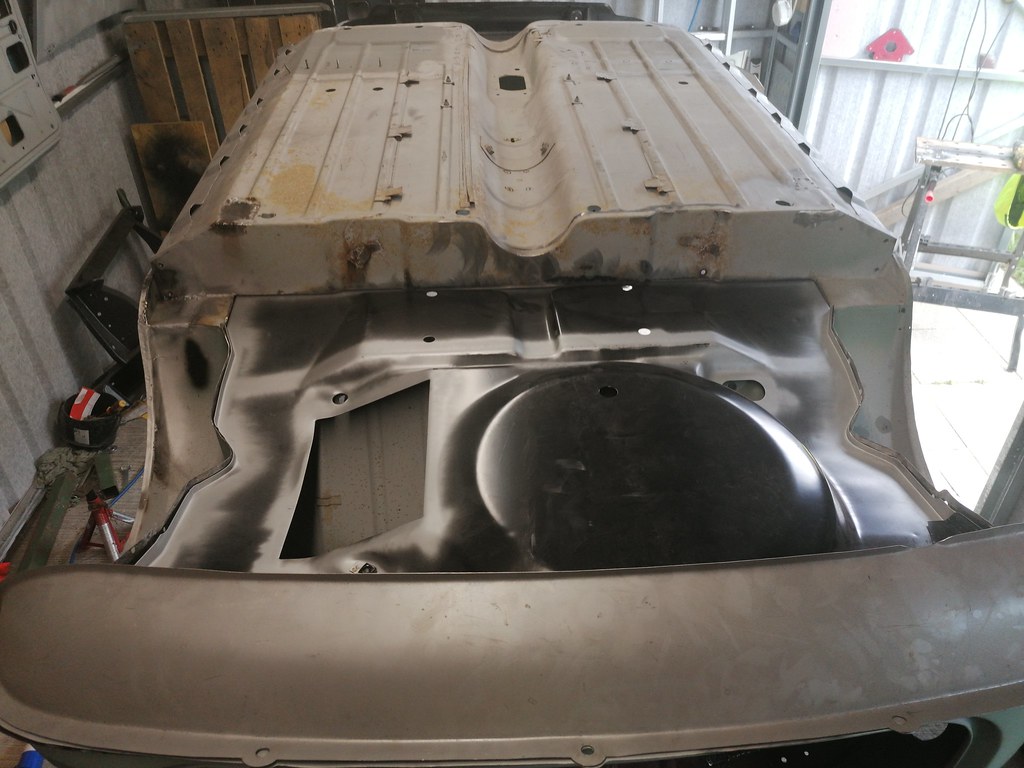
More cutting and grinding today, there's a lot of surfaces to prep where the boot floor needs to touch.
A few repairs to the hinge panel, one in the middle, then one on the passenger side corner.

Then a test fit of the panel, pretty much spot on at the first attempt. Tried on the valance and closers, closers needed a bit of work, but there nearly there. Took it out to drill for some plug welds, then back in, check alignment and start welding.
The high temperature today didn't help the spot welder, plus I was pushing it quicker than what it's recommended duty cycle is, got a bit of discolouration on the arms and machine went into cool down mode for an hour or so. Had a cuppa tea, then done my plug welds and spot welder was ready to go again.

Just along the heel board, rear bins and middle stiffener then that's theaim panel in, then time to get stiffeners and valance on...
A few repairs to the hinge panel, one in the middle, then one on the passenger side corner.
Then a test fit of the panel, pretty much spot on at the first attempt. Tried on the valance and closers, closers needed a bit of work, but there nearly there. Took it out to drill for some plug welds, then back in, check alignment and start welding.
The high temperature today didn't help the spot welder, plus I was pushing it quicker than what it's recommended duty cycle is, got a bit of discolouration on the arms and machine went into cool down mode for an hour or so. Had a cuppa tea, then done my plug welds and spot welder was ready to go again.
Just along the heel board, rear bins and middle stiffener then that's theaim panel in, then time to get stiffeners and valance on...
-
colinf1
- NON Member
- Posts: 427
- Joined: Mon Aug 24, 2020 10:27 am
- Whats your location?: Dundalk
- Region: Eastern
- What Minis have you?: 1983 Mini City 1000
- Contact:
Re: 1983 Mini City
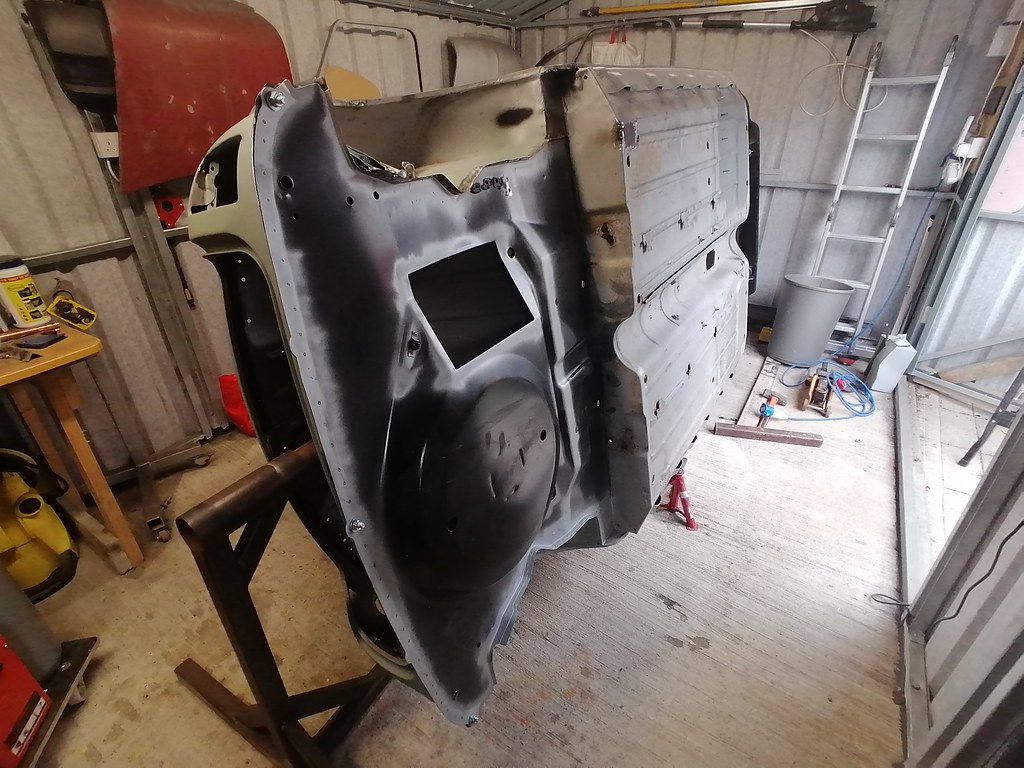
Another day on the boot floor, finally finished it! Seat base was a right pain to get to spot weld, as there isn't enough clamping force with the longer arms. Also not much room to swing a hammer to get the lip on the heelboard to come up slightly.
Managed to get there in the end after lots and lots of sweating and swearing!
Seat back to floor also repaired, lots of ugly welds here, but its all about strength here and its going to be hidden. I'll grind it down slightly, but not going for an invisible repair.
I had used up all my off cuts of materials, so had to take a cutting from passenger quarter panel...

Plan is to get subframe strengtheners and brackets on, then valance and closers, then move onto quarter panel...nearly there...
Managed to get there in the end after lots and lots of sweating and swearing!
Seat back to floor also repaired, lots of ugly welds here, but its all about strength here and its going to be hidden. I'll grind it down slightly, but not going for an invisible repair.
I had used up all my off cuts of materials, so had to take a cutting from passenger quarter panel...
Plan is to get subframe strengtheners and brackets on, then valance and closers, then move onto quarter panel...nearly there...
-
colinf1
- NON Member
- Posts: 427
- Joined: Mon Aug 24, 2020 10:27 am
- Whats your location?: Dundalk
- Region: Eastern
- What Minis have you?: 1983 Mini City 1000
- Contact:
Re: 1983 Mini City
Took it easy today as my back is still rather sore from yesterday's welding/fighting with the spot welder.
Made a small patch to finish the wheel arch, some nice welds on this and only 1 small bit of blow through. Yet to be ground down...

Also got the drivers side scuttle closing panel in, it needed a lot of fettling to get anywhere near right, but its in now, I'll be sure to get plenty of seam sealer around this entire area and use my extended nozzle and get plenty of paint in there.
The gauge on the gas has dropped a good bit, so think it's nearly gone, hopefully it'll last til I'm finished...
Made a small patch to finish the wheel arch, some nice welds on this and only 1 small bit of blow through. Yet to be ground down...
Also got the drivers side scuttle closing panel in, it needed a lot of fettling to get anywhere near right, but its in now, I'll be sure to get plenty of seam sealer around this entire area and use my extended nozzle and get plenty of paint in there.
The gauge on the gas has dropped a good bit, so think it's nearly gone, hopefully it'll last til I'm finished...
-
colinf1
- NON Member
- Posts: 427
- Joined: Mon Aug 24, 2020 10:27 am
- Whats your location?: Dundalk
- Region: Eastern
- What Minis have you?: 1983 Mini City 1000
- Contact:
Re: 1983 Mini City
Small bit of progress today, concentrating on finishing the rear end. Picked up a small sheet of 1mm steel for the strengthener in between the floor and closing panel. Easy enough piece to make as there's only a slight fold on one piece. Held it all in place with bolts til it was welded in.
The arms wouldn't close fully because of the boot opening lip being bigger than the space between arms when fully closed and button pressed. But, I extended the longer electrodes fully, then loosened off the handle spring to let me get the upper arm into the boot, then lower arm positioned, pull them together as tight as I could, then press trigger with the tip of my finger and it welded fine. Repeated this process another 10 or 15 times
Then put on valance, and offered up closing panel, needed slight adjustments, then welded that in place also.
Next up was the curved section of the closing panel, a cardboard template, then salvaged the last good piece of metal from the old battery box. Cut and folded, fettled slightly and welded in place.

And with valance offered up again to check fit...

Now to repeat it on the other side....
The arms wouldn't close fully because of the boot opening lip being bigger than the space between arms when fully closed and button pressed. But, I extended the longer electrodes fully, then loosened off the handle spring to let me get the upper arm into the boot, then lower arm positioned, pull them together as tight as I could, then press trigger with the tip of my finger and it welded fine. Repeated this process another 10 or 15 times
Then put on valance, and offered up closing panel, needed slight adjustments, then welded that in place also.
Next up was the curved section of the closing panel, a cardboard template, then salvaged the last good piece of metal from the old battery box. Cut and folded, fettled slightly and welded in place.
And with valance offered up again to check fit...
Now to repeat it on the other side....
-
ctwomey
- NON Member
- Posts: 298
- Joined: Thu Jan 03, 2019 9:44 am
- Whats your location?: Ballybrittas, Co. Laois
- Region: Eastern
- What Minis have you?: I owned a 1978 Mini 850 when I was in my late teens. I owned a 1986 Mini Chelsea that I imported from the UK. Also owned a 1982 MG Metro that was bored out to 1293. Restoring a 1981 Dublin Mini City.
- Contact:
Re: 1983 Mini City
Great work Colin! Flying along.
-
colinf1
- NON Member
- Posts: 427
- Joined: Mon Aug 24, 2020 10:27 am
- Whats your location?: Dundalk
- Region: Eastern
- What Minis have you?: 1983 Mini City 1000
- Contact:
Re: 1983 Mini City
Thanks! How is yours coming along?
Feels like I've been stuck doing the back-end forever, we had no electricity yesterday so back to it today.
Got the closing panel on opposite side done, then valance put on. I made sure to get some paint in the corners, I'll get more in there through the opening on boot floor.

Then got the arch bracket on, linished back and also got battery box welded in. Just have the small corner pieces to put on the underside.
Passenger side needs small repairs to the arch tub, then arch bracket and fuel tank bracket welded in and that's the rear end done.
Feels like I've been stuck doing the back-end forever, we had no electricity yesterday so back to it today.
Got the closing panel on opposite side done, then valance put on. I made sure to get some paint in the corners, I'll get more in there through the opening on boot floor.
Then got the arch bracket on, linished back and also got battery box welded in. Just have the small corner pieces to put on the underside.
Passenger side needs small repairs to the arch tub, then arch bracket and fuel tank bracket welded in and that's the rear end done.
-
ctwomey
- NON Member
- Posts: 298
- Joined: Thu Jan 03, 2019 9:44 am
- Whats your location?: Ballybrittas, Co. Laois
- Region: Eastern
- What Minis have you?: I owned a 1978 Mini 850 when I was in my late teens. I owned a 1986 Mini Chelsea that I imported from the UK. Also owned a 1982 MG Metro that was bored out to 1293. Restoring a 1981 Dublin Mini City.
- Contact:
Re: 1983 Mini City
Colin I am working on the doors and boot at the moment. One door done just needs assembly, currently repairing the boot inner frame and then on to the other door.
You seemed to have had a good few days to spend on your mini. Summer is so start stop depending on family and other commitments.
You seemed to have had a good few days to spend on your mini. Summer is so start stop depending on family and other commitments.
-
colinf1
- NON Member
- Posts: 427
- Joined: Mon Aug 24, 2020 10:27 am
- Whats your location?: Dundalk
- Region: Eastern
- What Minis have you?: 1983 Mini City 1000
- Contact:
Re: 1983 Mini City
Yes, got a good run at it this week, my wife & kid are visiting family in the UK this past week, took the week off work, so it was just me, the dog and the welder. Make hay while the sun shines, or so they say...
Heading to Portrush mini show next weekend, hoping for a good show and maybe a few purchases and a bout of inspiration to get this final push done...then it's time to figure out what to do about painting it. I'd have no issues doing it myself, but I would want to do it safely and the cost of the air fed masks for epoxy / 2 pack are quite expensive.
Heading to Portrush mini show next weekend, hoping for a good show and maybe a few purchases
-
colinf1
- NON Member
- Posts: 427
- Joined: Mon Aug 24, 2020 10:27 am
- Whats your location?: Dundalk
- Region: Eastern
- What Minis have you?: 1983 Mini City 1000
- Contact:
Re: 1983 Mini City
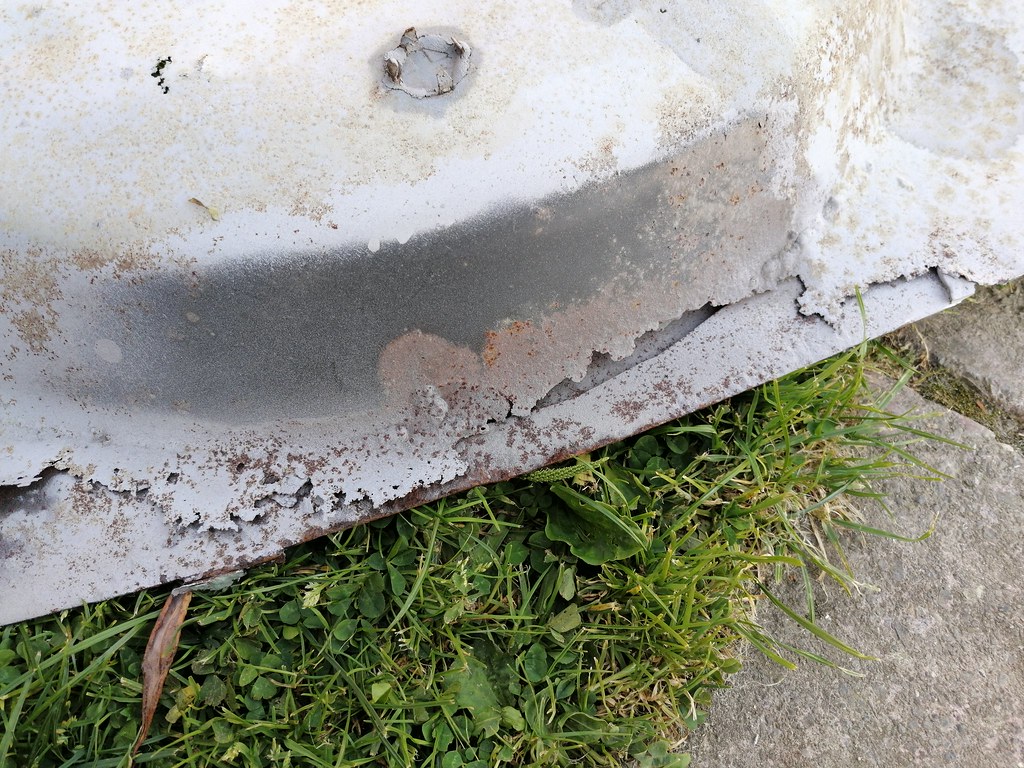
Not a lot done this weekend, remade the fuel tank bracket as the old one is too far gone on the underside.

-
colinf1
- NON Member
- Posts: 427
- Joined: Mon Aug 24, 2020 10:27 am
- Whats your location?: Dundalk
- Region: Eastern
- What Minis have you?: 1983 Mini City 1000
- Contact:
Re: 1983 Mini City
Small bit of work done on door frame repair, carefully cut out the bad patch with dremel, being extra careful around the roof lip.
New patch offered up and then mostly welded in place, need to flat down the welds but much too noisy to use grinder any later than 8.30pm...

New patch offered up and then mostly welded in place, need to flat down the welds but much too noisy to use grinder any later than 8.30pm...
-
ctwomey
- NON Member
- Posts: 298
- Joined: Thu Jan 03, 2019 9:44 am
- Whats your location?: Ballybrittas, Co. Laois
- Region: Eastern
- What Minis have you?: I owned a 1978 Mini 850 when I was in my late teens. I owned a 1986 Mini Chelsea that I imported from the UK. Also owned a 1982 MG Metro that was bored out to 1293. Restoring a 1981 Dublin Mini City.
- Contact:
Re: 1983 Mini City
Colin, it only dawned on me that the shell is upside down. I like the way you are repairing the lip by cutting further into the door opening.
-
colinf1
- NON Member
- Posts: 427
- Joined: Mon Aug 24, 2020 10:27 am
- Whats your location?: Dundalk
- Region: Eastern
- What Minis have you?: 1983 Mini City 1000
- Contact:
Re: 1983 Mini City
Patch on drivers door frame finished off today, lots of careful grinding to get it nice and flush, will only need a small skim of filler...

Then got passenger rear wheel arch tub repair done, linished it back but seam sealer and stone chip should blend it in...

These small repairs take a lot of time, but that's another 2 marked off the list...
Then got passenger rear wheel arch tub repair done, linished it back but seam sealer and stone chip should blend it in...
These small repairs take a lot of time, but that's another 2 marked off the list...
-
colinf1
- NON Member
- Posts: 427
- Joined: Mon Aug 24, 2020 10:27 am
- Whats your location?: Dundalk
- Region: Eastern
- What Minis have you?: 1983 Mini City 1000
- Contact:
Re: 1983 Mini City
Back to it after being ill last weekend.
Finished off some repairs to the passenger wheel arch tub, probably would have been much quicker to replace the tub but it's done now. Boot floor to arch bracket also welded in. Plenty of grinding down to do another day...

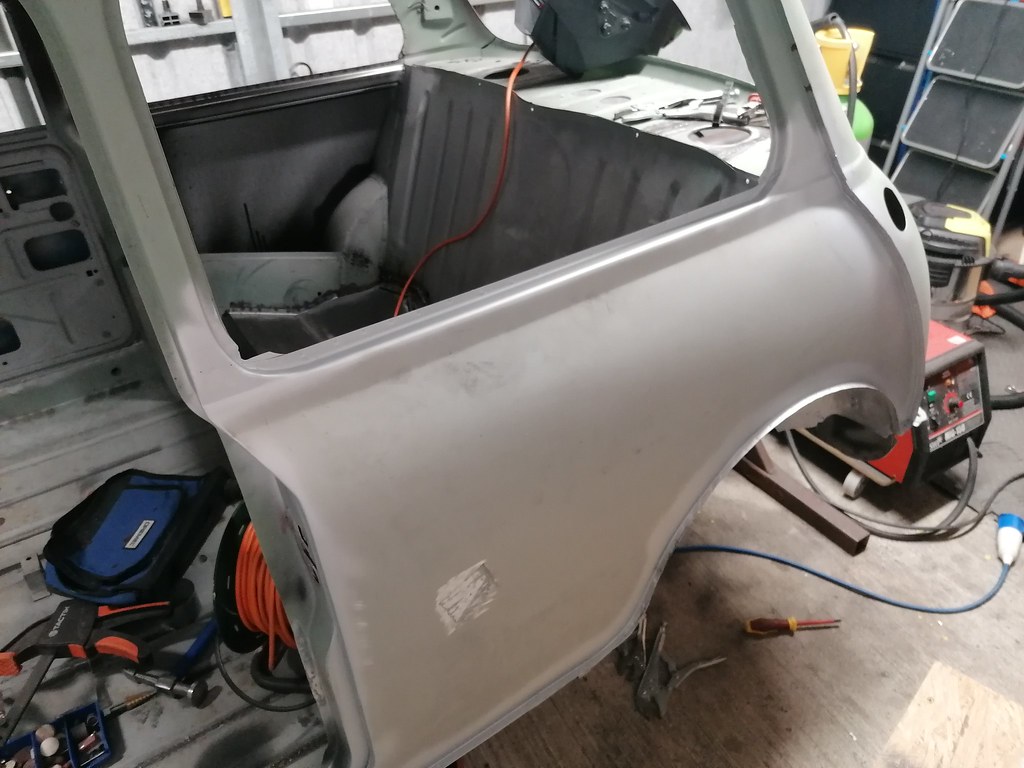
Also cut off the passenger quarter panel, just need to get the lip off then it's time to offer up the new panel.

Finished off some repairs to the passenger wheel arch tub, probably would have been much quicker to replace the tub but it's done now. Boot floor to arch bracket also welded in. Plenty of grinding down to do another day...
Also cut off the passenger quarter panel, just need to get the lip off then it's time to offer up the new panel.
-
colinf1
- NON Member
- Posts: 427
- Joined: Mon Aug 24, 2020 10:27 am
- Whats your location?: Dundalk
- Region: Eastern
- What Minis have you?: 1983 Mini City 1000
- Contact:
Re: 1983 Mini City
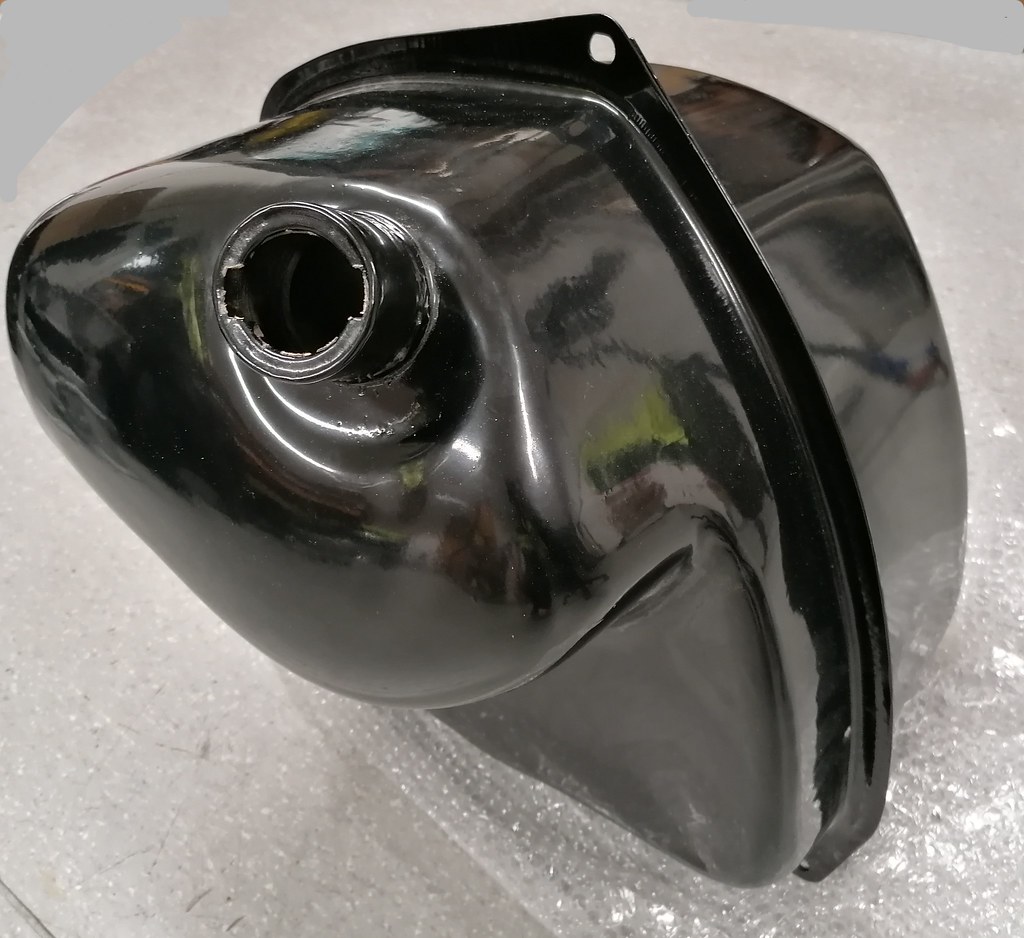
Got fuel tank strap bracket in today...

Then onto the long slog of grinding off the remainder of the lip of the old quarter panel. Seemed to take forever, had to switch between flap disc and grinding disc as some parts were getting too thin and too much heat build up.
Cleaned up the inside of rear bin and inner sill, then got on with getting the new panel on. About 60% there with the welding, some felting needed around the corners of the window as they aren't any way close...


Hopefully get the rest done during the week with a few evenings on it...
Then onto the long slog of grinding off the remainder of the lip of the old quarter panel. Seemed to take forever, had to switch between flap disc and grinding disc as some parts were getting too thin and too much heat build up.
Cleaned up the inside of rear bin and inner sill, then got on with getting the new panel on. About 60% there with the welding, some felting needed around the corners of the window as they aren't any way close...
Hopefully get the rest done during the week with a few evenings on it...
-
colinf1
- NON Member
- Posts: 427
- Joined: Mon Aug 24, 2020 10:27 am
- Whats your location?: Dundalk
- Region: Eastern
- What Minis have you?: 1983 Mini City 1000
- Contact:
Re: 1983 Mini City
Had planned on getting the B and C pillars finished on the passenger side today, I got the rest of the spot welding done during the week. But have not been feeling great today but attempted some work, called it quits after an hour or so as was too achey and tired!
The passenger quarter panel didn't line up as good as the drivers side around window curve at the B and C pillars, had to make a small cut to allow me to fettle it into the right shape.
Welded it up slowly, then started to linish it back, then discovered 2 small tears on the rear panel lip that I'll have to sort out next.


Need to add a bit of material and reshape the lip for the window seal...the the list is slowly getting smaller...
The passenger quarter panel didn't line up as good as the drivers side around window curve at the B and C pillars, had to make a small cut to allow me to fettle it into the right shape.
Welded it up slowly, then started to linish it back, then discovered 2 small tears on the rear panel lip that I'll have to sort out next.
Need to add a bit of material and reshape the lip for the window seal...the the list is slowly getting smaller...
-
colinf1
- NON Member
- Posts: 427
- Joined: Mon Aug 24, 2020 10:27 am
- Whats your location?: Dundalk
- Region: Eastern
- What Minis have you?: 1983 Mini City 1000
- Contact:
Re: 1983 Mini City
The passenger side quarter panel finished off today, just needs a light skim of filler along the join.
Then inner wing plug welded to the inner box section of the A-post, had been meaning to do this for a while.

Dressed down the welds on the passenger floor repair panel, not fully as they'll be hidden with stonechip and soundproofing.
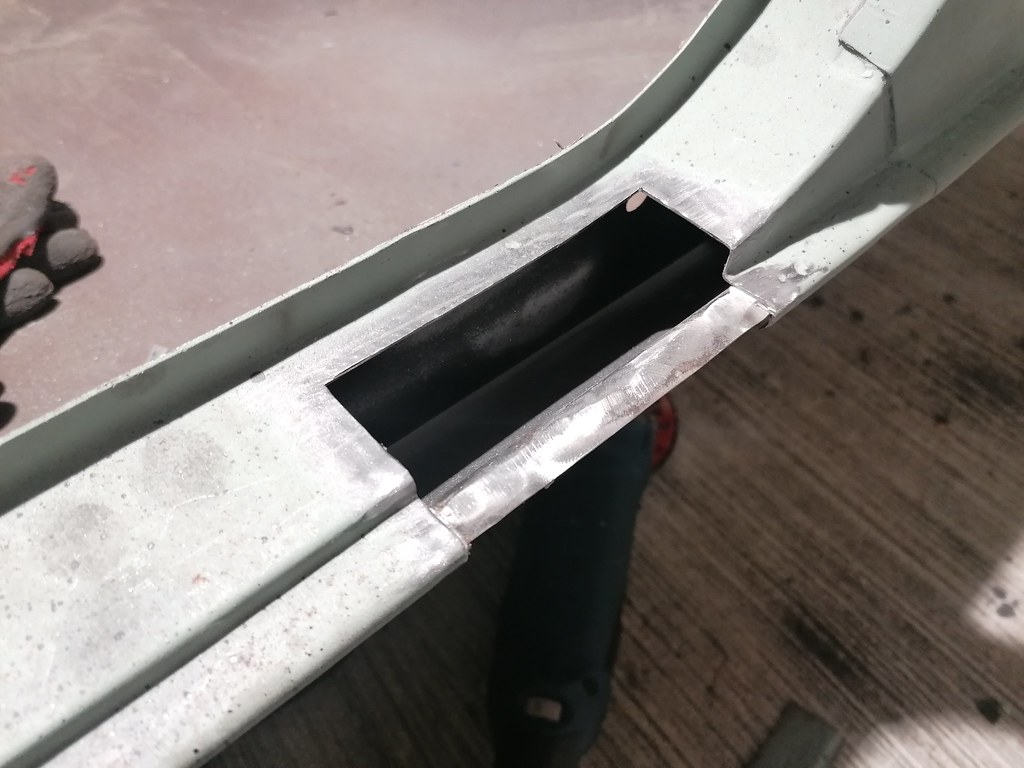
Small repair on a pin hole on the roof gutter, had to open up the gutter slightly to get the tip of the gun close enough to get a good weld.
I've a bigger hole to fill on the drivers side, so at least I know to what to expect...
Also small tear on the rear panel repaired, nicely blended in. There was another small tear along the waist rail that I managed to get with a few welds.

Then inner wing plug welded to the inner box section of the A-post, had been meaning to do this for a while.
Dressed down the welds on the passenger floor repair panel, not fully as they'll be hidden with stonechip and soundproofing.
Small repair on a pin hole on the roof gutter, had to open up the gutter slightly to get the tip of the gun close enough to get a good weld.
I've a bigger hole to fill on the drivers side, so at least I know to what to expect...
Also small tear on the rear panel repaired, nicely blended in. There was another small tear along the waist rail that I managed to get with a few welds.
-
colinf1
- NON Member
- Posts: 427
- Joined: Mon Aug 24, 2020 10:27 am
- Whats your location?: Dundalk
- Region: Eastern
- What Minis have you?: 1983 Mini City 1000
- Contact:
Re: 1983 Mini City
A few steps closer to the finish line...
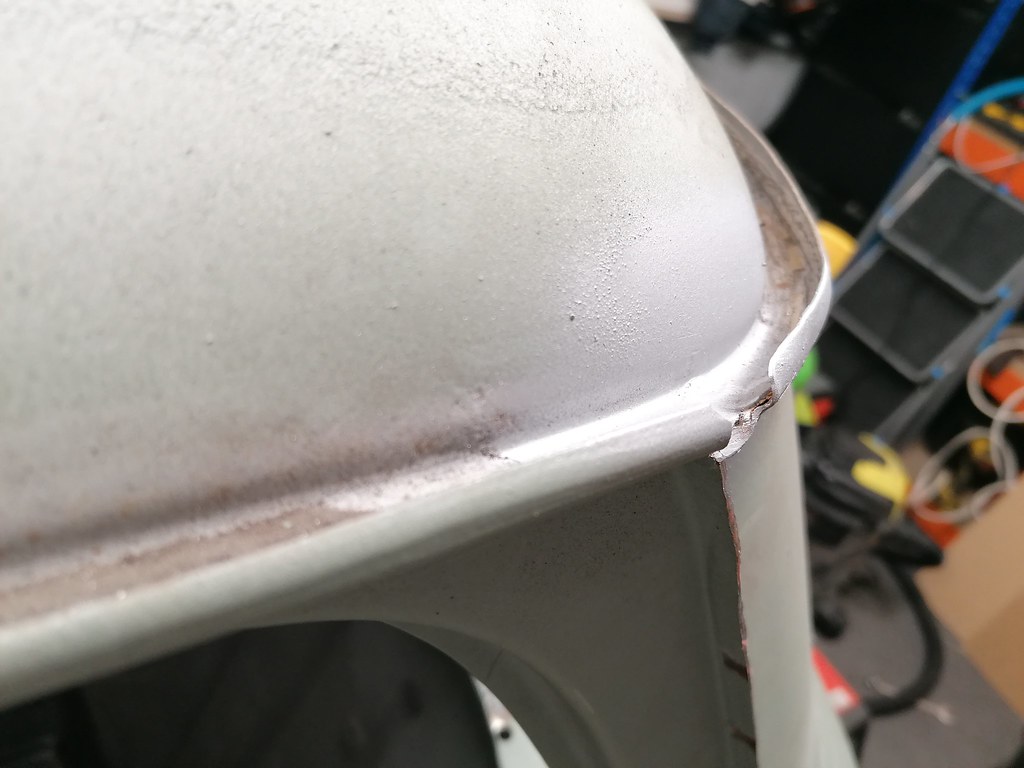
Roof gutter repair on drivers side, started with this...

Welded, ground to shape and zinc primed.

This took about an hour to get done, used up plenty of small cutting discs on the dremel but worked out great, minimal heat going into the welds and grinds at a controllable pace..
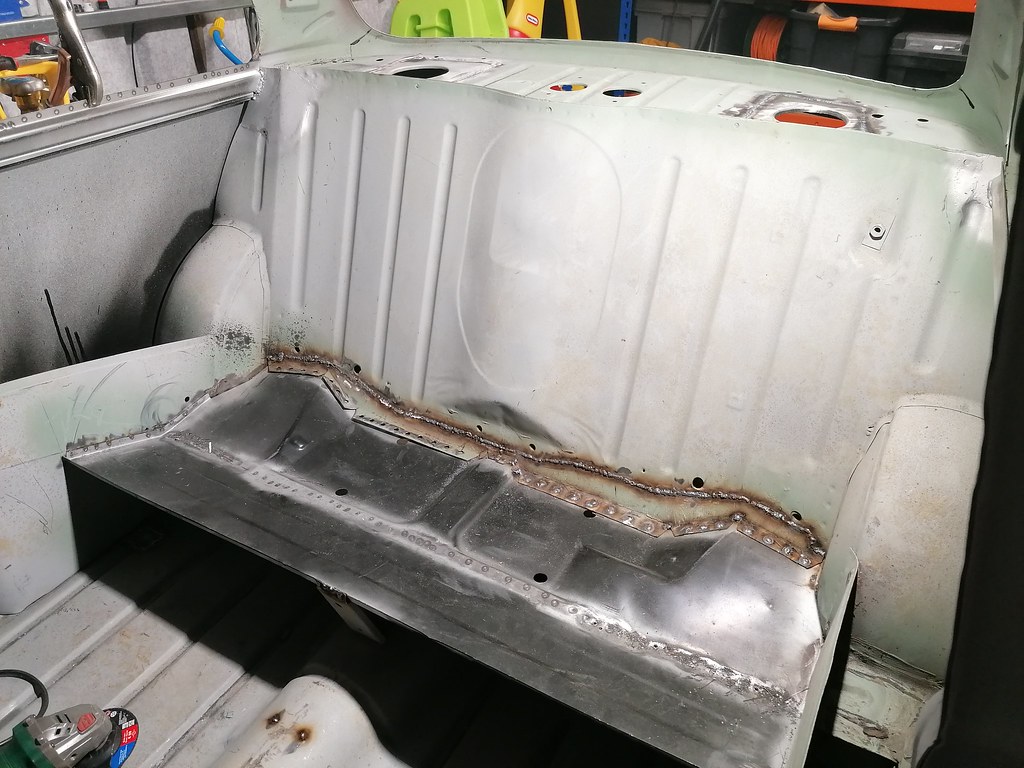
Also got the stiffener on the rear bench panel, rescued the old one off the old panel, cleaned up, primed and spot welded on.
Also got the seat back fully welded now, added some extra weld along parts of the join that I felt was a bit hit and miss...just need to grind it down slightly.
Roof gutter repair on drivers side, started with this...
Welded, ground to shape and zinc primed.
This took about an hour to get done, used up plenty of small cutting discs on the dremel but worked out great, minimal heat going into the welds and grinds at a controllable pace..
Also got the stiffener on the rear bench panel, rescued the old one off the old panel, cleaned up, primed and spot welded on.
Also got the seat back fully welded now, added some extra weld along parts of the join that I felt was a bit hit and miss...just need to grind it down slightly.
-
colinf1
- NON Member
- Posts: 427
- Joined: Mon Aug 24, 2020 10:27 am
- Whats your location?: Dundalk
- Region: Eastern
- What Minis have you?: 1983 Mini City 1000
- Contact:
Re: 1983 Mini City
not much done today on the mini, the joys of countryside living - dealing with mice in the attic 
I did receive my new wheel inserts, there pressed in now so wheels should be ready for painting.
Been fixing my door hinges, all but one had snapped studs, so ground them all down ready for drilling and replacing the studs. It's very hard to drill through the small bit of weld on the inside of the hinge, even though I ground it flush. Ended up drilling as much as I could then using a punch to bang out the last bit.
Got 2 lower hinges done, one pin was very loose so replaced that also. Top hinges are being a bit more challenging, tried to weld in new studs 3 times and just can't get good penetration, it just comes loose when I grind it back flush. Very frustrating.
One in zinc primer...

One primed and top coated gloss black..
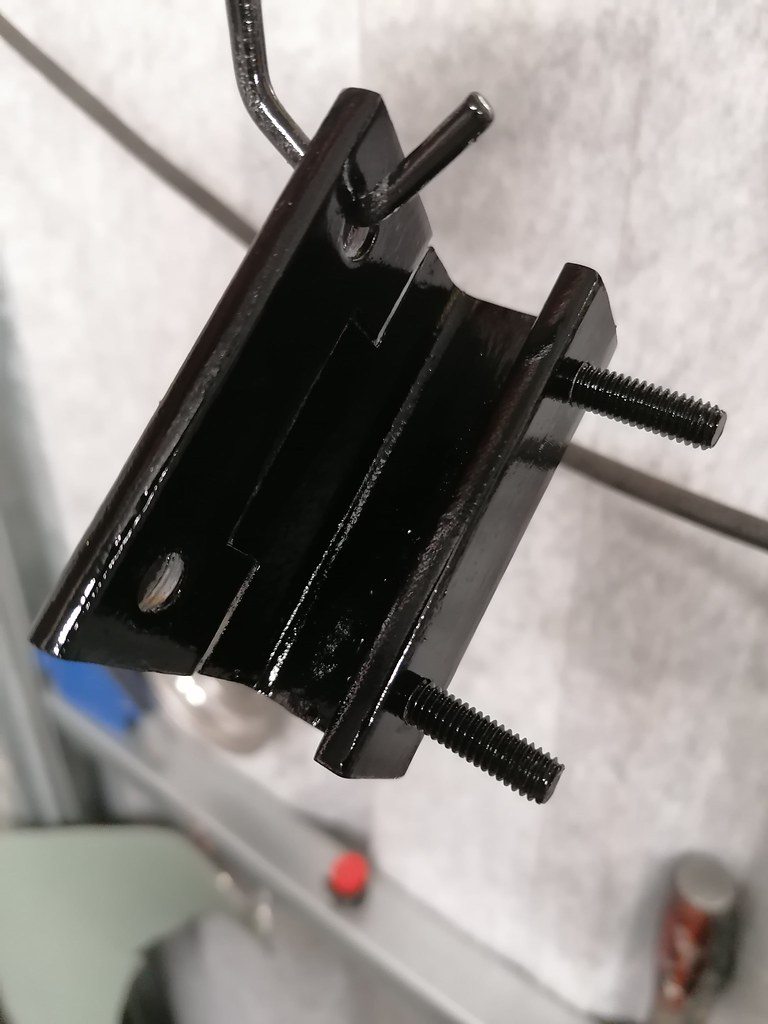
Top hinge on drivers door has 1 screw that refuses to budge, will try some heat on it before resorting to drilling it out...
I did receive my new wheel inserts, there pressed in now so wheels should be ready for painting.
Been fixing my door hinges, all but one had snapped studs, so ground them all down ready for drilling and replacing the studs. It's very hard to drill through the small bit of weld on the inside of the hinge, even though I ground it flush. Ended up drilling as much as I could then using a punch to bang out the last bit.
Got 2 lower hinges done, one pin was very loose so replaced that also. Top hinges are being a bit more challenging, tried to weld in new studs 3 times and just can't get good penetration, it just comes loose when I grind it back flush. Very frustrating.
One in zinc primer...
One primed and top coated gloss black..
Top hinge on drivers door has 1 screw that refuses to budge, will try some heat on it before resorting to drilling it out...
-
colinf1
- NON Member
- Posts: 427
- Joined: Mon Aug 24, 2020 10:27 am
- Whats your location?: Dundalk
- Region: Eastern
- What Minis have you?: 1983 Mini City 1000
- Contact:
Re: 1983 Mini City
Made a start on the door repairs, well, more of a restart having initially started the repair back in July 2021!
Both doors needed bottom frame repairs and skins.
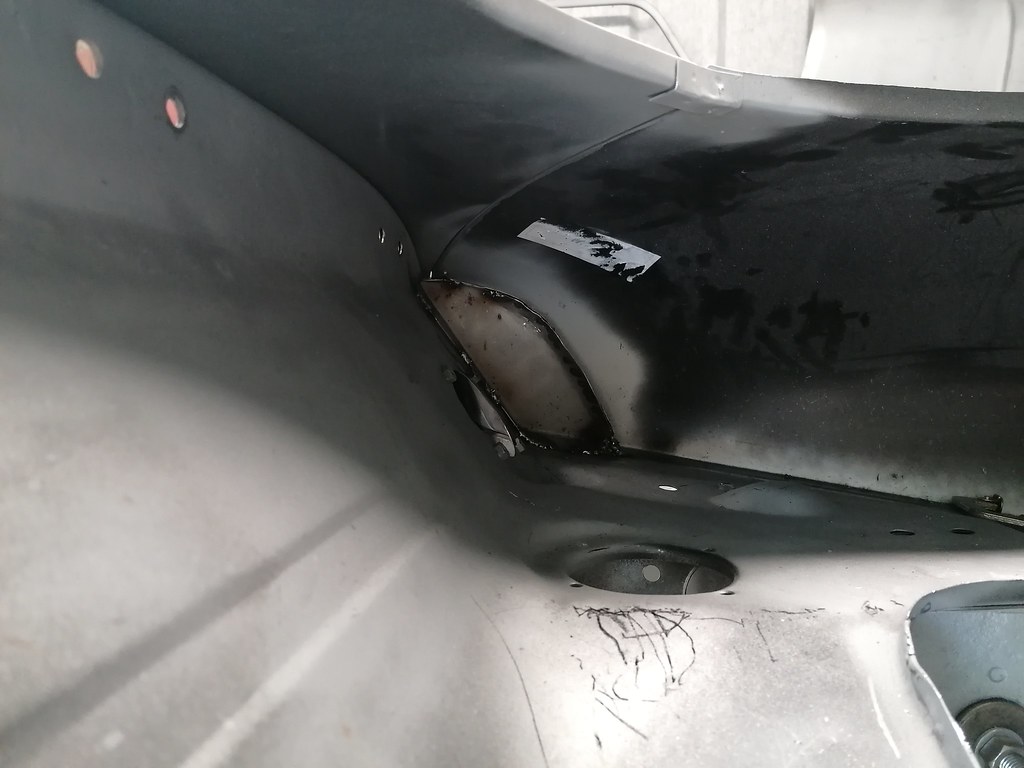
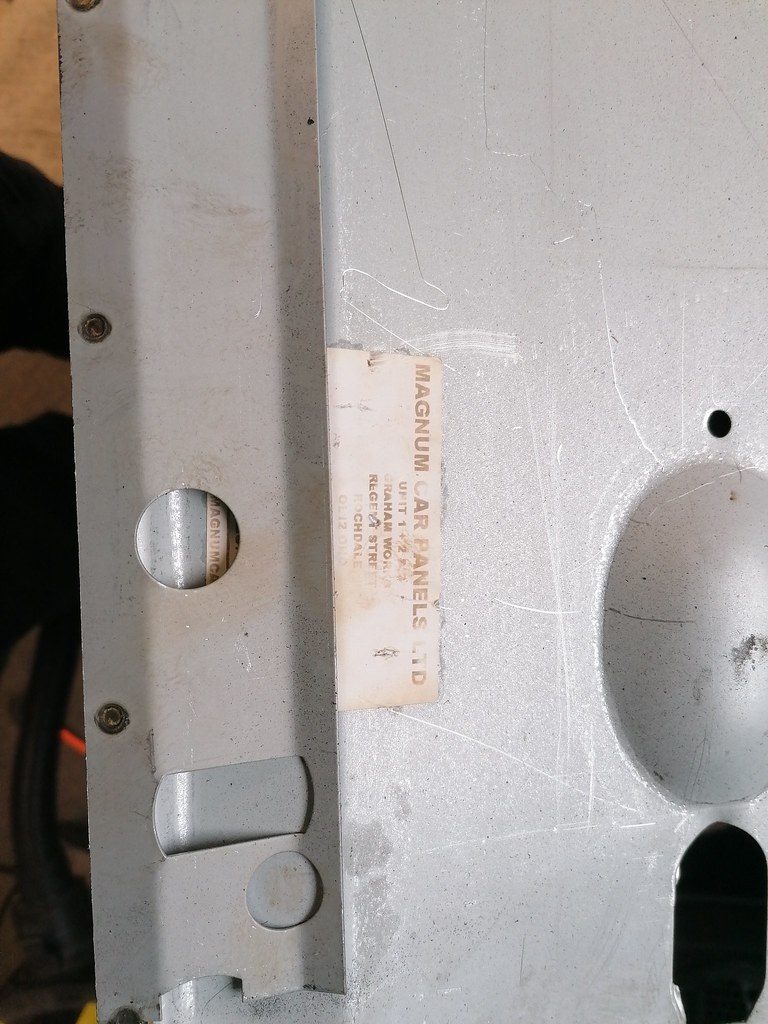
What a great place to put a sticker!
Not many photos of the repair before welding, lots of holes blowing through..
Zinc primed
Then a good top coat on the inner part of the door and skin..


Just waiting for paint to dry before putting the skin onto frame again and offering it up to the car for alignment.
Have been trying to find some old photos of the mini, then was looking at previous owners in logbook. Managed to find the mini on streetview back in 2009 in a place called Mount Nugent in Co. Cavan...

Both doors needed bottom frame repairs and skins.
What a great place to put a sticker!
Not many photos of the repair before welding, lots of holes blowing through..
Zinc primed
Then a good top coat on the inner part of the door and skin..
Just waiting for paint to dry before putting the skin onto frame again and offering it up to the car for alignment.
Have been trying to find some old photos of the mini, then was looking at previous owners in logbook. Managed to find the mini on streetview back in 2009 in a place called Mount Nugent in Co. Cavan...
-
colinf1
- NON Member
- Posts: 427
- Joined: Mon Aug 24, 2020 10:27 am
- Whats your location?: Dundalk
- Region: Eastern
- What Minis have you?: 1983 Mini City 1000
- Contact:
Re: 1983 Mini City
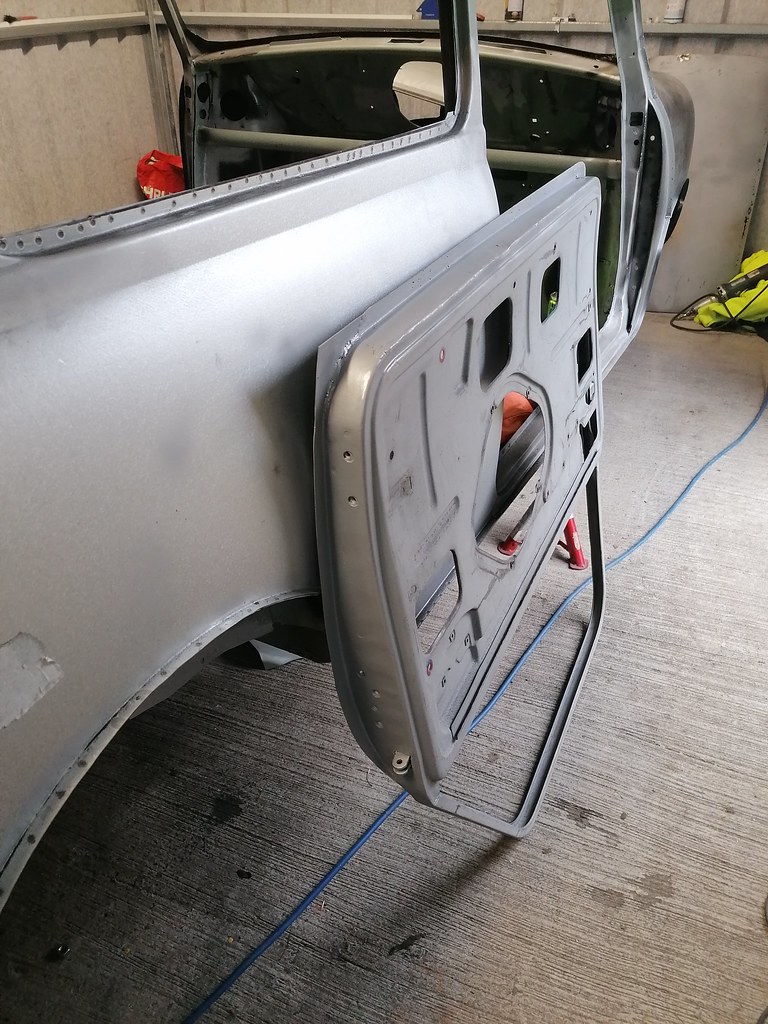
Got the passenger door skin on today, started by putting the door frame back on the car, then offered up the skin. Had to add a shim to the top hinge then got skin set in the correct position and welded up. Folded the lip around using a dolly and hammer, very slow process and felt like my arm was going to fall off!

Needs a bit more fettling to get the gaps better.
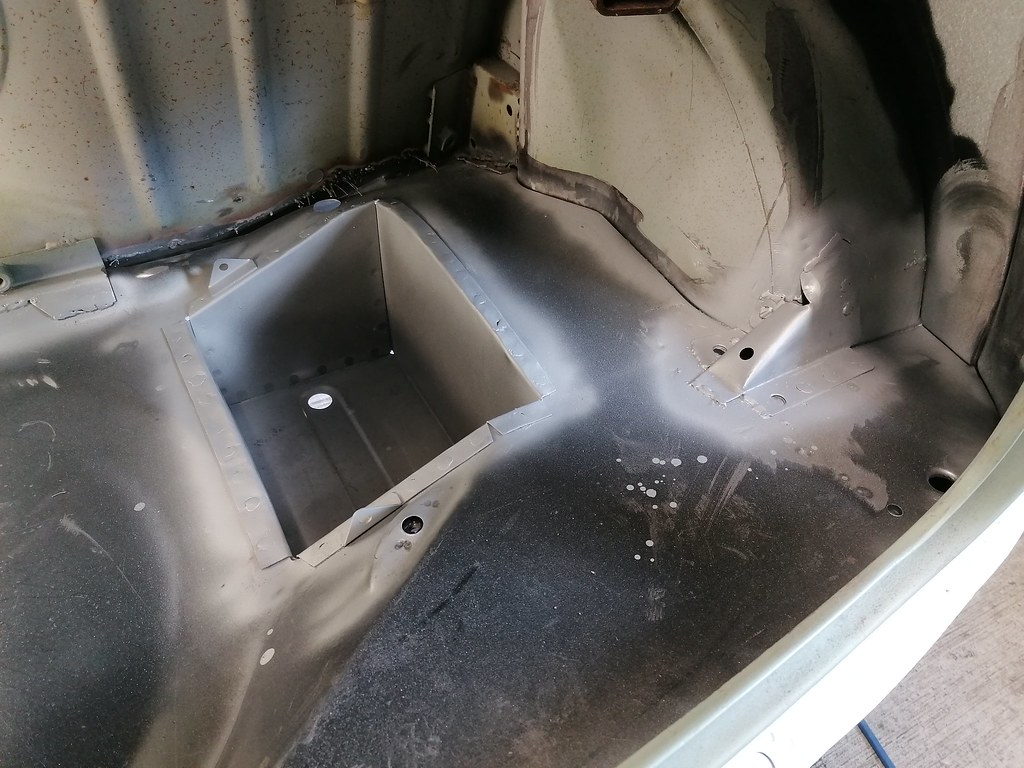
Also got scuttle closer on and battery box stiffeners, plus the seam weld on boot floor to closing panel.
Needs a bit more fettling to get the gaps better.
Also got scuttle closer on and battery box stiffeners, plus the seam weld on boot floor to closing panel.
-
colinf1
- NON Member
- Posts: 427
- Joined: Mon Aug 24, 2020 10:27 am
- Whats your location?: Dundalk
- Region: Eastern
- What Minis have you?: 1983 Mini City 1000
- Contact:
Re: 1983 Mini City
Rear subframe welded, zinc primed and painted gloss black. Also recreated the original date of production stamp, although I think I used more paint than the factory did...
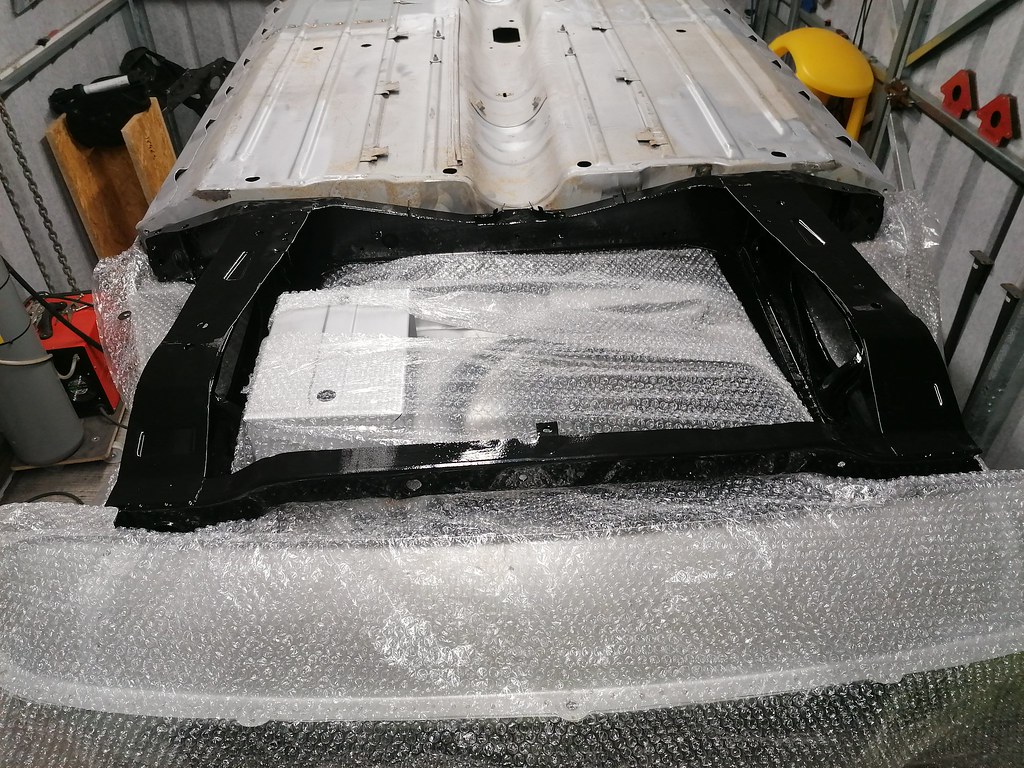


Unfortunately the gloss black shows up all the lumps and bumps, but at least I know its rust free and protected.
Unfortunately the gloss black shows up all the lumps and bumps, but at least I know its rust free and protected.
Who is online
Users browsing this forum: No registered users and 3 guests
