Page 13 of 13
Re: 1981 Mini City 1000
Posted: Sun Oct 22, 2023 9:02 pm
by ctwomey
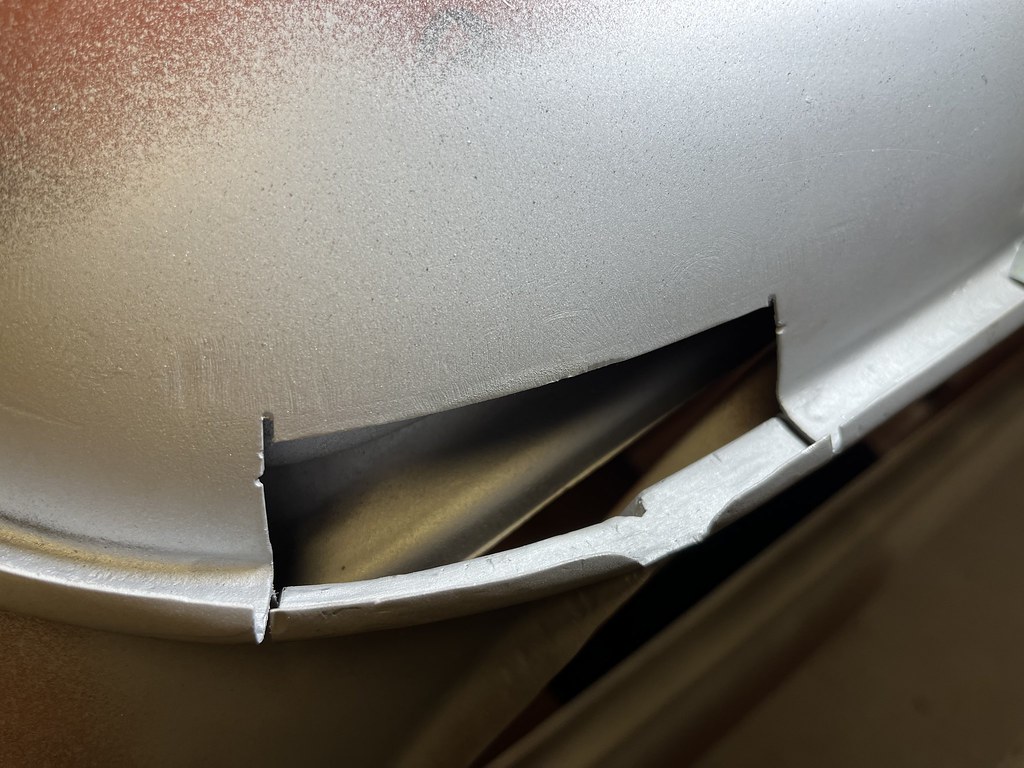
Bought this burr in Wurth in Portlaoise to tidy between the corner of the rain gutter and the vertical seam on the rear panel.
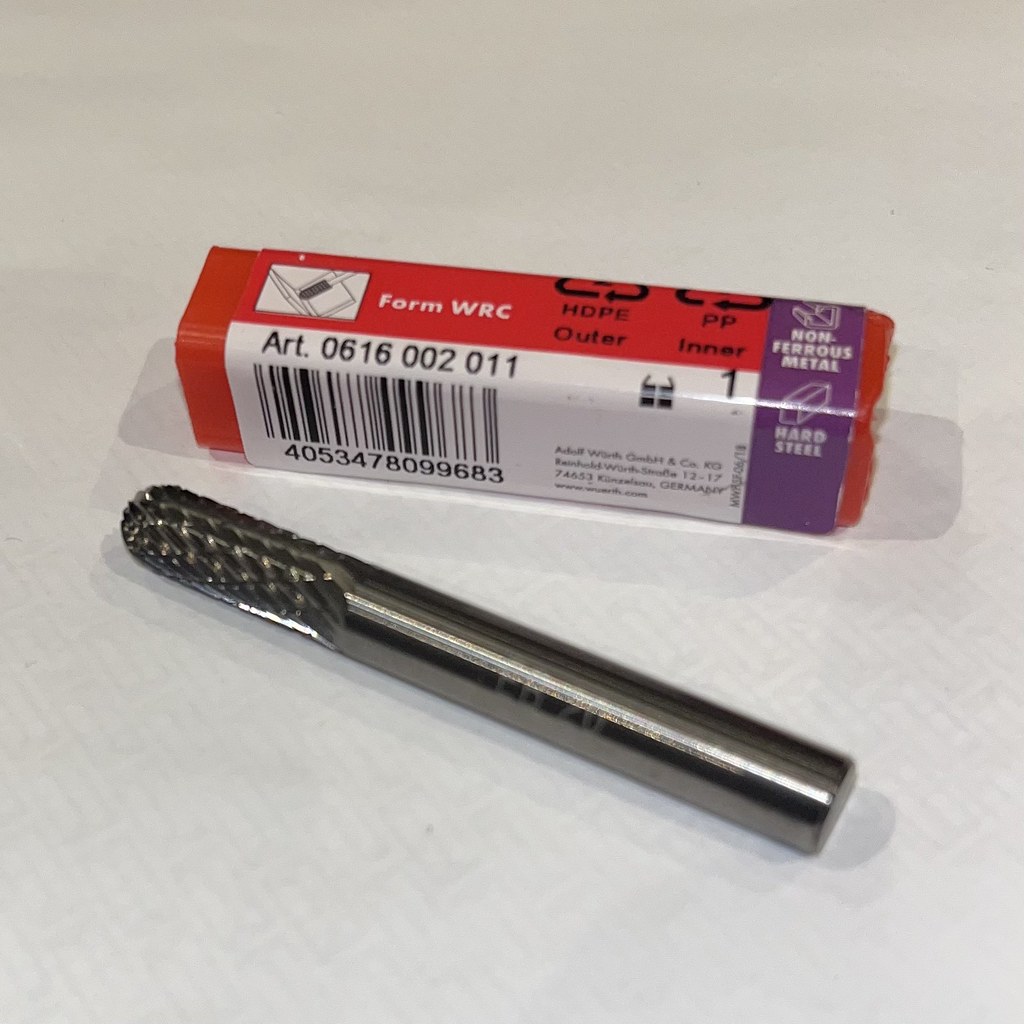
It cleaned it up really nicely and it was super sharp.
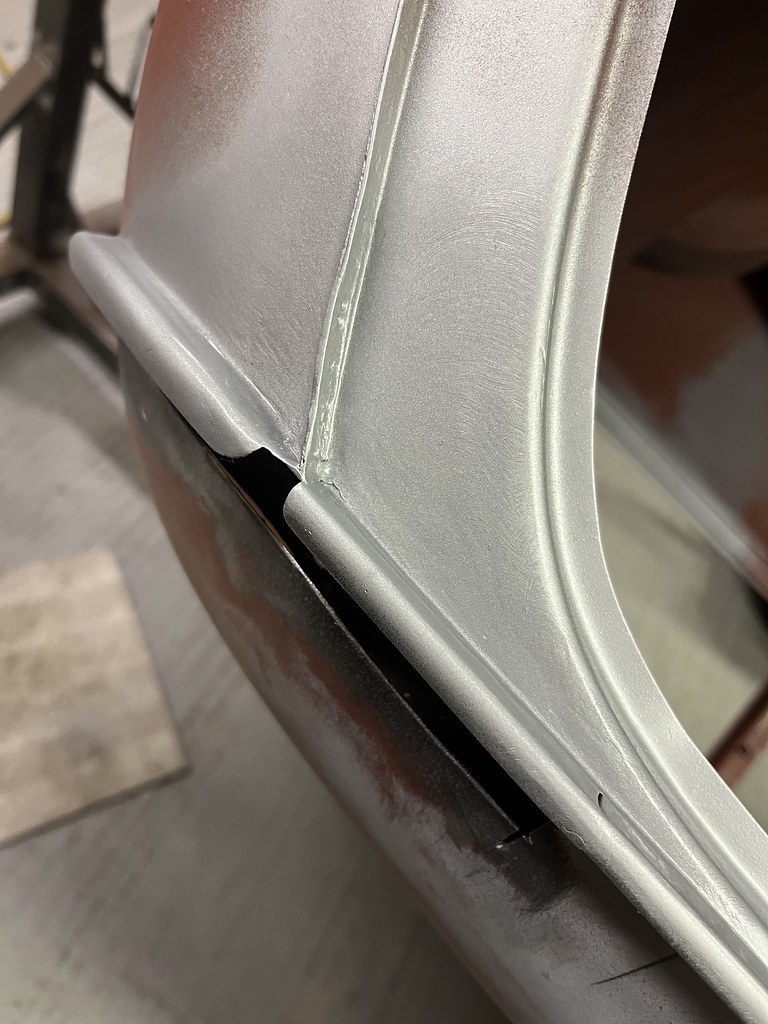
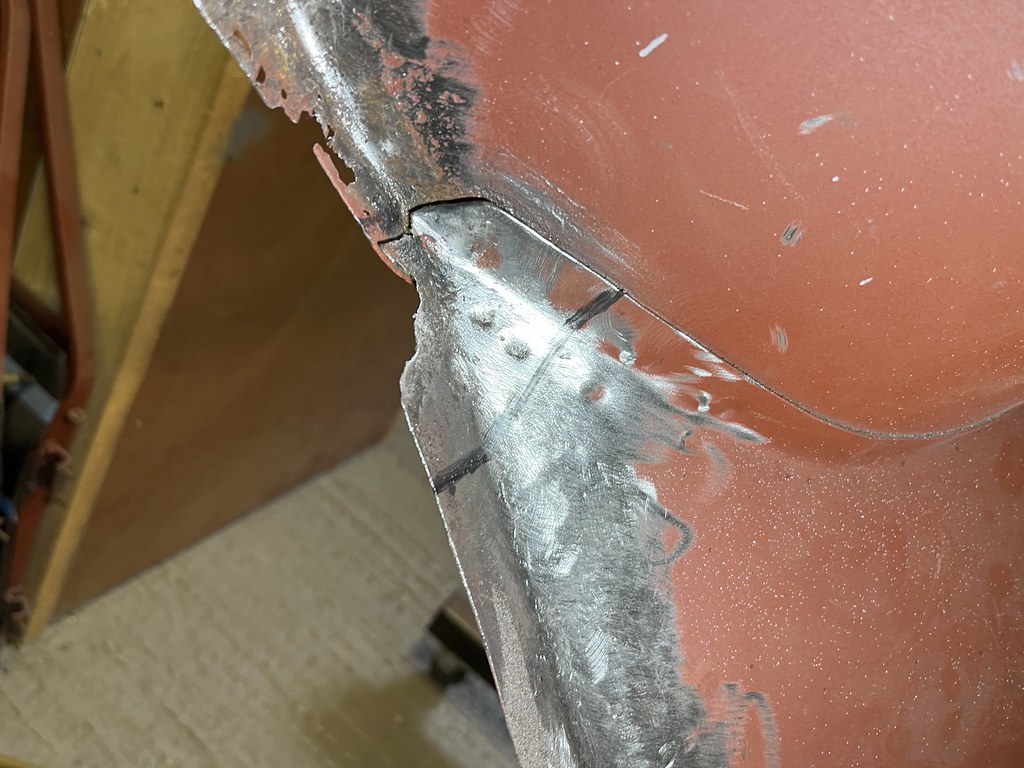
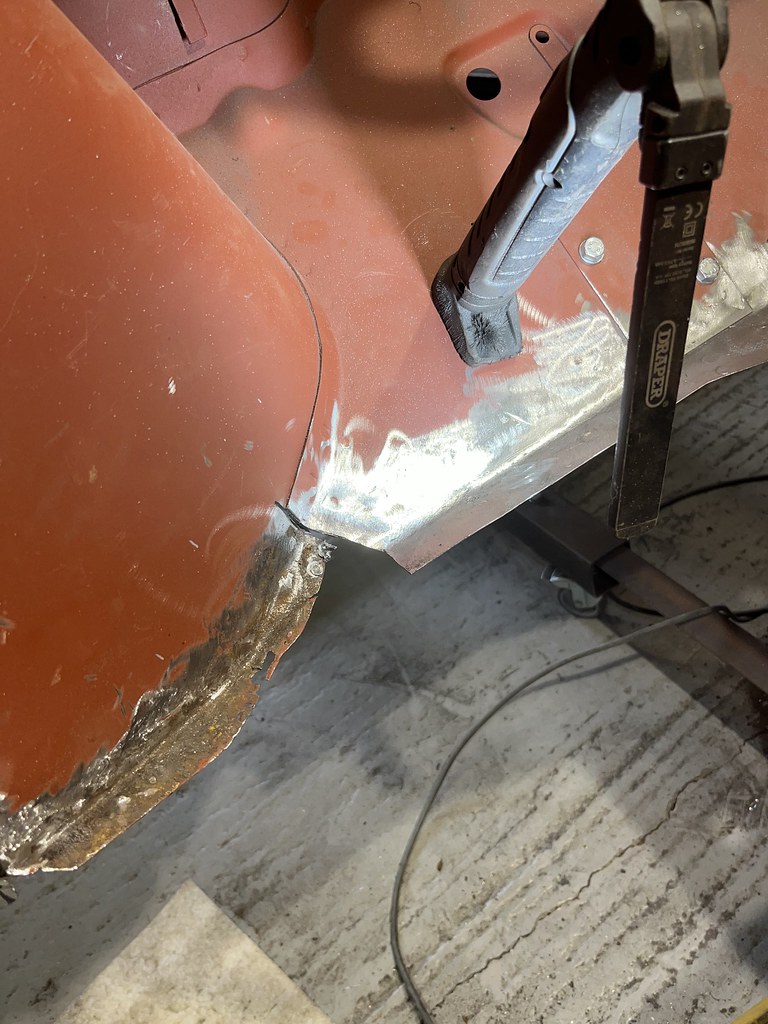
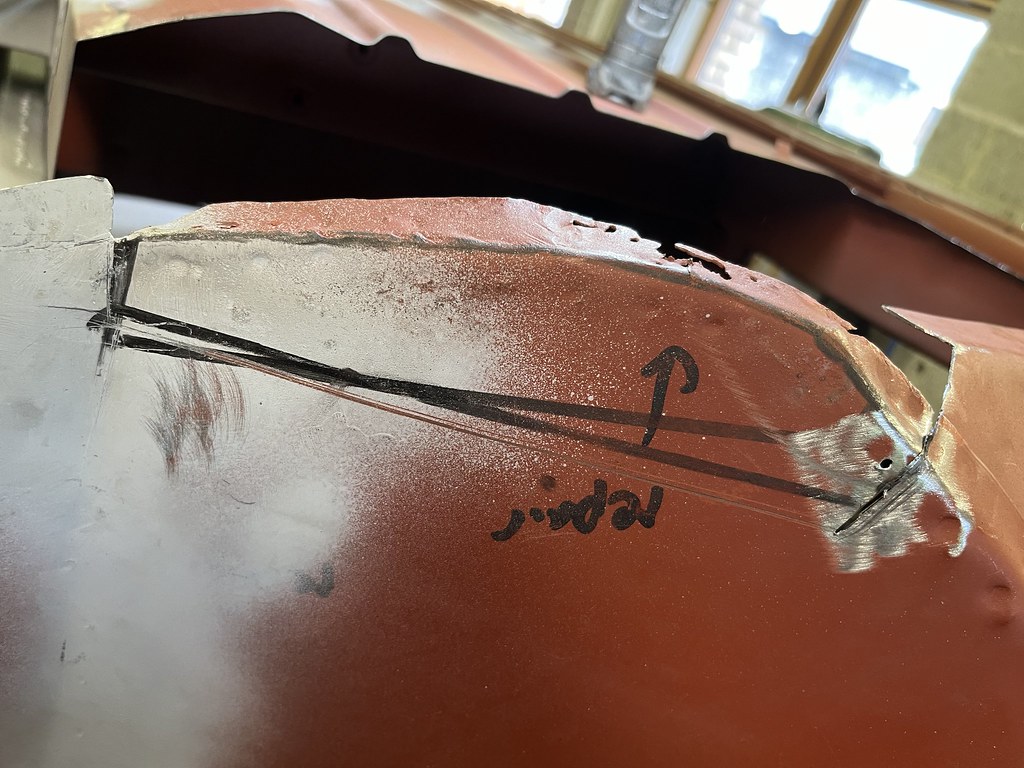
Next up is rebuilding the lip on the corner patch from the donor roof. I have finished welding the lip but this week I will need to reshape the edge and tidy up the visible weld on the other side.

If you are at the Portlaoise Classic Car Show with your Mini and you see someone examining your roof gutters in great detail it's probably me ... so apologies in advance

Re: 1981 Mini City 1000
Posted: Sun Oct 29, 2023 10:32 pm
by ctwomey
I attended the Portlaoise Classic Car Show today and managed to pick up this brochure.
It's the BL Cars Mini Brochure for the 1980/81 models
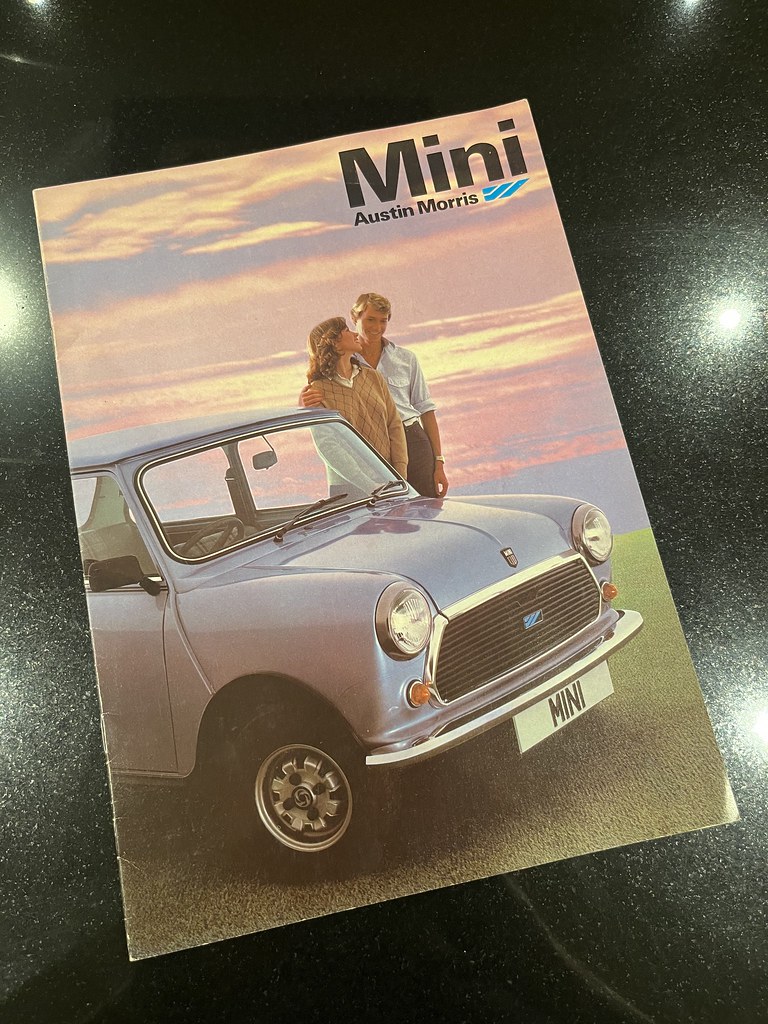
The last double page has the Mini City I am restoring albeit in a different shade of red (Cinnabar - CMT) compared with my own (Emberglow - CMN).

Re: 1981 Mini City 1000
Posted: Mon Oct 30, 2023 12:00 pm
by ctwomey
Started the blending of the weld through on the other-side of the new lip of the patch panel.

Job done.
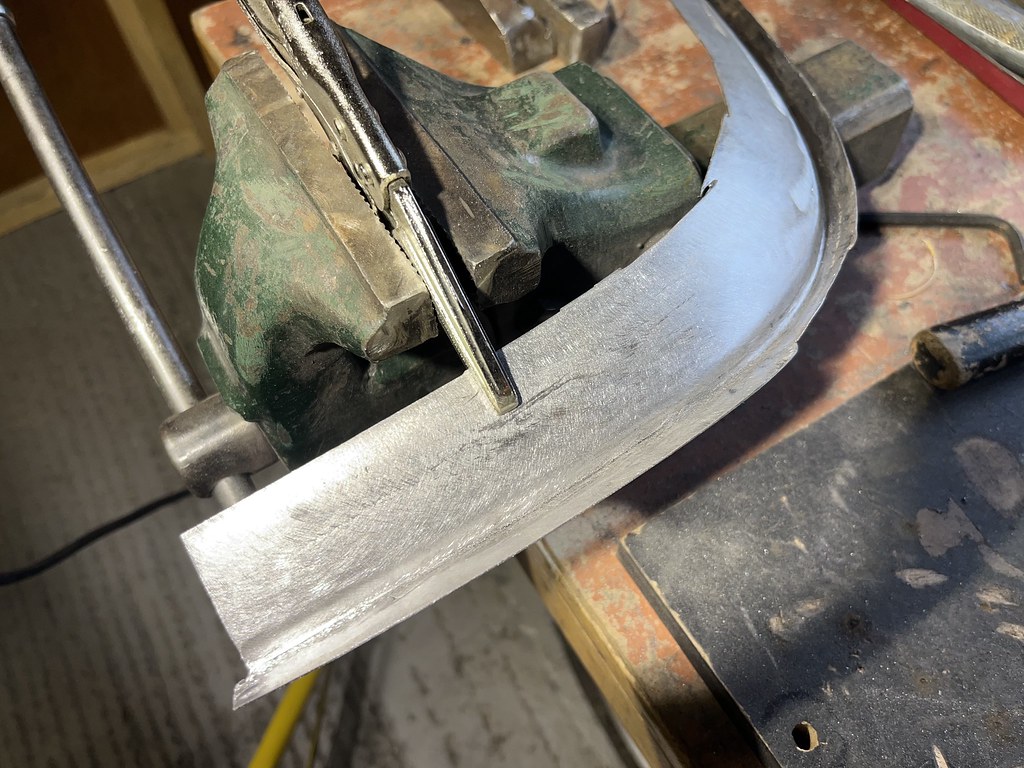
Final sizing and cutting of the patch panel to fit the roof. I will give it a coat of weld-through primer on the backside before welding to the roof.

Re: 1981 Mini City 1000
Posted: Mon Oct 30, 2023 4:06 pm
by colinf1
You don't see too many of them about with that original style grille.
How close you hoping to get to original spec?
I think you said that you'd be adding a few essentials like temp and oil gauges....
Re: 1981 Mini City 1000
Posted: Mon Oct 30, 2023 5:33 pm
by ctwomey
colinf1 wrote: ↑Mon Oct 30, 2023 4:06 pm
You don't see too many of them about with that original style grille.
How close you hoping to get to original spec?
I think you said that you'd be adding a few essentials like temp and oil gauges....
The car didn't come with a grill so might have to go looking for one. Alternatively, there is a black 11-slat one that Mini Spares do.
Other changes will be chrome bumpers, mirrors and wiper blades. The Interior will be the same except I will need to find a way to mount the oil pressure and water temp gauges. The oval centre console might be the easiest solution, but would prefer to retain the round one.
I will have to change the wheels as I have Cooper S discs and wider rear drums, so either Cooper S steel wheels or a suitable alloy that doesn't require arch extensions. 4.5 x 10 or 4.75 x 10.
Re: 1981 Mini City 1000
Posted: Tue Oct 31, 2023 2:22 pm
by Marktoby
Only new to the group, and to Mini ownership so I'm playing catch up on the work you've done, but its exceptional. Great work.
Re: 1981 Mini City 1000
Posted: Tue Oct 31, 2023 7:50 pm
by ctwomey
Marktoby wrote: ↑Tue Oct 31, 2023 2:22 pm
Only new to the group, and to Mini ownership so I'm playing catch up on the work you've done, but its exceptional. Great work.
Thanks a million. There is a wealth of knowledge and support on the board so please don't hesitate to ask questions.
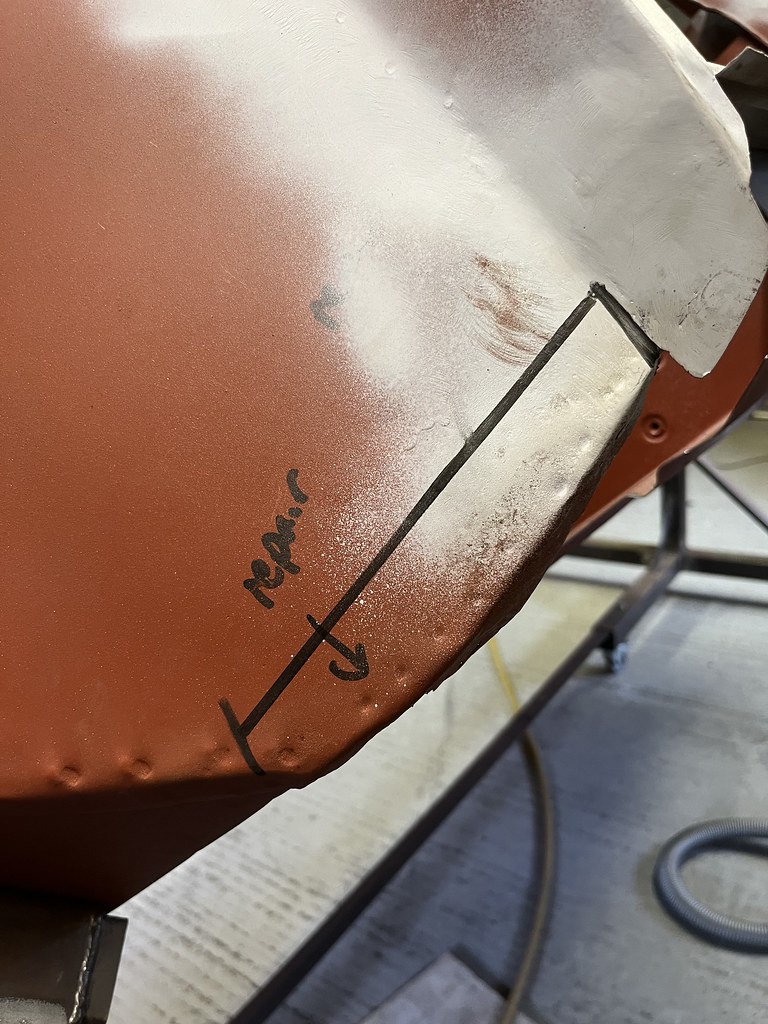
Re: 1981 Mini City 1000
Posted: Tue Dec 19, 2023 9:38 pm
by ctwomey
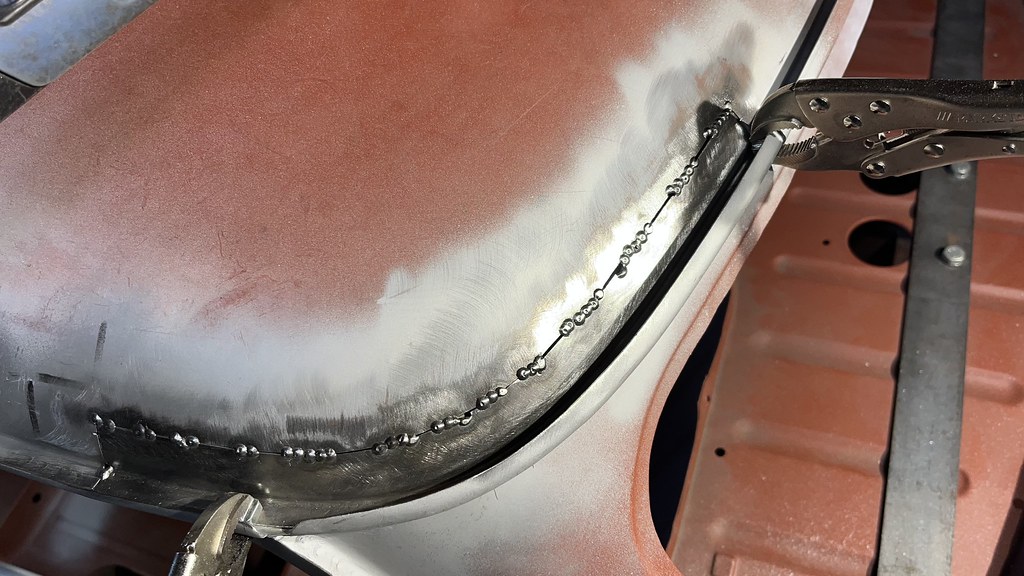
I have been busy studying for exams of late and haven't had time to finish the roof on the mini. Exams are completed now. I spent the last couple of days on the mini and have completed the rear passenger corner of the roof.
The series of photos shows how I approach the weld.
Keeping a ~1mm gap and keeping the panels cool is the secret to preventing warping. But it's impossible to make it perfect when you can't get access to the back of the panel.
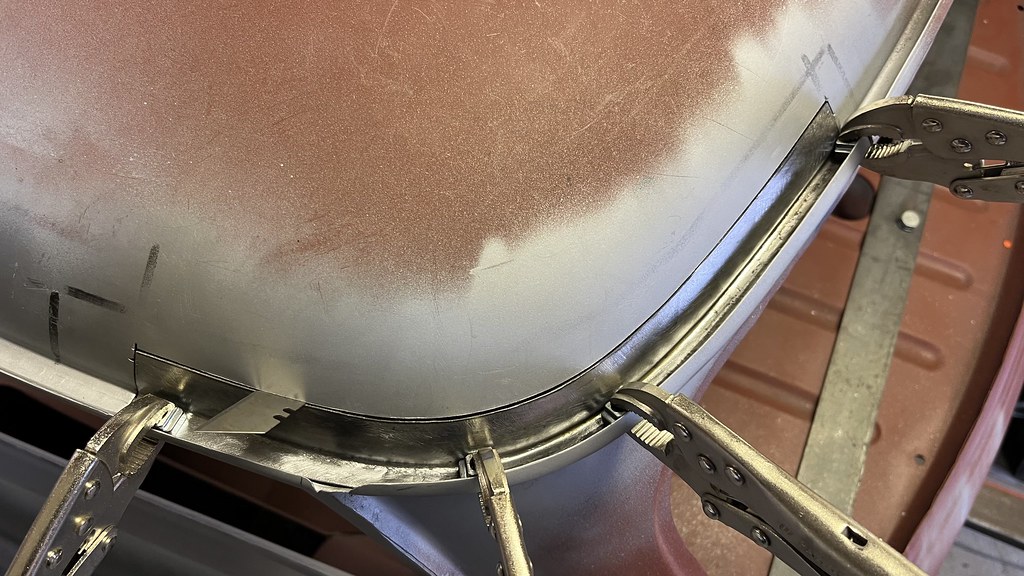
I always start on one side and tack as I go along to the other. This way the panel can expand and contract as it heats up and cools down.

It's all about keeping it cool once it is completely tacked and locked in place.


Re: 1981 Mini City 1000
Posted: Wed Dec 20, 2023 5:49 pm
by ctwomey
Re: 1981 Mini City 1000
Posted: Sat Dec 23, 2023 10:02 am
by colinf1
Fantastic repairs as usual Conor, if the exams for welding bodywork you'd ace them!
Re: 1981 Mini City 1000
Posted: Sat Dec 23, 2023 5:54 pm
by ctwomey
colinf1 wrote: ↑Sat Dec 23, 2023 10:02 am
Fantastic repairs as usual Conor, if the exams for welding bodywork you'd ace them!
Thanks Colin!
Re: 1981 Mini City 1000
Posted: Sat Apr 06, 2024 7:04 pm
by ctwomey
I haven't been posting much on the progress lately but I have been working away on the bodywork over the last few weeks.
Finally finished the roof and here is the last section welded in place. I have joined up the two panels as I am hoping to not have any plastic trim on the gutters.

I trial-fitted the petrol tank and have located the position for the petrol tank bracket.
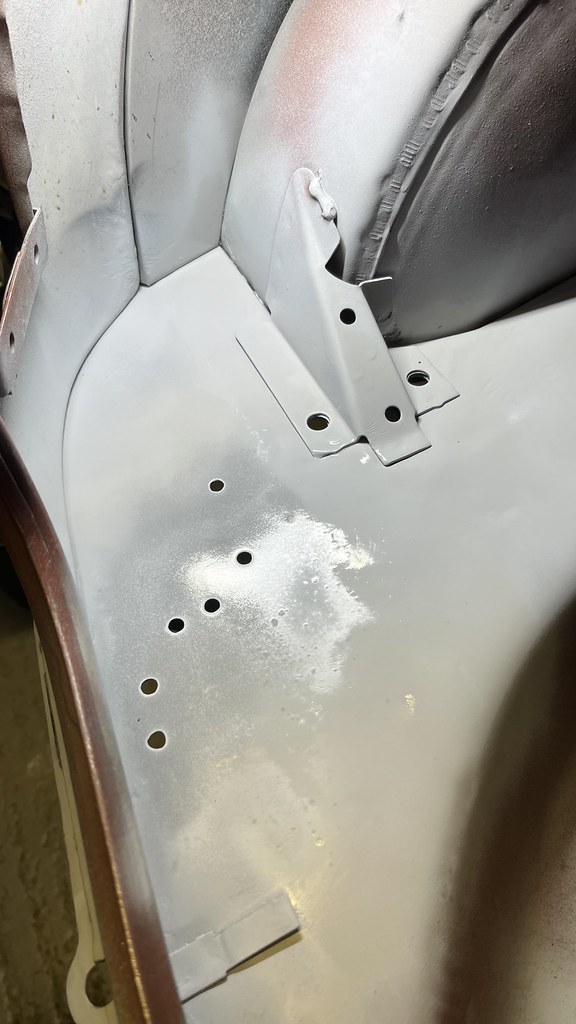
Welded the closing panel in place and plug-welded the petrol tank bracket in place.

While it is not spot welded in place it looks stock and original.

Re: 1981 Mini City 1000
Posted: Wed Apr 17, 2024 10:45 am
by ctwomey
What's everyone using in terms of paint for the inside of cavities?
i.e. Inside of sill cavities, rear valence and front gusset closing panel cavities before welding them up?
Everywhere else is accessible except for these three areas.
Any help would be appreciated?
I was thinking of just using 2K epoxy as that would seal the metal and then I could apply seam sealer in the necessary areas.
Re: 1981 Mini City 1000
Posted: Wed Apr 17, 2024 5:20 pm
by colinf1
I used rattle cans of zinc rich primer, followed by gloss black top coat. The 2K epoxy would give off nastier fumes if welded nearby, both probably have the same chance of catching fire.
For cavity wax, you can get to the majority of the sill through each flute and the heelboard captive nuts, scuttle closer can be got to from down the A-pillar and I think you can get to the drivers side of the rear valance through the fog light wiring hole, can't remember if there is a similiar hole on passenger side.
Re: 1981 Mini City 1000
Posted: Thu Apr 18, 2024 9:03 am
by ctwomey
Thank Colin, I think the rear valence can be got from underneath too. I don't plan on putting the original fog light back on the car. I bought an earlier valence without the holes and nut for the external fog light.
Re: 1981 Mini City 1000
Posted: Thu Apr 18, 2024 1:22 pm
by colinf1
ctwomey wrote: ↑Thu Apr 18, 2024 9:03 am
Thank Colin, I think the rear valence can be got from underneath too. I don't plan on putting the original fog light back on the car. I bought an earlier valence without the holes and nut for the external fog light.
Mine has a hole each side of the boot floor, but I've figured out its because its a full new boot floor that was based on the later MPi mini.
Re: 1981 Mini City 1000
Posted: Thu Apr 18, 2024 2:41 pm
by woody
There is a hole each side because LHD cars have the fog light on the left.
Re: 1981 Mini City 1000
Posted: Fri May 03, 2024 6:57 pm
by ctwomey
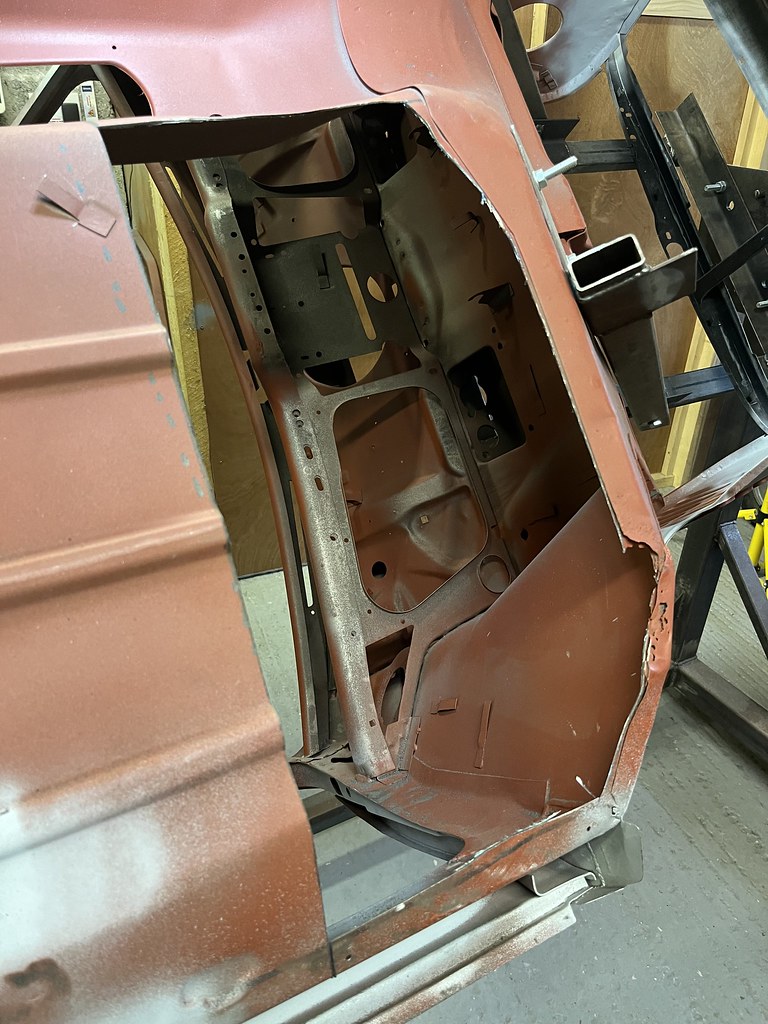
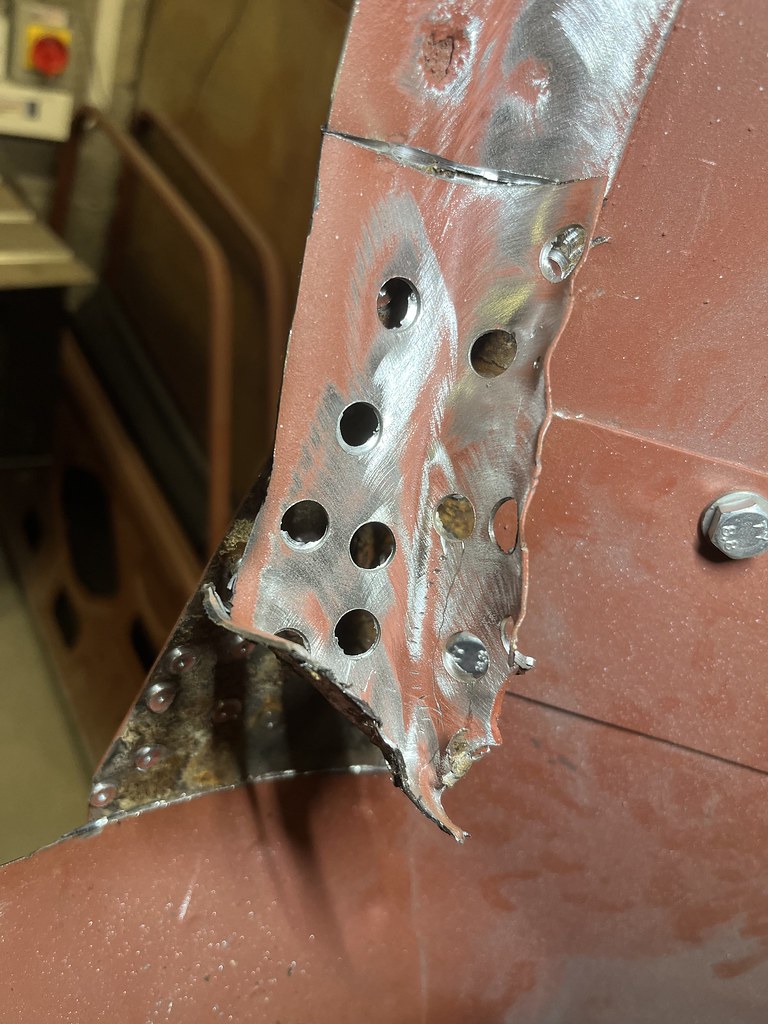
Time to replace the front quarter floor panels. I am starting with the passenger side first. I am replacing them with M-Machine panels
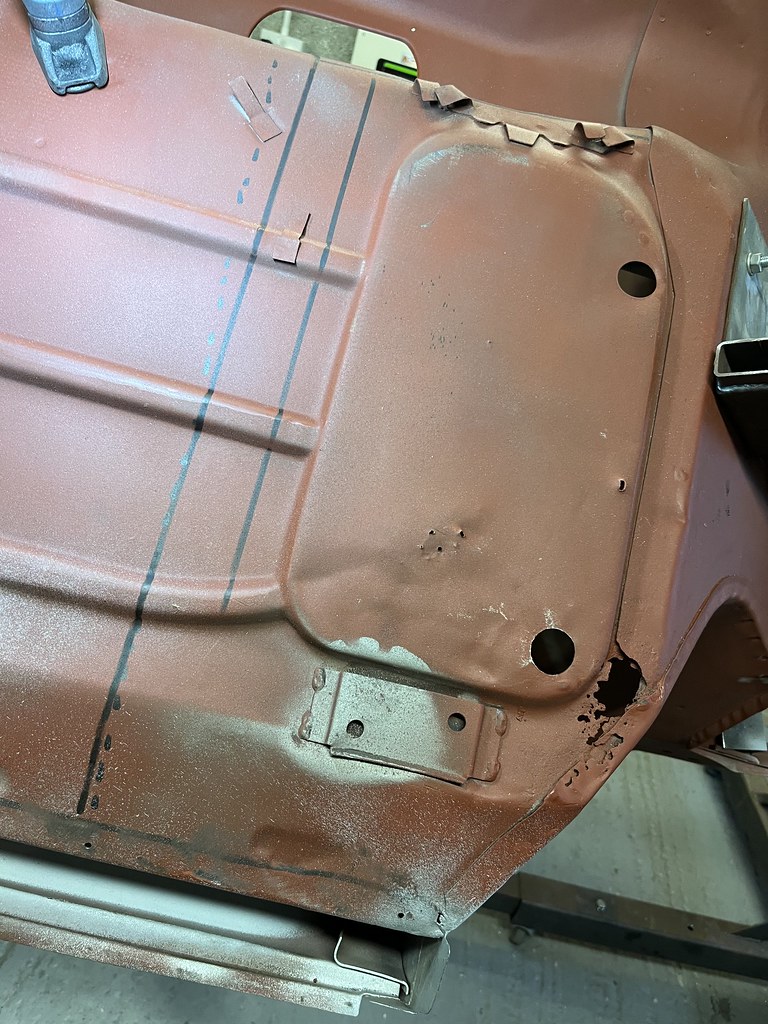
I have cleaned up the inside sill and you can see the weld through for the repair patches I did on the bottom of the inner wing panel
Quite a lot of dirty rust on the lip of the inner wing panel where water ran down under the floor.
Re: 1981 Mini City 1000
Posted: Sat May 04, 2024 4:11 pm
by ctwomey
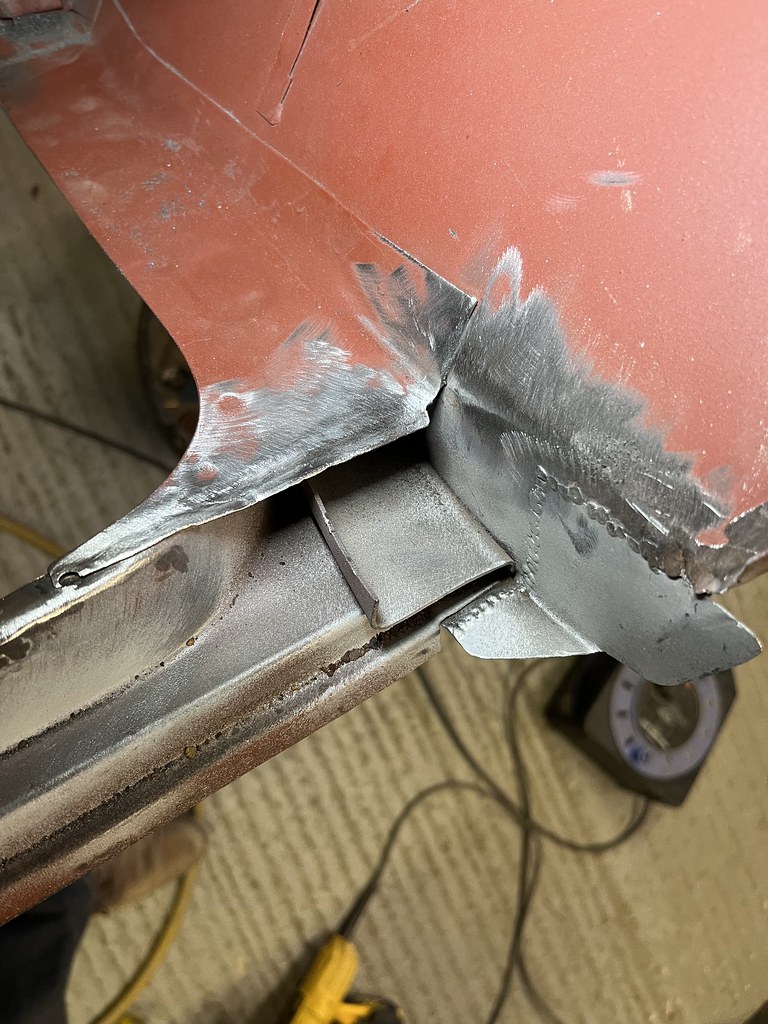
Drilling out the spot welds
Loving the rust but there is clean metal there
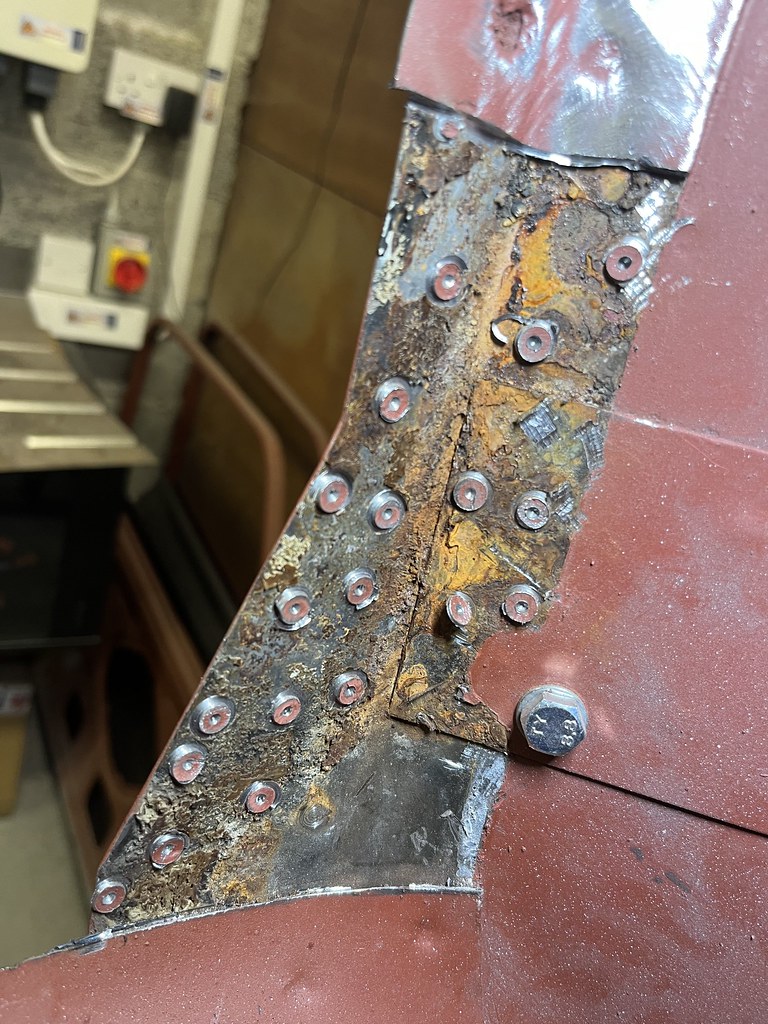
The bottom of the inner wing will need replacing
I will take a decent chunk off it
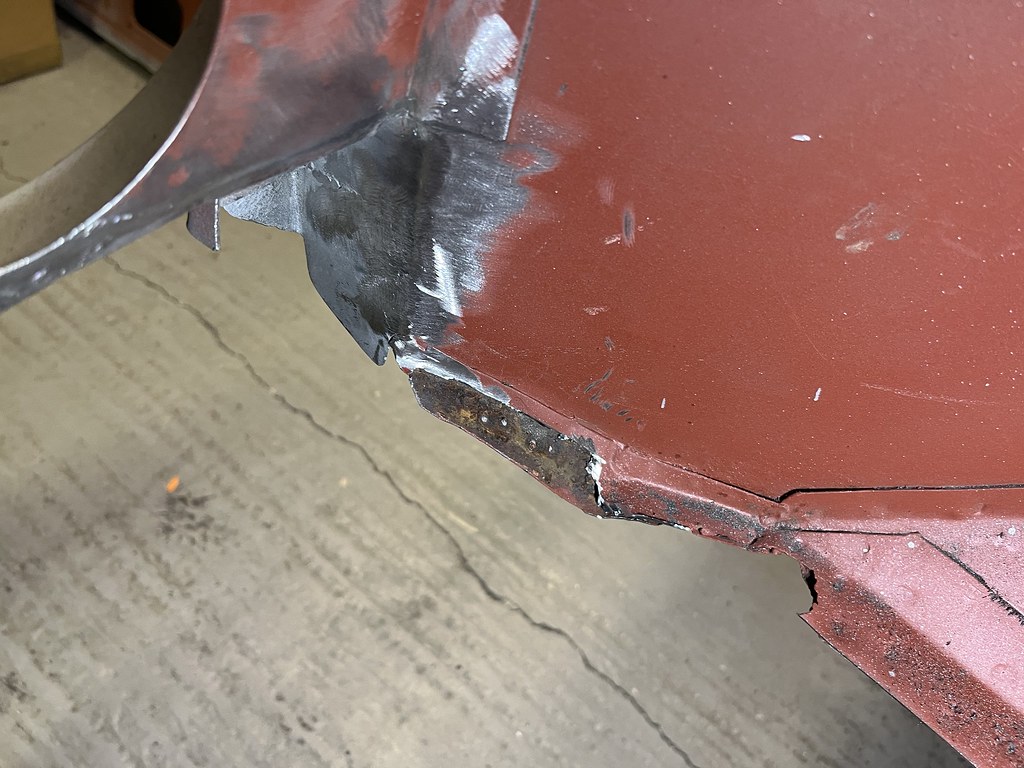
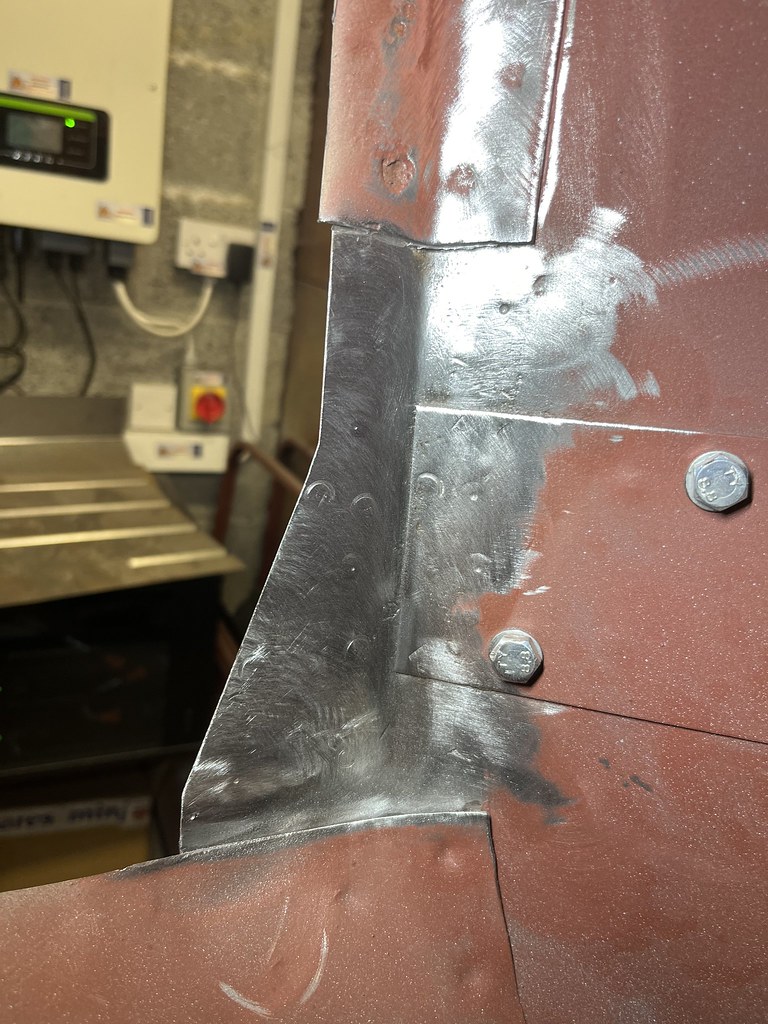
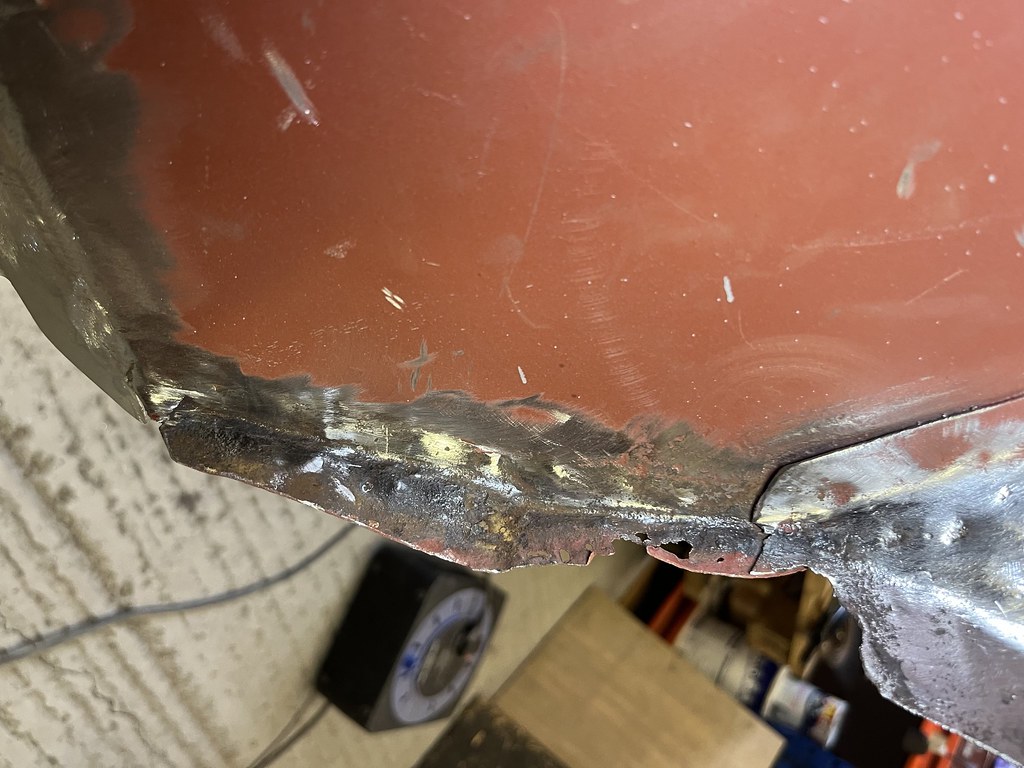
The bottom of the toe board is bad as well
Cut out the toe board rot
Some cardboard by design is required here, such and odd shape
Here is the resulting patch I have made up