Page 2 of 7
Re: 61 Van resto
Posted: Wed Jul 16, 2008 10:01 pm
by DaveC
Good work there KMG

Re: 61 Van resto
Posted: Thu Jul 17, 2008 11:48 pm
by joebe1
That El Bo Grease is great stuff alrite...could it be something to do with what u put it on with? Are those nice clean muslin cloths hard to get & where do u get them?...

Re: 61 Van resto
Posted: Fri Jul 18, 2008 1:48 pm
by kerryminigringo
They can be hard to get but I,ve seen a few thrown about in your photos so you must have the same source as me.

Re: 61 Van resto
Posted: Fri Jul 18, 2008 3:35 pm
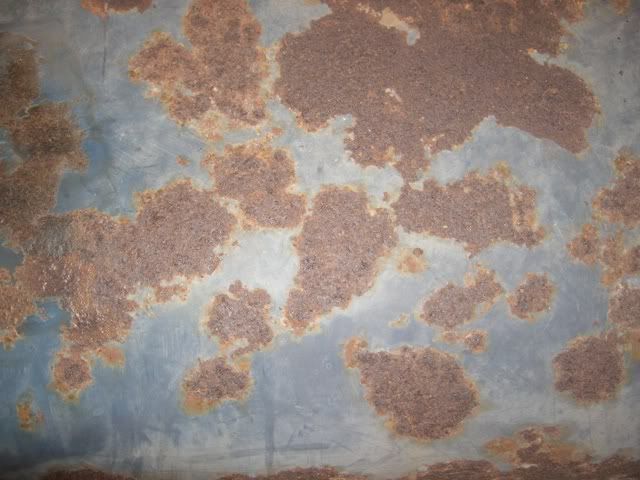
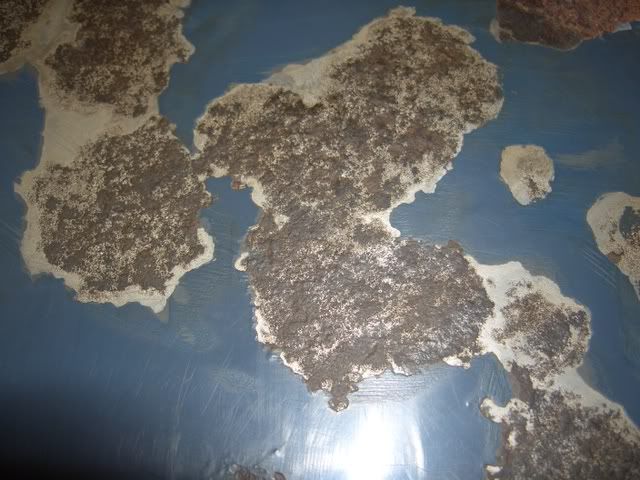
by kerryminigringo
As I said I have been trying ways of getting the rust off the panels with non destructive means as I have been hearing conflicting reports about media blasting,especially on large panels which can become deformed and one of these methods I have been using is bilthambers deox-gel.You can see for yourselves the effect of on application on a badly rusted roof panel.I removed as much as I could with a wire brush on the grinder and then applied the gel and left it overnight.I will try another application again as the instructions say one or more applications may be required.
BEFORE.
AFTER
Re: 61 Van resto
Posted: Sat Jul 19, 2008 9:28 pm
by kerryminigringo
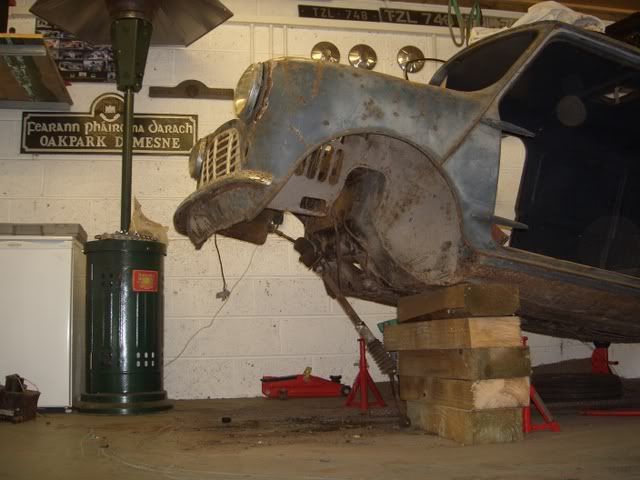
I got the front subframe out of the van today and it,s back down on axle stands.The rear subframe has been blasted and I will be picking it up on Monday and I will see if there is more rust than I thought.The plan will be to build up the rear subframe before I start to strip the front one.
Re: 61 Van resto
Posted: Sun Jul 20, 2008 9:52 am
by Billy
Outdoor gas heater along with a freezer to keep the beers cold. Very posh garage!
Re: 61 Van resto
Posted: Wed Aug 06, 2008 9:40 pm
by kerryminigringo
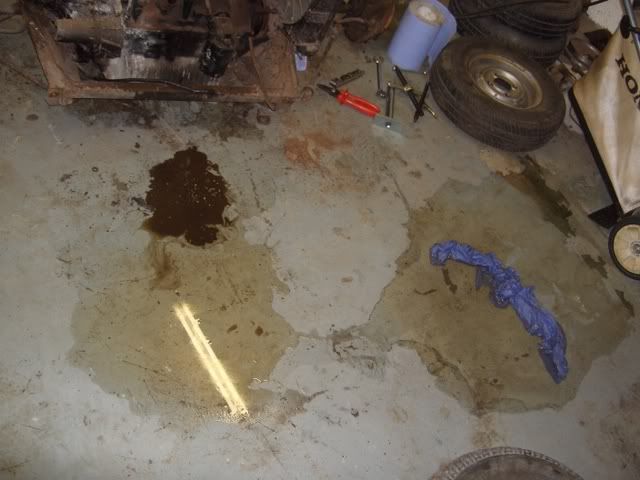
I have the rear subframe nearly repaired,just one or two welds to grind off so I thought that I would start stripping the front subframe and all the suspension so that it could go for blasting as well as the finished rear subframe.I started stripping the passenger suspension off the subframe and as the whole lot is sitting on the floor,I decided to tip it forward to get at the bottom arm.As I did I heard water pouring out and assumed it was the bottom rad hose.As I was tipping the subframe back I caught a glimpse of where the water was coming from,the DIPSTICK hole.A good half litre was out around the floor at this stage.I,m wondering how the water got in as the van was in a dry shed with the bonnet down.I will know more about the engine when I strip it down but maybe thats the reason it came off the road.
Re: 61 Van resto
Posted: Thu Aug 07, 2008 9:20 am
by The Marcos Graveyard
Bummer, I might have a source for an early gearbox though if you need one.
Re: 61 Van resto
Posted: Wed Aug 13, 2008 5:50 pm
by kerryminigringo
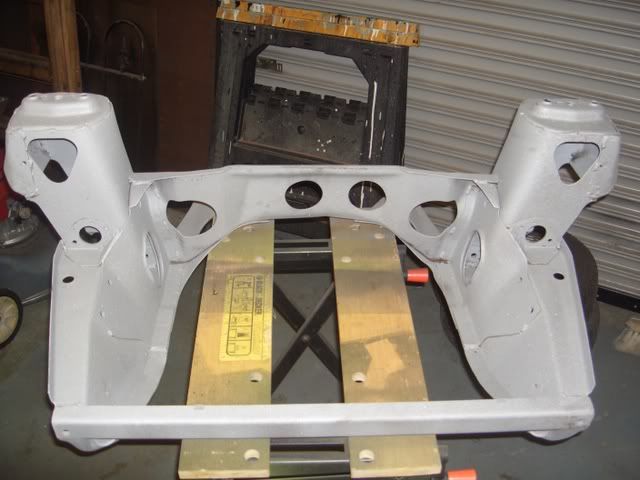
I,ve been working away on the two subframes recently.The two of them have been sand blasted and the rear one has gotten two coats of primer,two coats of black and one coat of lacquer and as soon as it is fully dry I will start to assemble it.Here is a picture of the front subframe when it was sand blasted.
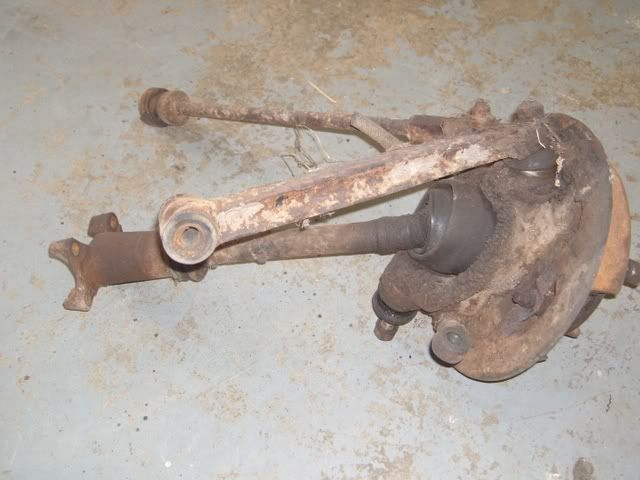
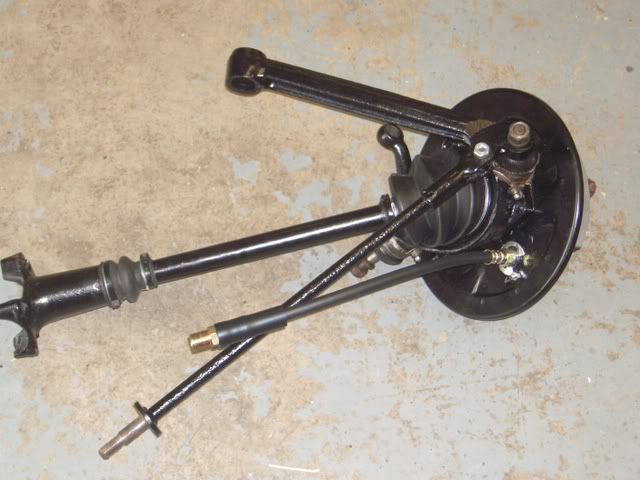
I have also got one of the hubs ready for fitting as soon as I finish painting the front subframe.It took over 5 coats of El-Bo grease to clean it up.I fitted new shoes,brake cyclinder and pipe to this side.The ball joints were dismantled,cleaned and re-assembled as they were in perfect condition complete with MOWOG dust shields.I fitted a new CV gaitor and inner drive shaft sliding gaitor as well.Before TMG says it,I will change the ball joint nuts for new ones.
Before.
After.
Re: 61 Van resto
Posted: Wed Aug 13, 2008 10:52 pm
by DaveC
Nice work!
Re: 61 Van resto
Posted: Fri Aug 15, 2008 12:23 am
by The Marcos Graveyard
Re: 61 Van resto
Posted: Wed Aug 20, 2008 8:34 pm
by kerryminigringo
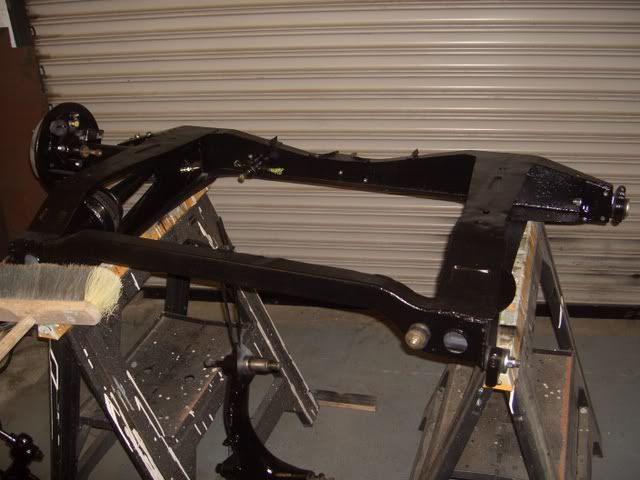
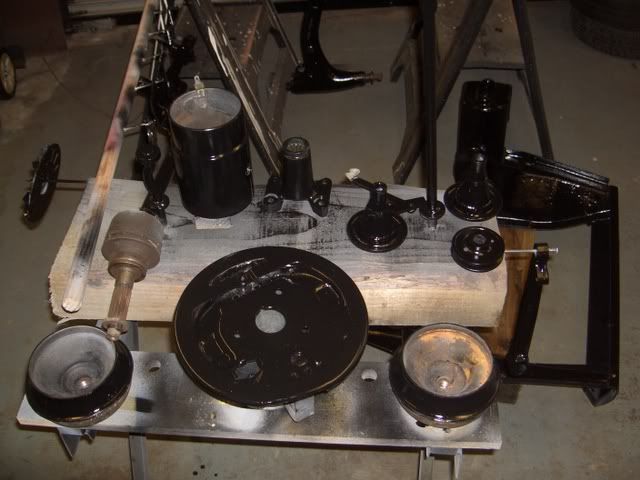
Well this week I got the two subframes painted and I,ve put the rear arm that I,d built up earlier on along with the new bushes in the trunnions.I finished painting all the pieces from the other side so I will leave them for a day or two to let the paint harden before I put it back together and install it on the subframe and using the old pipes as templates I will make up a new set of cooper pipes and thats the rear subframe finished.The only thing left to paint for the front subframe is the drivers side hub which needs a new bearing so I,m waiting for that to arrive and when it does I,ll take it to a local engineering shop to get it pressed in and I,ll take the 4 drums as well so that he can skim the inside so that they are running true.I put a new bearing in the dynamo that Woody gave me and got the commutator skimmed so I,ve just got to clean up the end caps,dress the brushes and thats the dynamo ready.
Partially built rear subframe.
Painted front subframe.
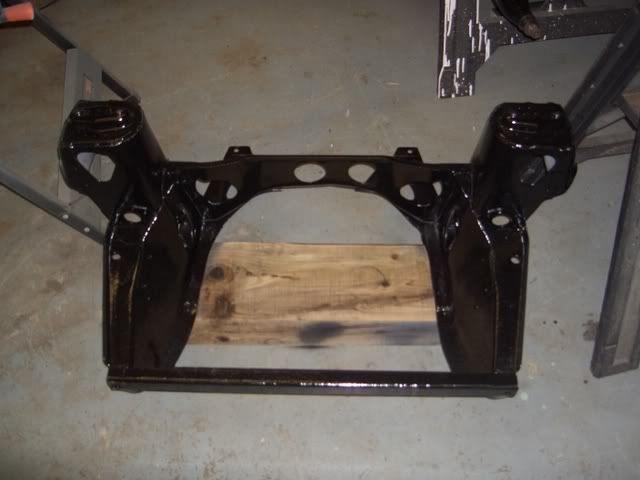
Table full of painted pieces ready for reassembley.
Re: 61 Van resto
Posted: Sat Sep 06, 2008 10:47 am
by kerryminigringo
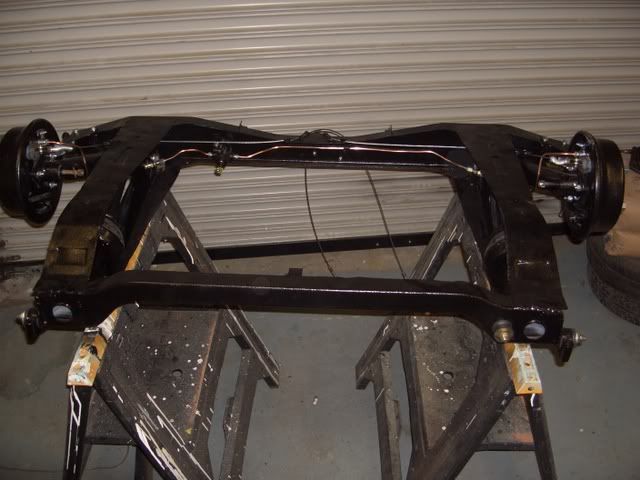
Finished the rear subframe last night and should have the front one finished by the weekend.All thats left is to build up the passenger side hub,make the brake pipes and thats that.
Re: 61 Van resto
Posted: Sat Sep 06, 2008 11:13 pm
by joebe1
Great work kmg, keep it up!

Re: 61 Van resto
Posted: Wed Sep 10, 2008 10:10 pm
by kerryminigringo
I knew that the month and year were stamped on some electrical gear but I never knew that the day,month and year were cast on early drums.
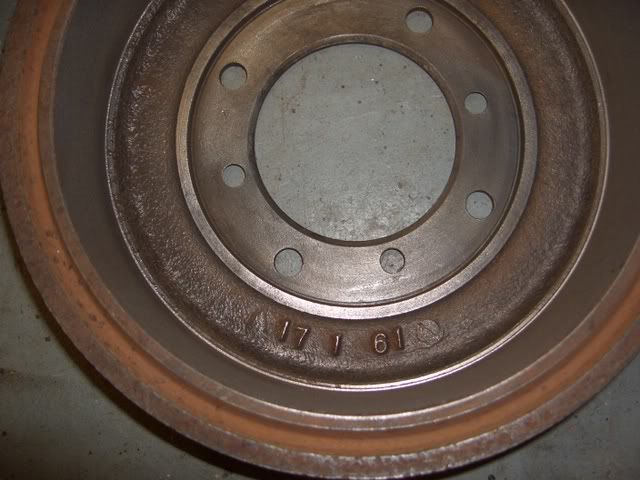
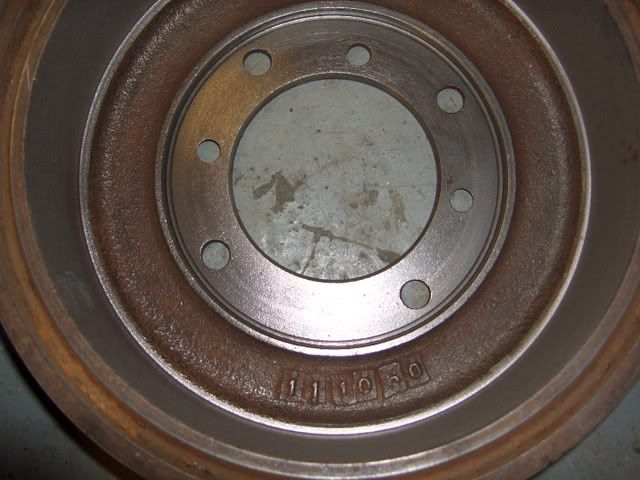
These are the two drums off the front of the van and given the date they should be the originals.The rear drums have later dates than the build date of the van so I,m guessing they were replaced.
Re: 61 Van resto
Posted: Thu Sep 11, 2008 9:29 am
by Billy
New one on me but very impressive
Re: 61 Van resto
Posted: Thu Sep 11, 2008 11:30 am
by The Marcos Graveyard
You do realise that you will have to drill a hole in the back plate and illuminate the whole thing some way in order for people to see this when you bring the van to shows.
Re: 61 Van resto
Posted: Thu Sep 11, 2008 12:54 pm
by joebe1

No bother to kmg to throw a bit of light on the subject!
Re: 61 Van resto
Posted: Thu Sep 11, 2008 2:12 pm
by Billy
I'd be very suspicious if KMG and Joeb1 were considering putting big electric motors into their Minis.......
Re: 61 Van resto
Posted: Thu Sep 11, 2008 7:07 pm
by steeo
Just looking at the rear subframe and there is 2 holes on either side about 35mm in diameter and on the outside of the holes there are three 2mm holes.
2 questions:
Is there a cap that covers these holes ???
I can't get to paint the inside is there any way of rust proofing inside ???
Re: 61 Van resto
Posted: Thu Sep 11, 2008 7:40 pm
by kerryminigringo
I,m just going to Waxoyl the cavities with an air line and hopefully get enough protection that way.Also I hope never to have the van out in the rain so given the Irish weather of late if anyone wants to see it when it,s finished I,ll give them directions to the house.

Re: 61 Van resto
Posted: Thu Sep 11, 2008 8:16 pm
by Billy
KMG,
Interested to know how to airline the Waxoyl. Anytime I've used the stuff I find that if it's not well warmed up, it clogs up the nozzle.
Billy
Re: 61 Van resto
Posted: Thu Sep 11, 2008 9:46 pm
by kerryminigringo
I work in a heated garage so I,ve never had that problem but your right.I usually have a pot of water simmering on a gas ring,put the waxoyl container into it.Let it there until its nice and warm,take it out and start working like a madman before its starts to go cold and clog the nozzle.But lately I,ve used Dinitrol and I have not had this problem.
Re: 61 Van resto
Posted: Thu Sep 25, 2008 1:19 pm
by kerryminigringo
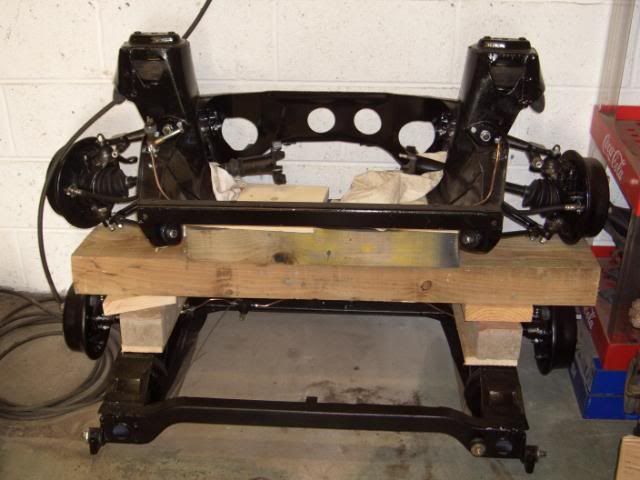
You will not get a sandwich like this down at Subway.Two subframes finished and packed away,ready for when the body work is complete.
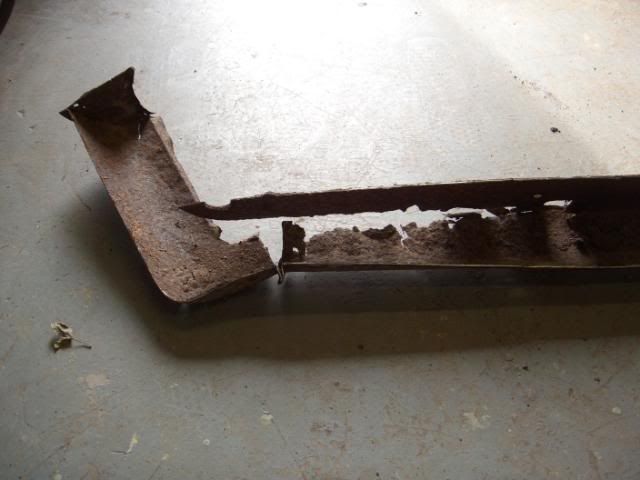
Speaking of which,I have started at the back end,cutting off bits that are rotten before I get it blasted so off can the complete rear valance and closing panel.
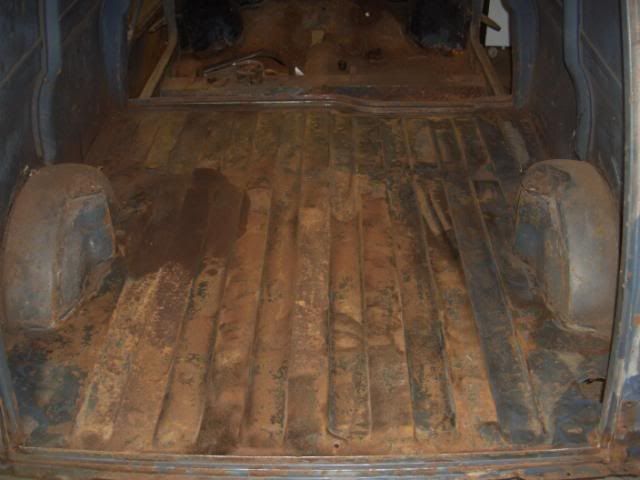
I also gave the rear load bed a quick rub of the wire brush on the angle grinder and apart from the two corners behind the wheel arch everything is in very good order.
Next up is to make two brackets for the front speedo hole and the rear door opening so that I can put it on a spit and get working on the underneath.
Re: 61 Van resto
Posted: Thu Oct 09, 2008 11:38 am
by kerryminigringo
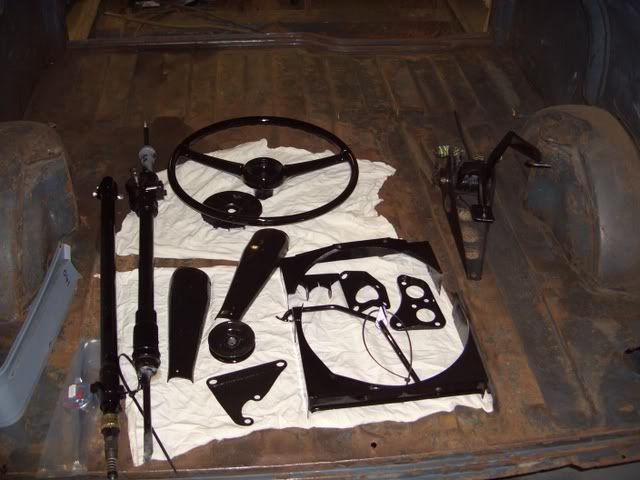
Been busy cleaning up lots of bits for the van,here is a load bed of stuff ready to be wrapped and packed away with all the other pieces.
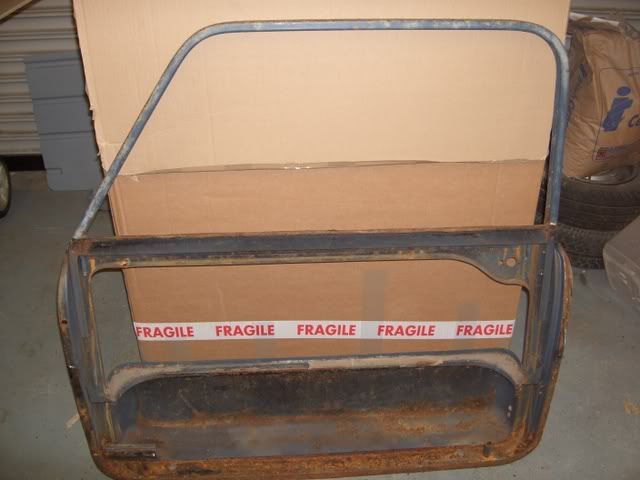
Here is the passenger door without its skin.I will clean up all the surface rust and fit the skin later in the week.This is my first time re-skinning a door so I hope it works out ok.
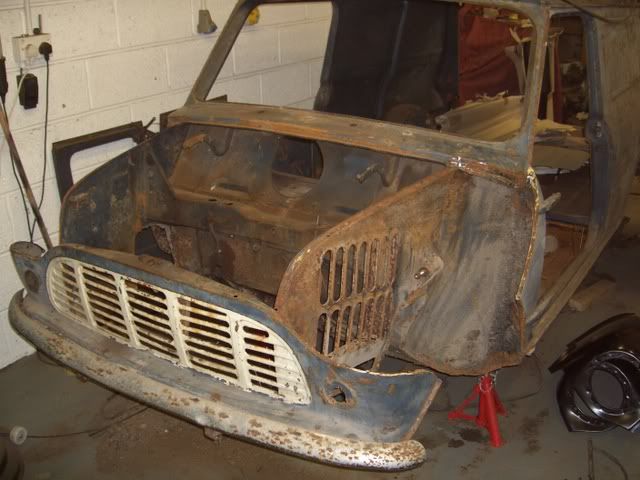
As there was rust around the headlamp bowl on the drivers side and the passenger side wing was badly repaired after a slight accident by the previous owner,I decided to replace both wings.Here is the van without it,s wings.
The next job to do to the bobyshell is to make a spit and get the floors,inner wings,bulkhead and load bed blasted.I,m not going to blast the sides as I don,t want them to warp so its out with the DA sander to clean them up.I also got 3 big boxes from Somerford this week,2 wings,2 door skins,door bottom repair,bonnet,2 rear quarter panel repair sections,2 rear doors,morris badge,floor pan and one broken credit card.


