Welcome to the Irish Mini Owners Club Forum. Keep an eye out of on coming events!!!!

1983 Mini City

This section is for Mini projects and restorations and also the place to show off your pride and joy.

Moderators: spud1979, The Marcos Graveyard, Moderators

Post Reply
ctwomey
NON Member
Posts: 296
Joined: Thu Jan 03, 2019 9:44 am
Whats your location?: Ballybrittas, Co. Laois
Region: Eastern
What Minis have you?: I owned a 1978 Mini 850 when I was in my late teens. I owned a 1986 Mini Chelsea that I imported from the UK. Also owned a 1982 MG Metro that was bored out to 1293. Restoring a 1981 Dublin Mini City.
Contact:

Re: 1983 Mini City

Post by ctwomey »

The Marcos Graveyard wrote: Thu Mar 10, 2022 3:02 pm
colinf1 wrote: Mon Mar 07, 2022 12:44 pm hopefully, do you think it would run ok with just the exhaust manifold and downpipe? yet to buy a backbox for it...
Will just be noisey. Woody used to have a jig that he checked motors in, simple ignition system and a rad, can't remember if there was a throttle or not.
Also without the exhaust, it will affect the fuelling.

Anyway, I was able to do it. Just set up the SU as per the manual and that is a good starting point. The area that caught me out was the choke, cold starting is a pain because not only do you need the throttle, you need to hold the choke out while it warms up. Have a screwdriver ready to adjust the throttle as needed.

If you have a new cam and cam followers then you need to get the revs up to 2000-2,500 immediately because they can't bed in at 1000 rpm. 4 cycles of 5 min intervals at 2,500 rpm with cooling in between will be fine to sort it out.

10 degrees of static timing will be fine and then once it is up and running aim for 28-30 degrees fully advanced > 4000 rpm.

All that is left then is to finish the car (like me) lol!


User avatar
colinf1
NON Member
Posts: 421
Joined: Mon Aug 24, 2020 10:27 am
Whats your location?: Dundalk
Region: Eastern
What Minis have you?: 1983 Mini City 1000
Contact:

Re: 1983 Mini City

Post by colinf1 »

Thanks for the advice guys, not had a chance to do much more this weekend with a sick household.

I did manage a few hours in the shed this evening, got another coat of yellow paint on the head, then a good tool cleaning session. I think it will need at least 1 more coat, then i can start bolting back on parts like the thermostat housing, water pump, heater tap etc...

I have reused the existing cam and cam followers, so hopefully that will save the need for higher revs when i do get round to starting it.
Image
User avatar
colinf1
NON Member
Posts: 421
Joined: Mon Aug 24, 2020 10:27 am
Whats your location?: Dundalk
Region: Eastern
What Minis have you?: 1983 Mini City 1000
Contact:

Re: 1983 Mini City

Post by colinf1 »

Got what I hope is the last coat of paint on the engine...

Image
Image
User avatar
colinf1
NON Member
Posts: 421
Joined: Mon Aug 24, 2020 10:27 am
Whats your location?: Dundalk
Region: Eastern
What Minis have you?: 1983 Mini City 1000
Contact:

Re: 1983 Mini City

Post by colinf1 »

Pulled shell out and got a chance to do some welding, almost finished off the drivers door step.

Image

Tried door back on to check clearance, all seems fine. Was a bit tight at A-post but noticed a big gap at the top so enlongated the hinge holes slightly to all a bit more clearance amd close the top gap.

Image

The liner in the welder is catching the wire so the feed is inconsistant, so I'll need to order a new one before doing any more welding.
Image
User avatar
colinf1
NON Member
Posts: 421
Joined: Mon Aug 24, 2020 10:27 am
Whats your location?: Dundalk
Region: Eastern
What Minis have you?: 1983 Mini City 1000
Contact:

Re: 1983 Mini City

Post by colinf1 »


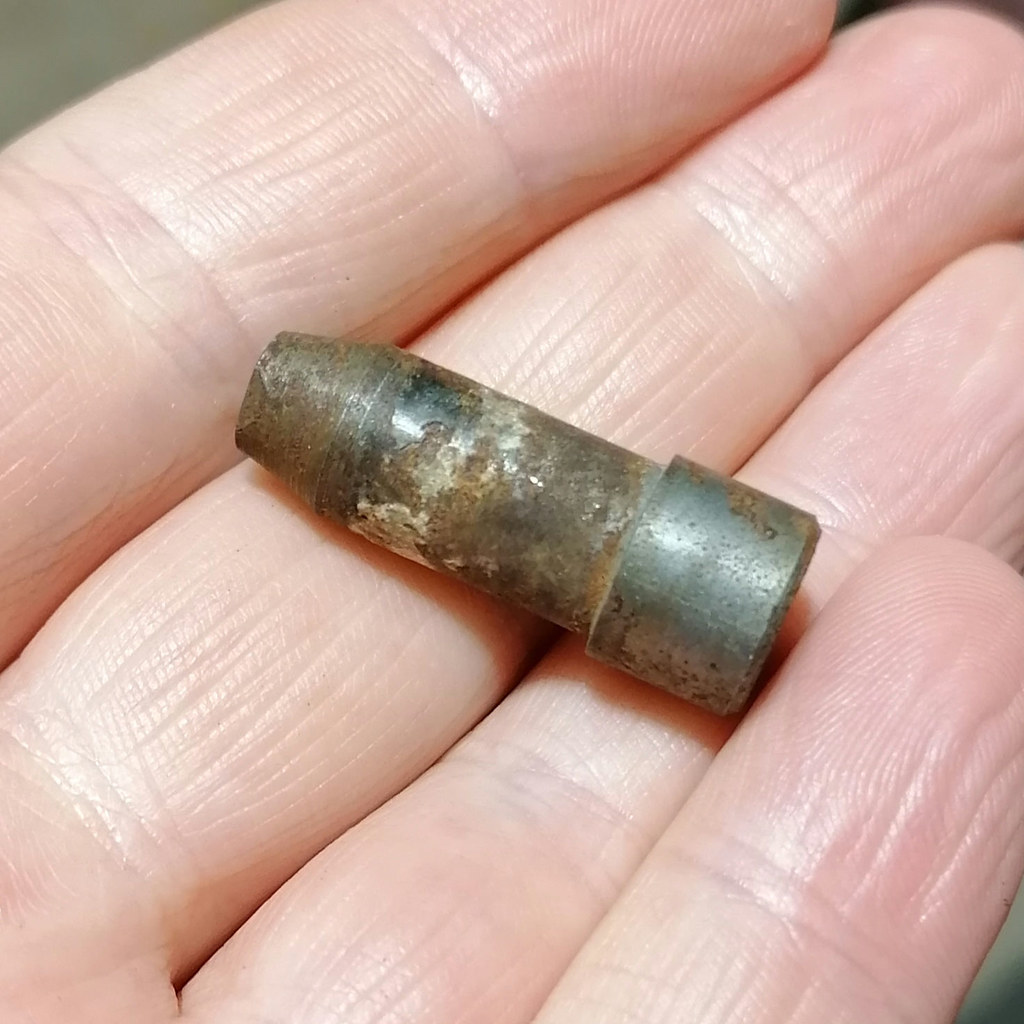
Got on the lathe on my lunch break, this is attempt number 2...it's pretty much spot on. 1st attempt I turned it around once I had the smaller diameter side done, this put it slightly out-of-line, around .25mm, so tried again, machining it all and keeping everything in the same axis.

Image

I wonder how long before I find the original one....
Well, well, well, look who decided to show up...

Image

Hiding in a box full of random bits n pieces..
Image
User avatar
colinf1
NON Member
Posts: 421
Joined: Mon Aug 24, 2020 10:27 am
Whats your location?: Dundalk
Region: Eastern
What Minis have you?: 1983 Mini City 1000
Contact:

Re: 1983 Mini City

Post by colinf1 »

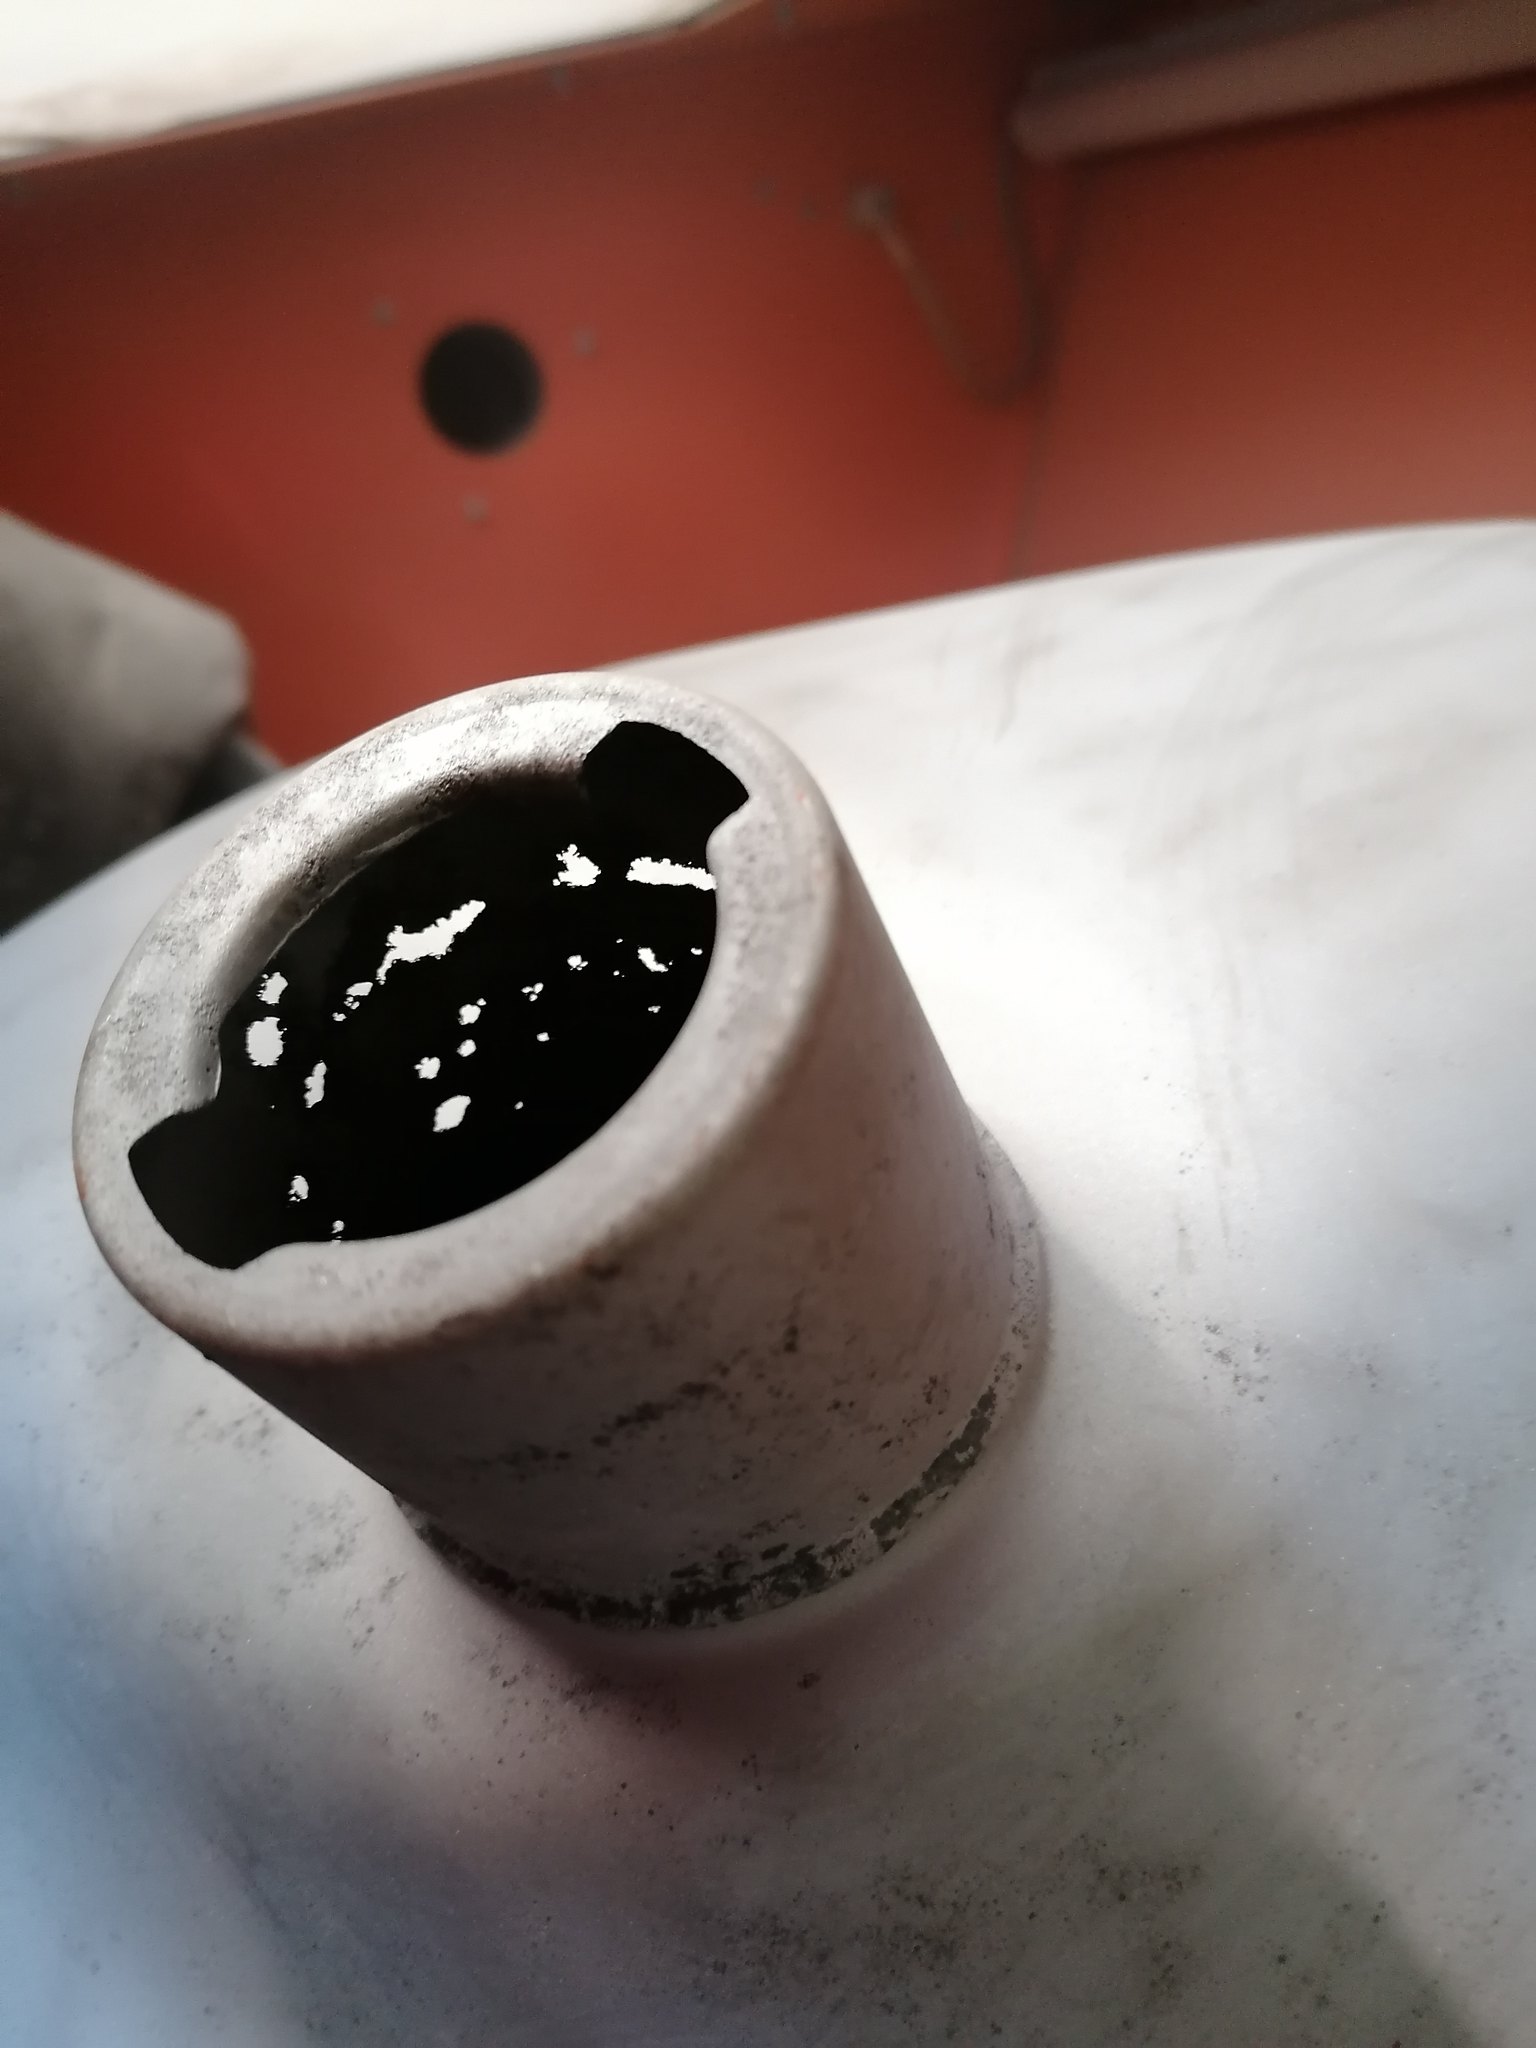
Sandblasted the fuel tank, gonna need to repair the neck, a bit holey....

Image
Image
ctwomey
NON Member
Posts: 296
Joined: Thu Jan 03, 2019 9:44 am
Whats your location?: Ballybrittas, Co. Laois
Region: Eastern
What Minis have you?: I owned a 1978 Mini 850 when I was in my late teens. I owned a 1986 Mini Chelsea that I imported from the UK. Also owned a 1982 MG Metro that was bored out to 1293. Restoring a 1981 Dublin Mini City.
Contact:

Re: 1983 Mini City

Post by ctwomey »

colinf1 wrote: Mon Apr 11, 2022 3:11 pm Sandblasted the fuel tank, gonna need to repair the neck, a bit holey....

Image
Might be worth finding a replacement one. I got mine powder coated but the powdercoaters were reluctant to do it because so many end up with holes from the blasting. What’s the inside like?
User avatar
colinf1
NON Member
Posts: 421
Joined: Mon Aug 24, 2020 10:27 am
Whats your location?: Dundalk
Region: Eastern
What Minis have you?: 1983 Mini City 1000
Contact:

Re: 1983 Mini City

Post by colinf1 »

It looks pretty good on the inside, one rough patch on the bottom side, but its only the neck that has any corrosion.

Ive a piece of 60mm pipe that I am going to turn down to 58mm to match the neck, salvage the pressed part on the end and weld it onto the pipe. I'm planning on add some guides to the fuel tank body so i have a good idea of where to weld on the replacement.

Ill get pictures of the inside tomorrow
Image
User avatar
colinf1
NON Member
Posts: 421
Joined: Mon Aug 24, 2020 10:27 am
Whats your location?: Dundalk
Region: Eastern
What Minis have you?: 1983 Mini City 1000
Contact:

Re: 1983 Mini City

Post by colinf1 »

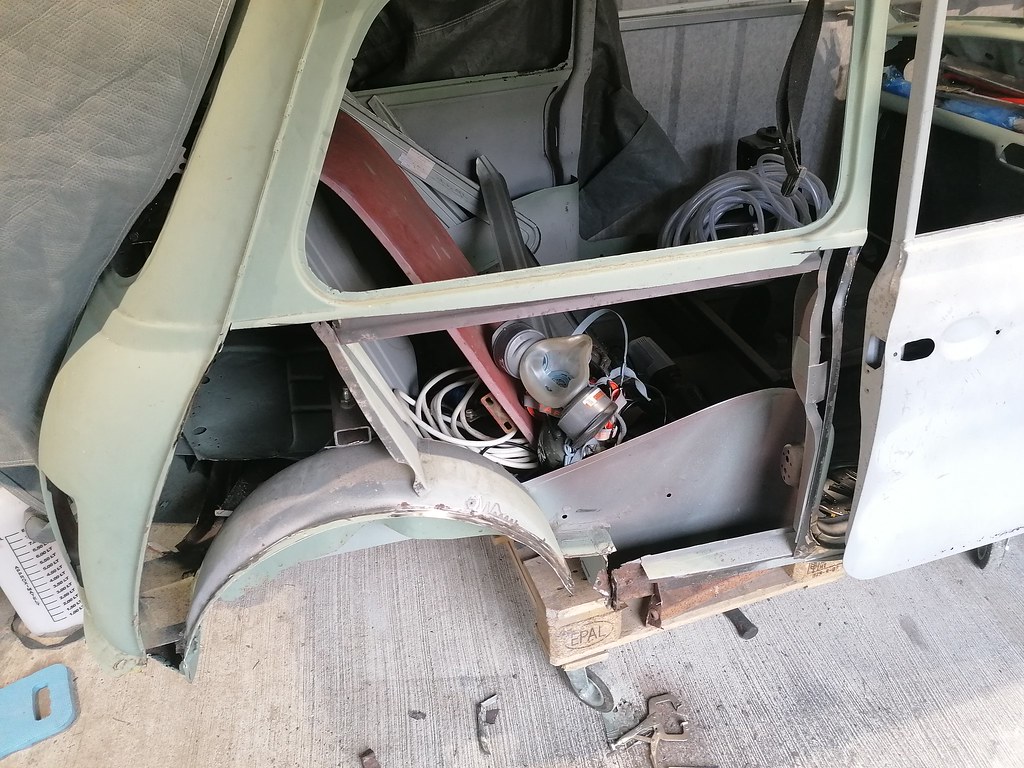
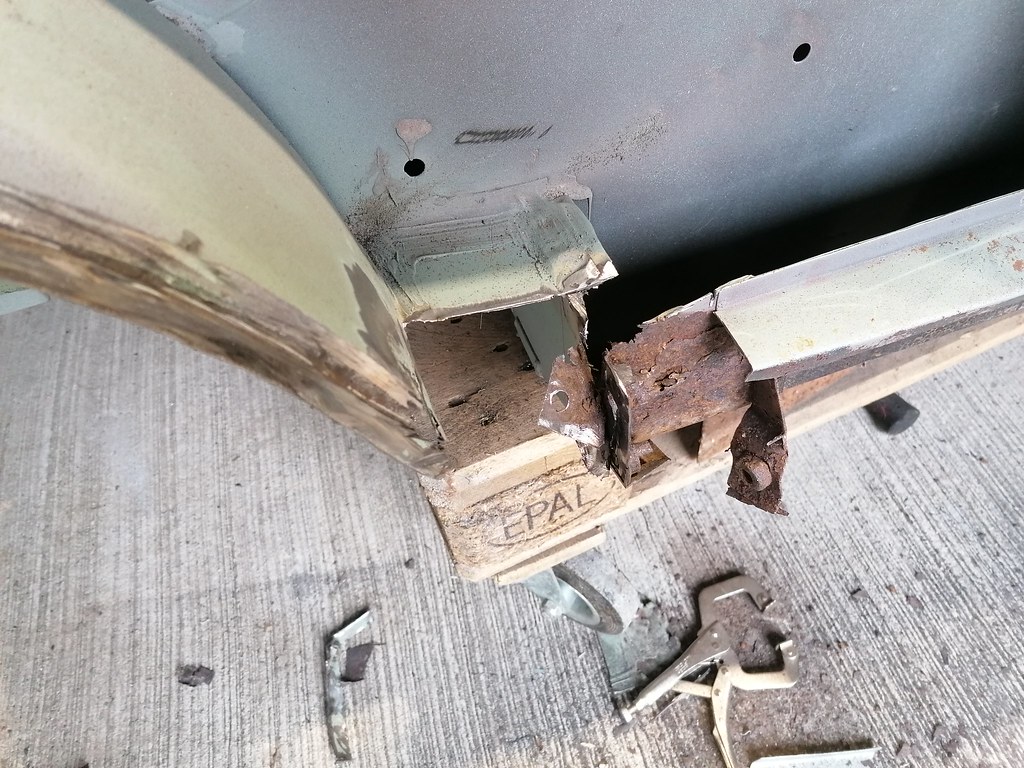
Removed the drivers side rear quarter panel as there was 2 long dents running from B-post to the wheel arch, had the replacement panel there for it, but glad I decided to do it as it revealed some more rust. I also wanted to weld the step repair panel to the B-post.

Image

Both bolts had snapped on the driverside heel board, way back when the subframe came off the car, and no amount of heat would budge them.
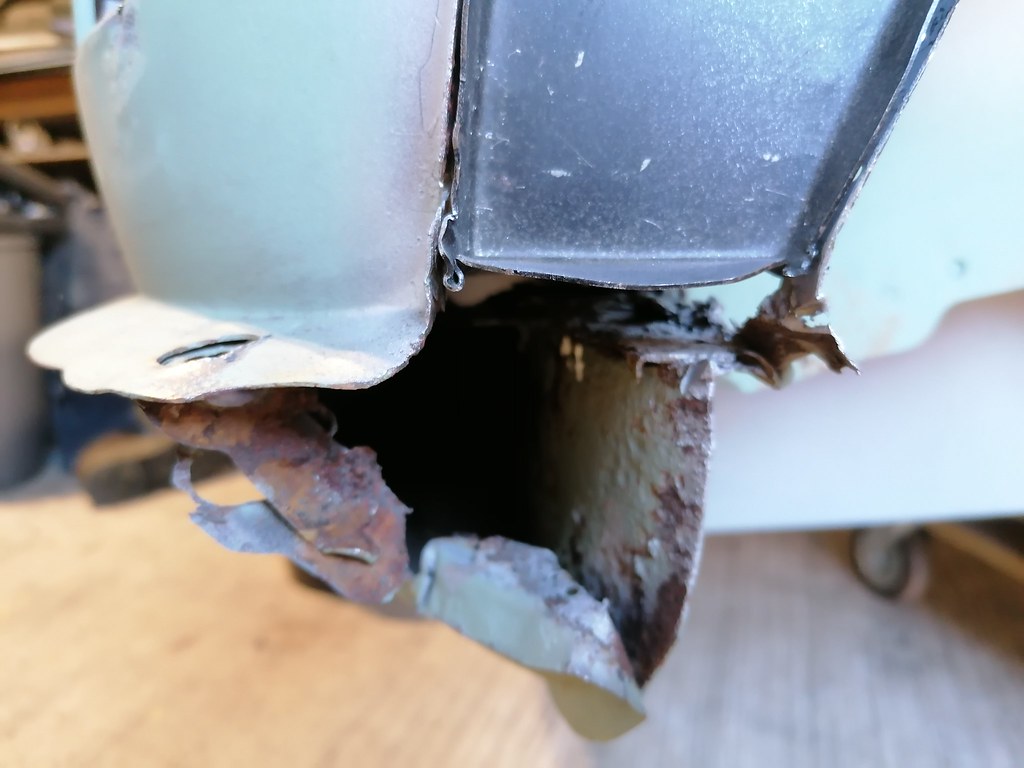
The stiffner bracket was almost corroded away to nothing, as was the end of the wheel arch closing panel and the rear bin closing plate, reinforcing bracket and the top of the inner sill were both very rusty.

Image

There was also a hole in the front of the wheel arch.

Got the wheel arch filler piece made up and welded in place,

Image

I also made a repair patch for the rear bulkhead as it had rusted where it joins to the waist rail, made a small repair piece for the waist rail too..

Image

I have the end of the heel board repair made, just need to make an inner support bracket with some nuts welded on, but I'll offer up subframe to mark the correct position for them.

Overall I'm happy enough with what I got done, even though it was only 3 or 4 small patches that actually got finished.

Wasn't getting too much hassle from the welder, new liner seems to be much smoother, plus seems more secure in the holder at the feed end.
Image
User avatar
woody
IMOC Paid Member
Posts: 2819
Joined: Mon Feb 07, 2005 11:55 pm
Whats your location?: Drogheda
Region: Eastern
What Minis have you?: Traveller
Turbo
Hornet
Equinox
MINI Clubman
Location: LOUTH
Contact:

Re: 1983 Mini City

Post by woody »

I have some of them support brackets with the captive nuts NOS if your interested
TECHNICAL MODERATOR
User avatar
colinf1
NON Member
Posts: 421
Joined: Mon Aug 24, 2020 10:27 am
Whats your location?: Dundalk
Region: Eastern
What Minis have you?: 1983 Mini City 1000
Contact:

Re: 1983 Mini City

Post by colinf1 »

woody wrote: Fri Apr 15, 2022 11:13 pm I have some of them support brackets with the captive nuts NOS if your interested
I'll PM you
Image
User avatar
colinf1
NON Member
Posts: 421
Joined: Mon Aug 24, 2020 10:27 am
Whats your location?: Dundalk
Region: Eastern
What Minis have you?: 1983 Mini City 1000
Contact:

Re: 1983 Mini City

Post by colinf1 »

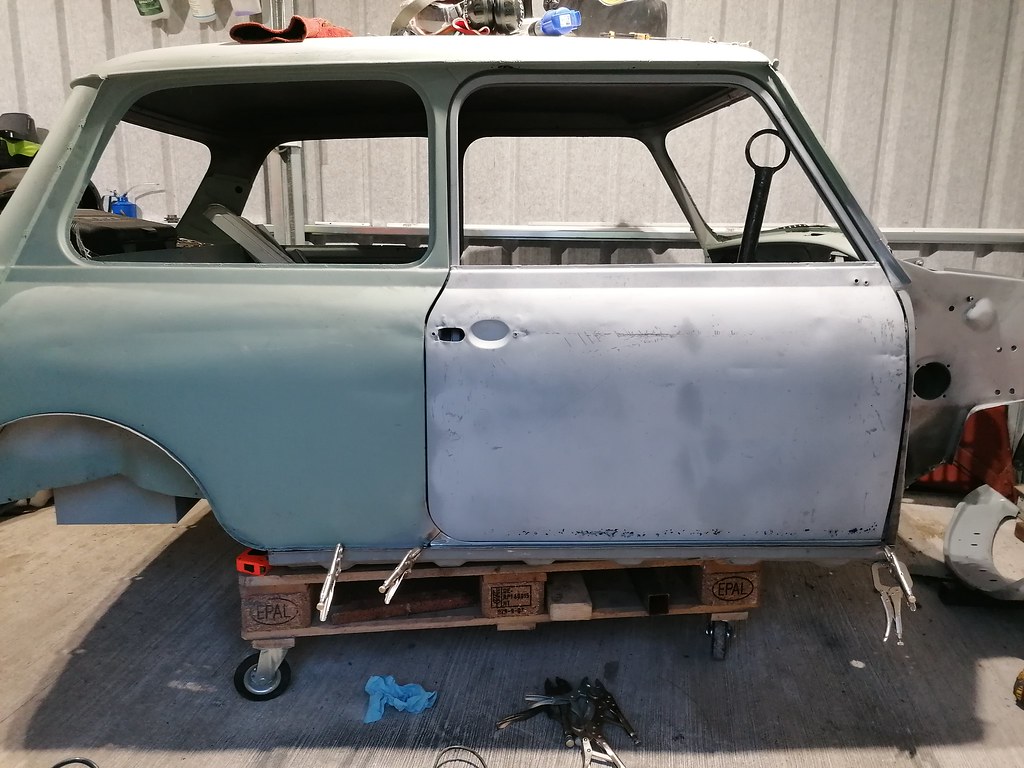
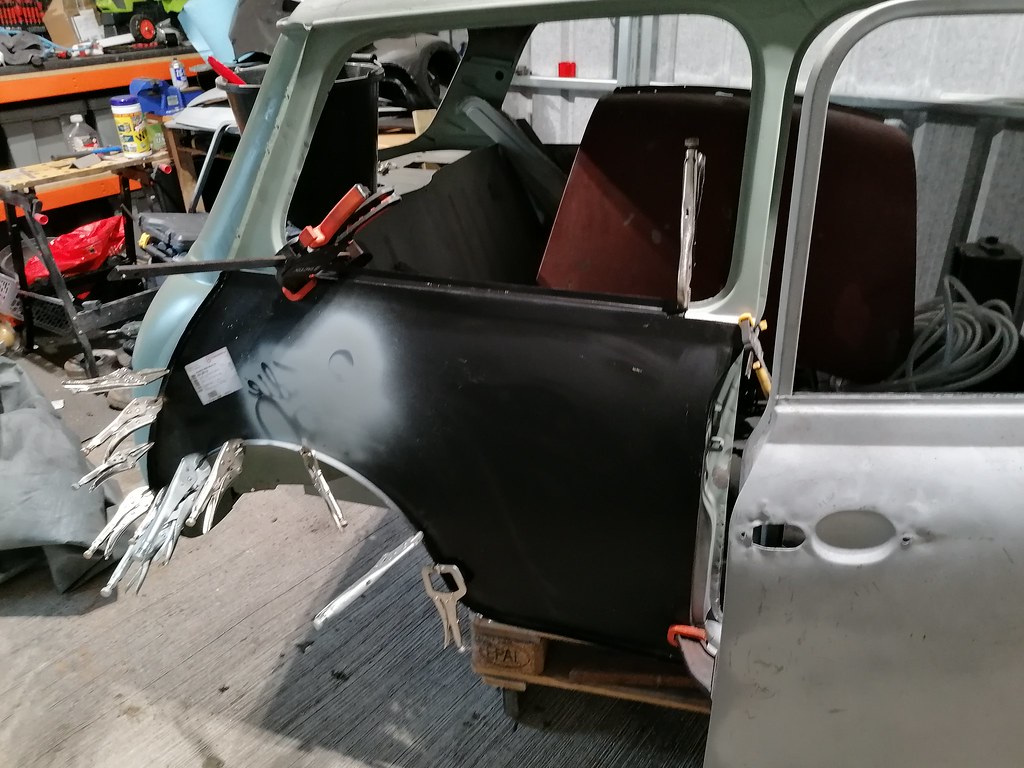
Another day at it, most of the day was spent removing the remaining lip of the old quarter panel. Along the B post wasnt too bad as I drilled out the spot welds but along the rear seam needed to be ground off with a flap disc.


Offered up the panel then cut a bit more of the old panel to let it sit in a bit better. Its a pattern part so its gonna take a bit of work to get it fitting and looking correct.

Image

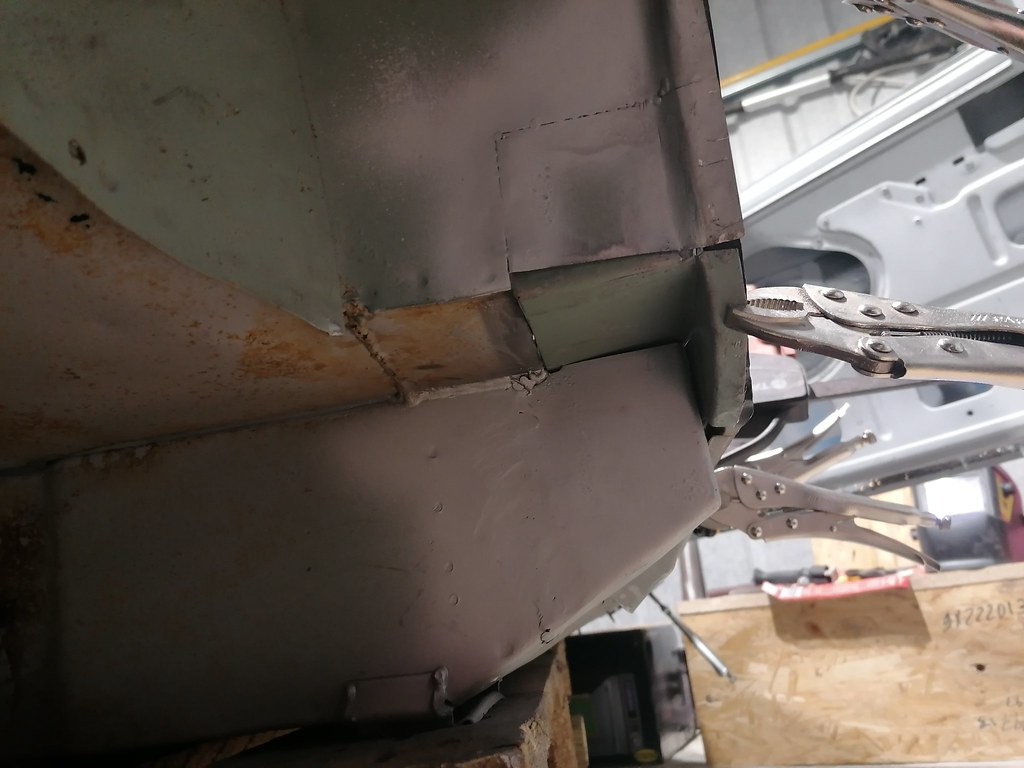
Welded on the heel board patch, and the inner sill upper section. I measured the passenger side to get it in the correct location. Also clamped on the outer sill to make sure the bottom of the quarter panel and the repair piece are all lined up.

Image

With the quarter panel in place I made a cardboard template for the rear bin closing panel, but called it a day.
Image
User avatar
colinf1
NON Member
Posts: 421
Joined: Mon Aug 24, 2020 10:27 am
Whats your location?: Dundalk
Region: Eastern
What Minis have you?: 1983 Mini City 1000
Contact:

Re: 1983 Mini City

Post by colinf1 »

Made up the closing panel, old quarter panel coming in useful for patches.

Image

And offered up roughly..

Image

Measured up the passenger side again and getting same measurements on drivers side which is good.

Need to make up the bin closing panel next.
Image
User avatar
colinf1
NON Member
Posts: 421
Joined: Mon Aug 24, 2020 10:27 am
Whats your location?: Dundalk
Region: Eastern
What Minis have you?: 1983 Mini City 1000
Contact:

Re: 1983 Mini City

Post by colinf1 »

Off work with a nasty throat infection this week, so wont be doing any welding until it clears up.

I managed a few hours "tidying" the shed, was quickly distracted with some tin snips..

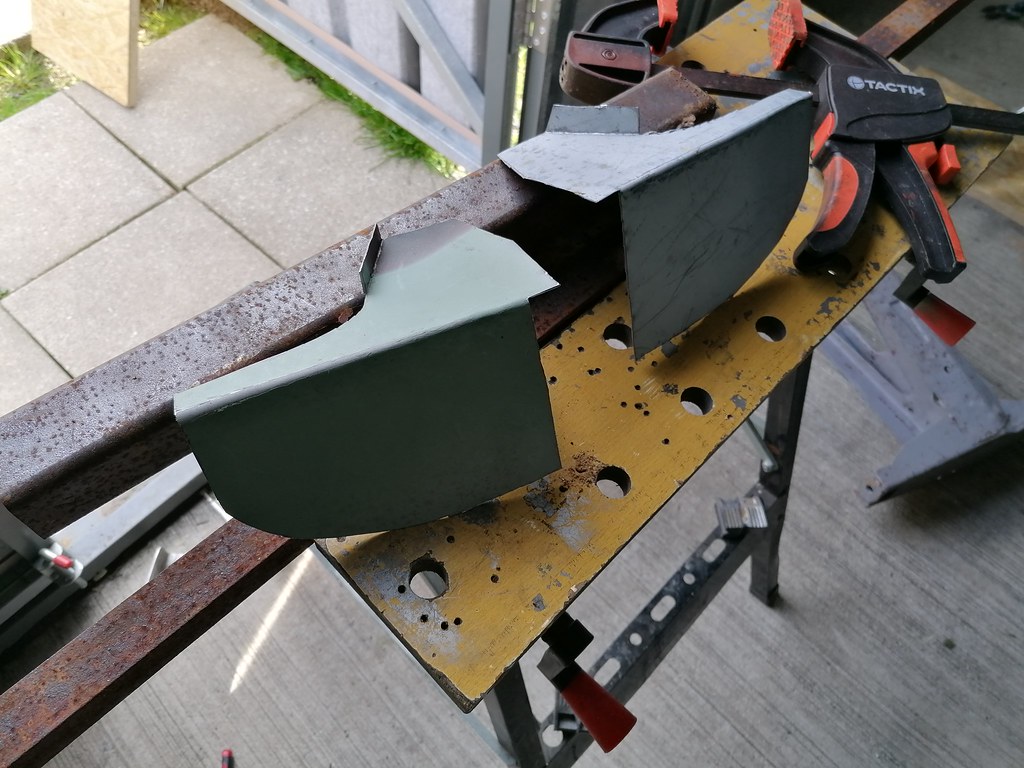
Image

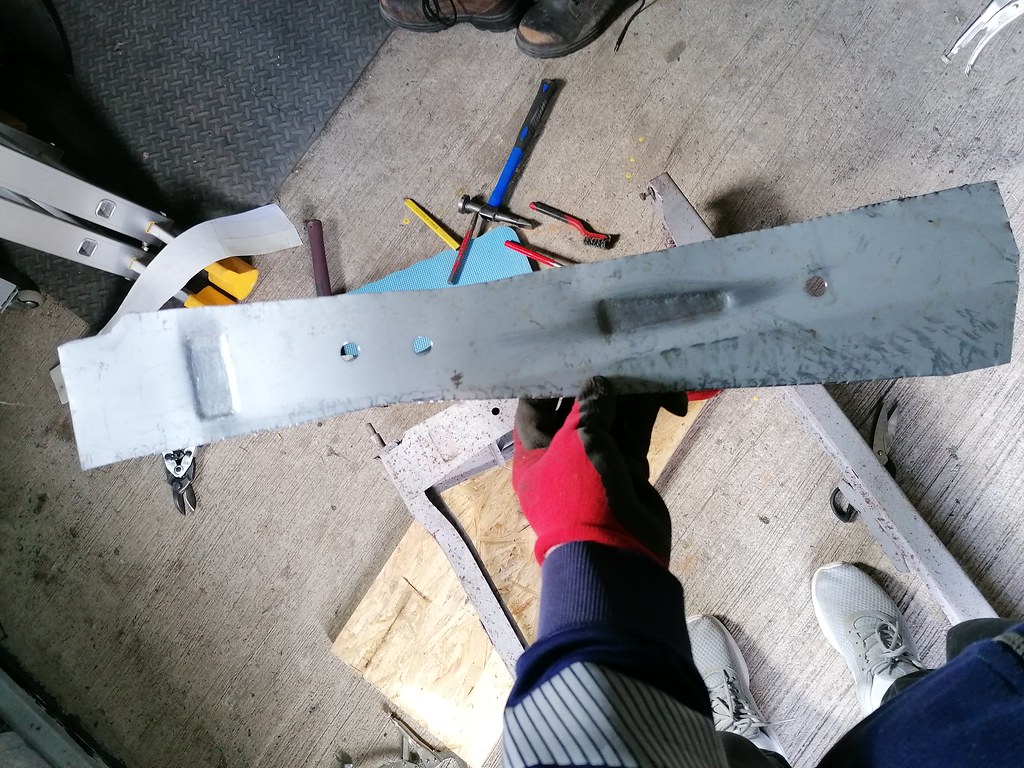
Rear valance closing panels, still have to make the other side if it, but new valance is magnum so different curve to genuine.

Looking at rear subframe, top plate is very thin along the edges, but dont seem to be able to buy these, only the bottom plate.
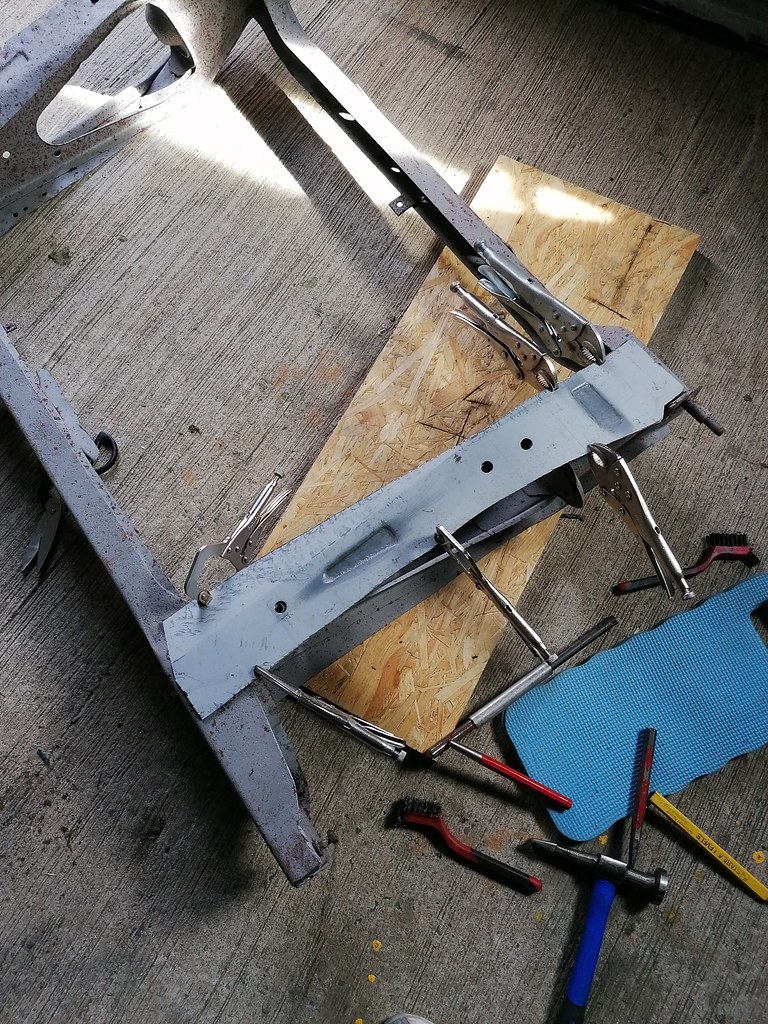
Old door skin, paper template, tin snips and a few hammers and I have two..

Image

Image

Held in place to see how it all lines up...
Image

Plan to mount it on a steel table, get it welded and braced before removing anything to keep it all in the right place.

Looking at quarter panel again and just not happy with the waistrail not lining up, think I'll get in contact with minispares see if they can offer a magnum panel - at least that should match up with magnum door skin.
Image
User avatar
colinf1
NON Member
Posts: 421
Joined: Mon Aug 24, 2020 10:27 am
Whats your location?: Dundalk
Region: Eastern
What Minis have you?: 1983 Mini City 1000
Contact:

Re: 1983 Mini City

Post by colinf1 »

A few emails back and forth to minispares and I've packaged up and sent both panels to go back to be assessed.

Panel in position set by window opening dimension taken from original panel.on passenger side...

Image

Which makes the panel too short to reach boot floor/rear panel bottom edge..

Image

And also puts waist line out of alignment with door and rear panel which would be very noticable once painted...

Image

Image

Hopefully I can get it sorted, suppose I could get on with sorting passenger side inner wing to allow the front end to be reattached...
Image
User avatar
colinf1
NON Member
Posts: 421
Joined: Mon Aug 24, 2020 10:27 am
Whats your location?: Dundalk
Region: Eastern
What Minis have you?: 1983 Mini City 1000
Contact:

Re: 1983 Mini City

Post by colinf1 »

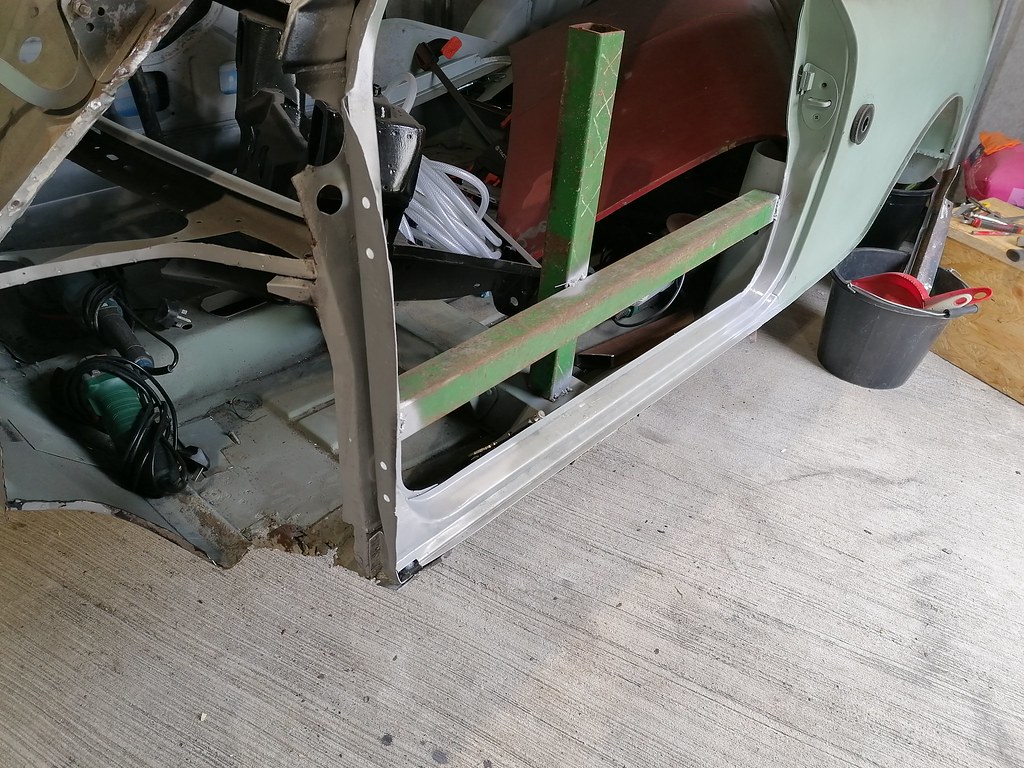
Tackled passenger door step today, welded in some bracing to keep everything in correct position.

Had a good look around A post and stiffner, I have a replacement for both but felt it was in perfect condition apart from last 100mm of outer part of the stiffner.

I managed to cut the required piece off the drivers side stiffner, flip it and use it as a repair patch. Welded it in and it looks good now. Slit along the step to remove it, just before it curves around to B post.

Took some measurements to make sure I put the step in at right height, welded in place and ground back the welds.

Image

I havent plug welded along the inner sill just yet, passenger floor pan needs replacing and small patch required above crossmember.
Image
User avatar
colinf1
NON Member
Posts: 421
Joined: Mon Aug 24, 2020 10:27 am
Whats your location?: Dundalk
Region: Eastern
What Minis have you?: 1983 Mini City 1000
Contact:

Re: 1983 Mini City

Post by colinf1 »

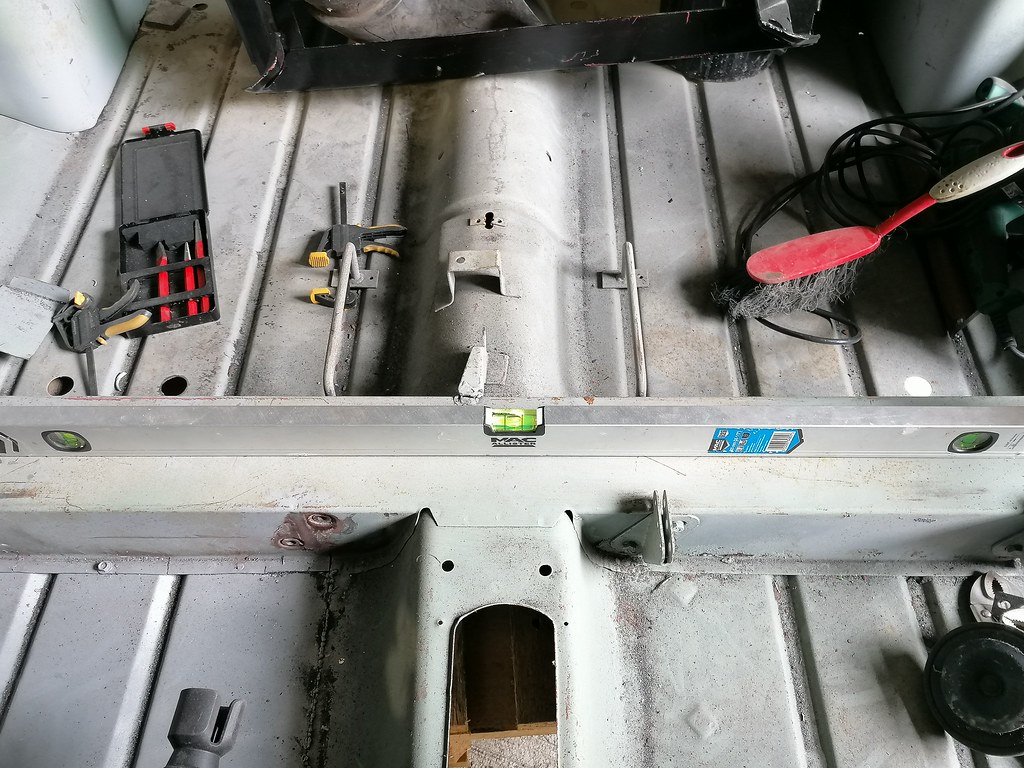
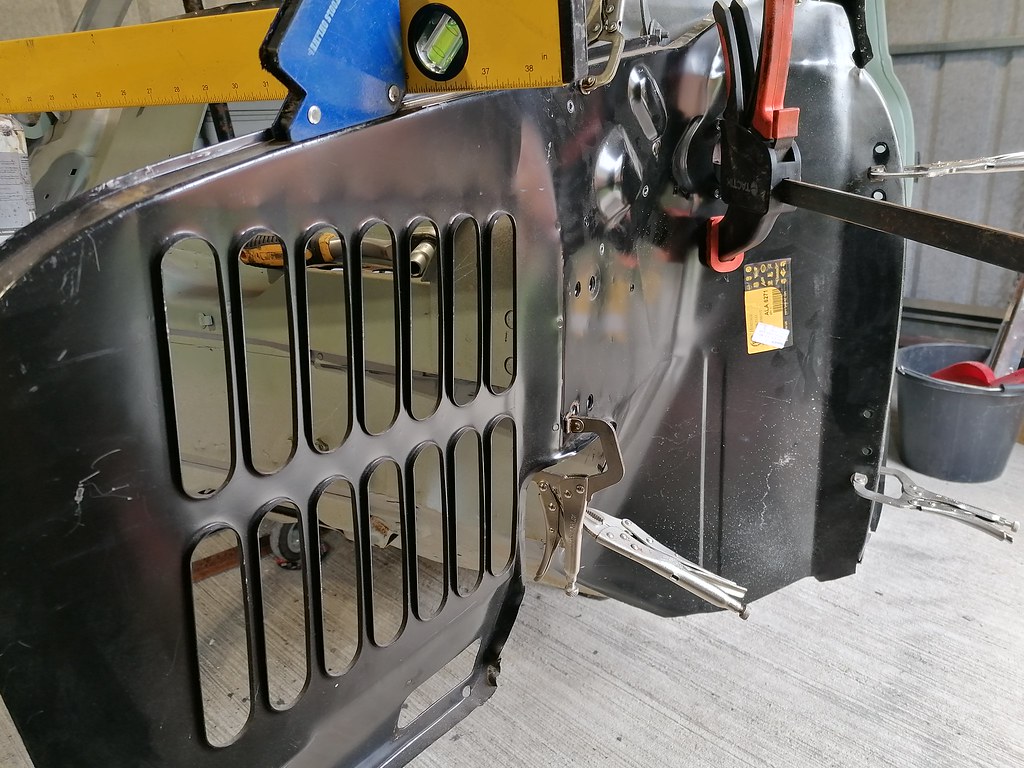
Offered up passenger inner wing, set shell to level across cross-member, then got wing roughly in correct spot, measured the same distance on both sides of the windscreen opening and put a level across both inner wings.

Image

Image

Held in place with lots of vice grips...

Image

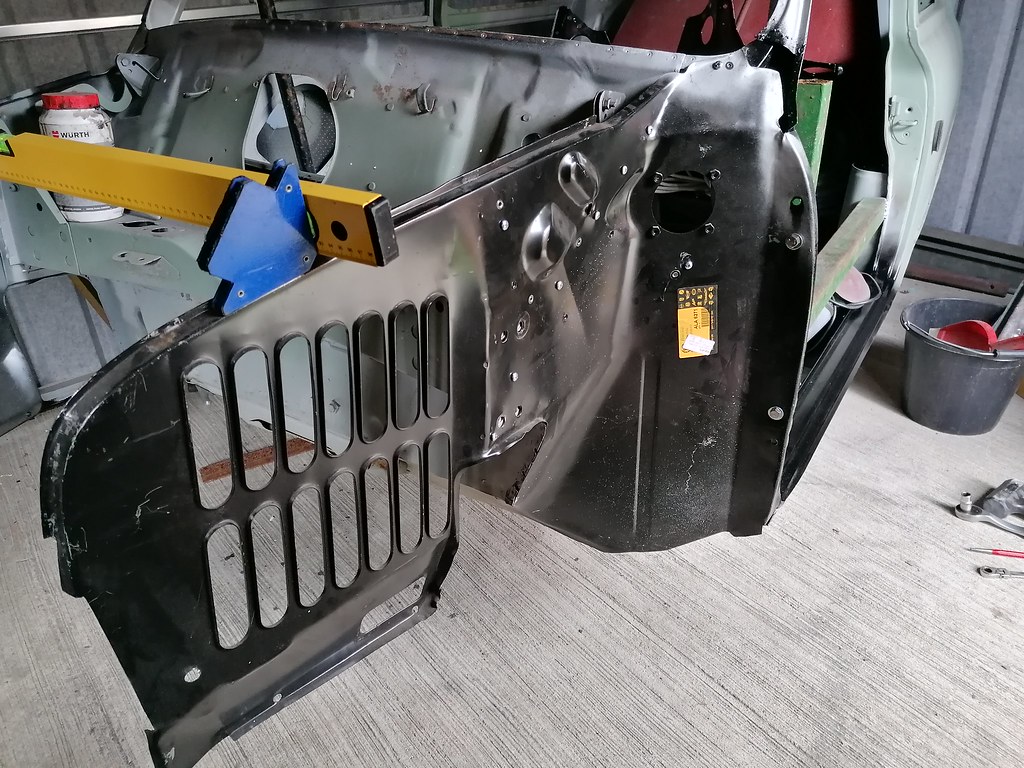
Pulled it in tighter around bulkhead, got it aligned with holes for door hinges then held it place with screws

Image

Took more measurements from front of bulkhead cross-member to the front of inner wings, all seems to be within 1mm.

Next step is to score around where I need to drill holes for plug welding, then get it fully welded.

The holes for the upper shock mounting need to grow slightly, but the actual threaded part still needs drilling and tapping out the broken bolt.
Image
User avatar
colinf1
NON Member
Posts: 421
Joined: Mon Aug 24, 2020 10:27 am
Whats your location?: Dundalk
Region: Eastern
What Minis have you?: 1983 Mini City 1000
Contact:

Re: 1983 Mini City

Post by colinf1 »

Big shout out to minispares for sorting the rear quarter panels, sending magnum replacements so hopefully they fit better and everything lines up.

Now to try and enjoy the last days of my holidays after getting food poisoning!
Image
User avatar
colinf1
NON Member
Posts: 421
Joined: Mon Aug 24, 2020 10:27 am
Whats your location?: Dundalk
Region: Eastern
What Minis have you?: 1983 Mini City 1000
Contact:

Re: 1983 Mini City

Post by colinf1 »

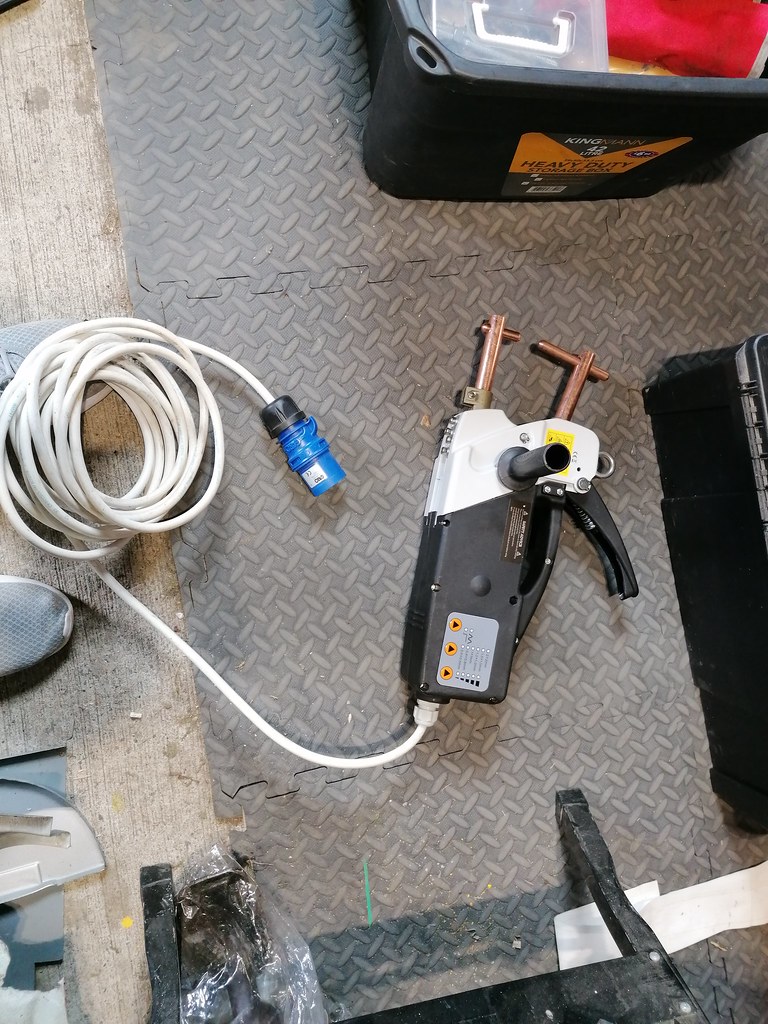
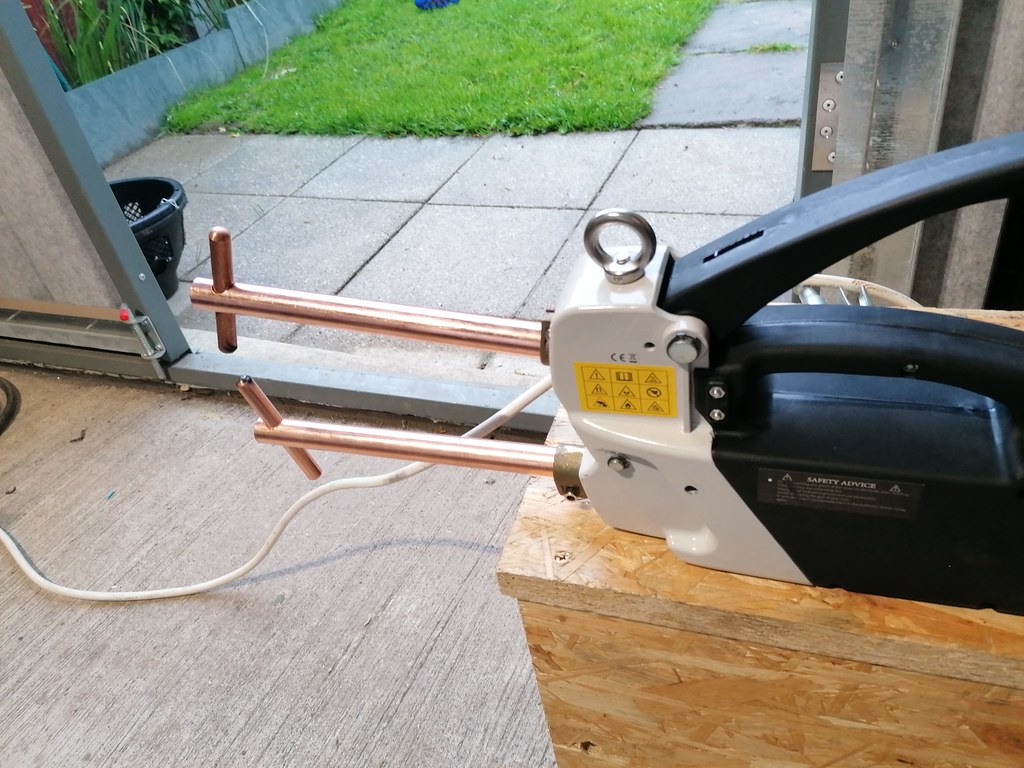
The boredom of being sick on holidays led to this being purchased...

Image

It a Vevor spot welder, around £300.

Looks to be a clone of a Sealey SR123.

Theres a good review on youtube for it, https://youtu.be/SGwXRm3TyHY , although he does show some issues with loose fittings.

It arrived with a euro 2 pin plug on short 1M - 1.5mm2 cable, I swapped this out for 2.5mm2 and a 16A plug that is around 3M long. While it was open, I doubled check all connection, a few loose so tighten them all up.

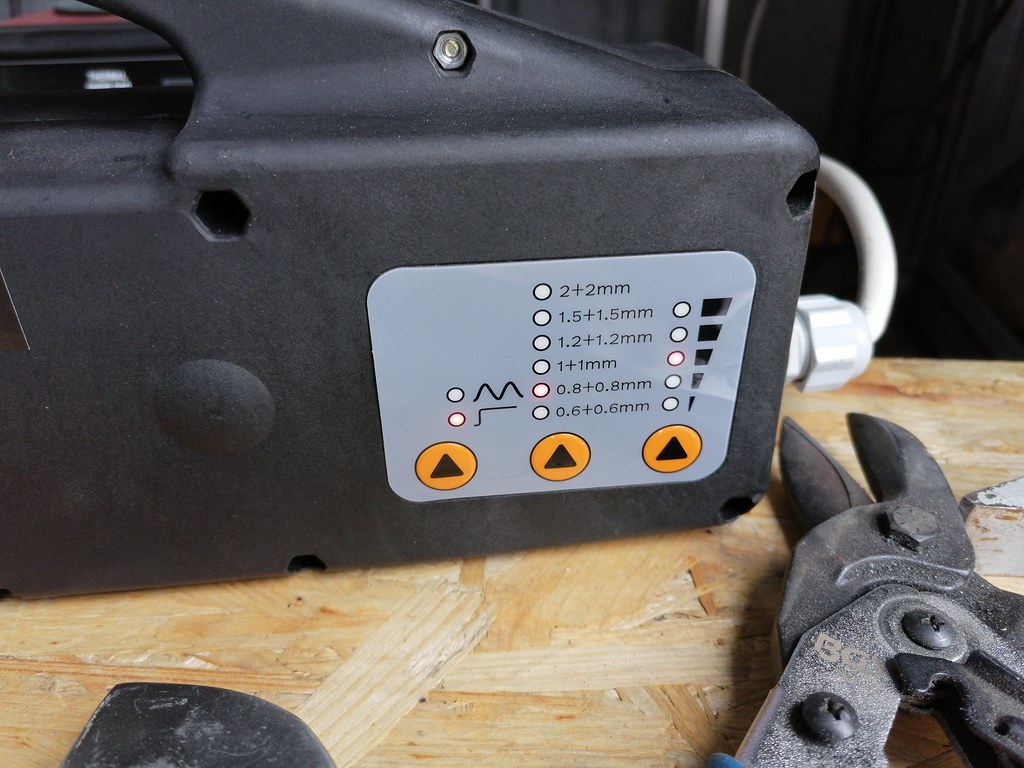
Cut a few test strips, old magnum panel that has the silver coating, didnt clean this off and tried it on 0.6 setting, worked pretty good, bumped it up to 0.8 and worked even better. Tried some 1+1mm, that worked, then 1+1+0.8 that would be same as boot floor/valance and that worked good too.

So hopefully it will work as good as this when I go to do the front end!
Image
ctwomey
NON Member
Posts: 296
Joined: Thu Jan 03, 2019 9:44 am
Whats your location?: Ballybrittas, Co. Laois
Region: Eastern
What Minis have you?: I owned a 1978 Mini 850 when I was in my late teens. I owned a 1986 Mini Chelsea that I imported from the UK. Also owned a 1982 MG Metro that was bored out to 1293. Restoring a 1981 Dublin Mini City.
Contact:

Re: 1983 Mini City

Post by ctwomey »

Was looking at the same spot welder. Sounds decent enough for home use with the couple of mods you mentioned.
User avatar
colinf1
NON Member
Posts: 421
Joined: Mon Aug 24, 2020 10:27 am
Whats your location?: Dundalk
Region: Eastern
What Minis have you?: 1983 Mini City 1000
Contact:

Re: 1983 Mini City

Post by colinf1 »

Here are the results from the test Ben_O over on theminiforum has suggested.

0.8+0.8mm material

Machine set to 0.8 and middle timer setting.

Image

Image

Peel test, smaller hole you see here is from timer set to lowest setting

Image

I had this in the vice on the bench and I could not get it to peel apart, used the vice grips and let them pivot against each other to get it to go.

Was also a comment regarding the material the arms and tips were made from, but these have been weighed and coming in as copper
Image
ctwomey
NON Member
Posts: 296
Joined: Thu Jan 03, 2019 9:44 am
Whats your location?: Ballybrittas, Co. Laois
Region: Eastern
What Minis have you?: I owned a 1978 Mini 850 when I was in my late teens. I owned a 1986 Mini Chelsea that I imported from the UK. Also owned a 1982 MG Metro that was bored out to 1293. Restoring a 1981 Dublin Mini City.
Contact:

Re: 1983 Mini City

Post by ctwomey »

Super stuff! Was the 16A socket enough? or do you think you would need a 32A installation?
User avatar
colinf1
NON Member
Posts: 421
Joined: Mon Aug 24, 2020 10:27 am
Whats your location?: Dundalk
Region: Eastern
What Minis have you?: 1983 Mini City 1000
Contact:

Re: 1983 Mini City

Post by colinf1 »

Hopefully 16A will be enough, we'll see once I get into a long run of welding
Image
User avatar
colinf1
NON Member
Posts: 421
Joined: Mon Aug 24, 2020 10:27 am
Whats your location?: Dundalk
Region: Eastern
What Minis have you?: 1983 Mini City 1000
Contact:

Re: 1983 Mini City

Post by colinf1 »

Got a bit done today, started out by welding in the closing panel in bin, then trying to fill some holes in the door step corner.
Kept chasing holes so decided to cut the bottom piece of the B-post out and remake ot from an off-cut of the A-post. All welded in and much better now.
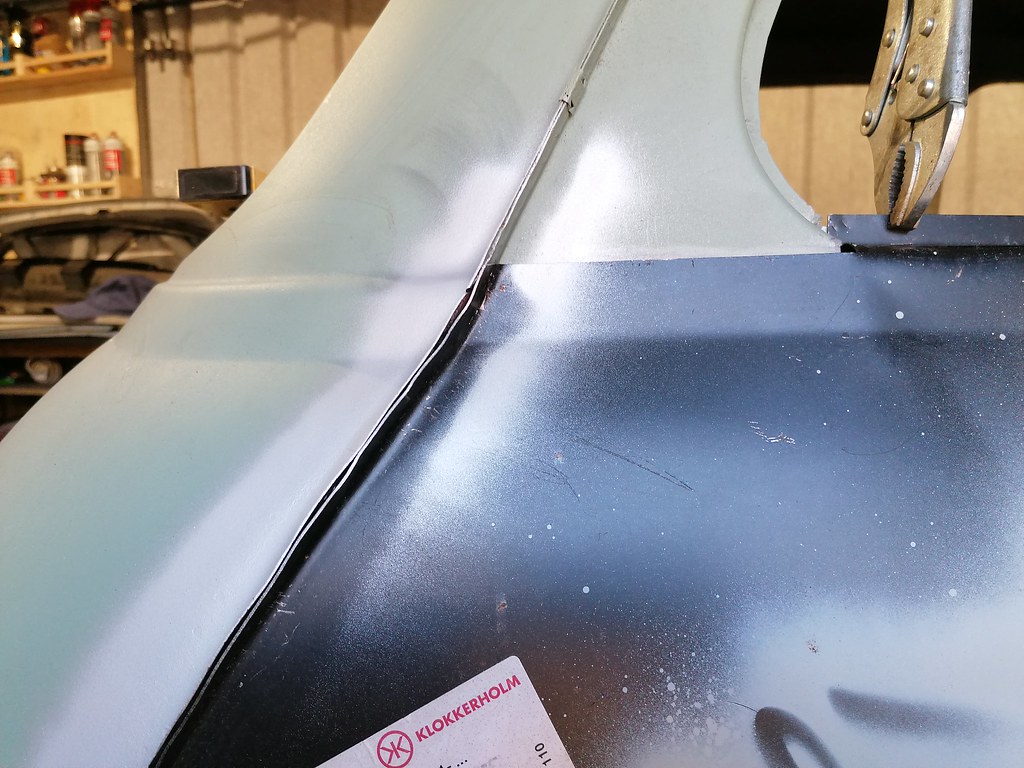
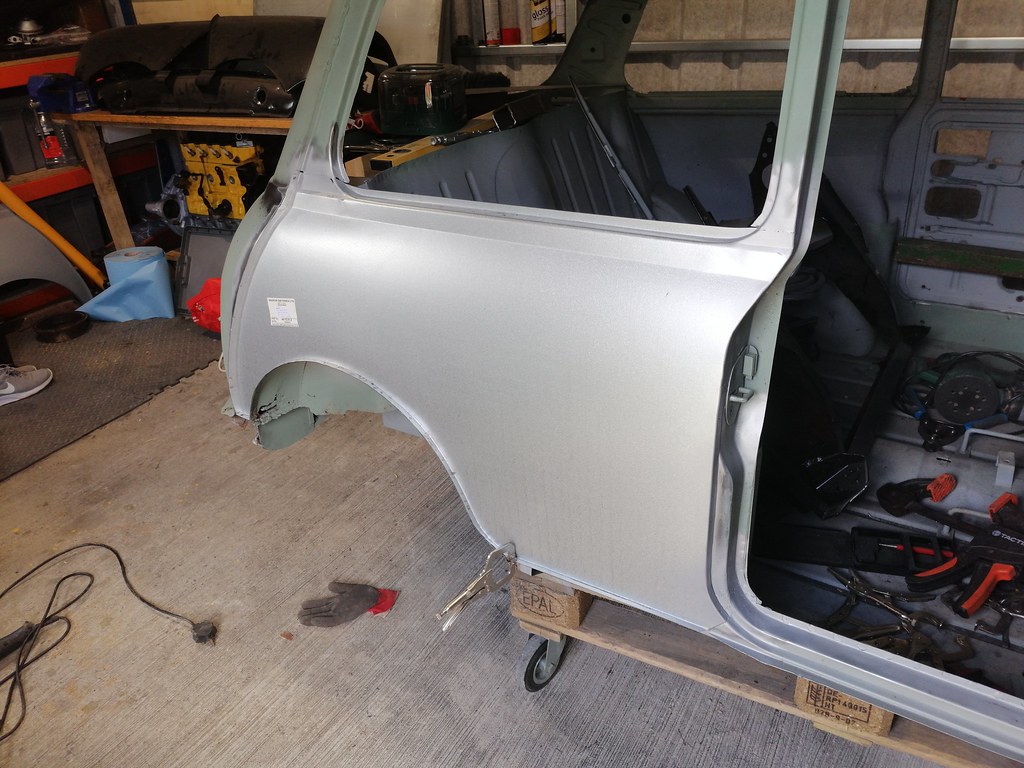
Also tackled the rear quarter, plenty of trial fitting, grind off a bit more, try it again, over and over til eventually it was fitting as best it could. Cleaned off all my edges and gave the spot welder a go on where I could get to, mainly the wheel arch lip. A few wouldnt weld on normal mode, so had to switch it to pulse and it worked then, the lights in the shed also flickered when on pulse mode.

Heres how I've left it for today,

Image

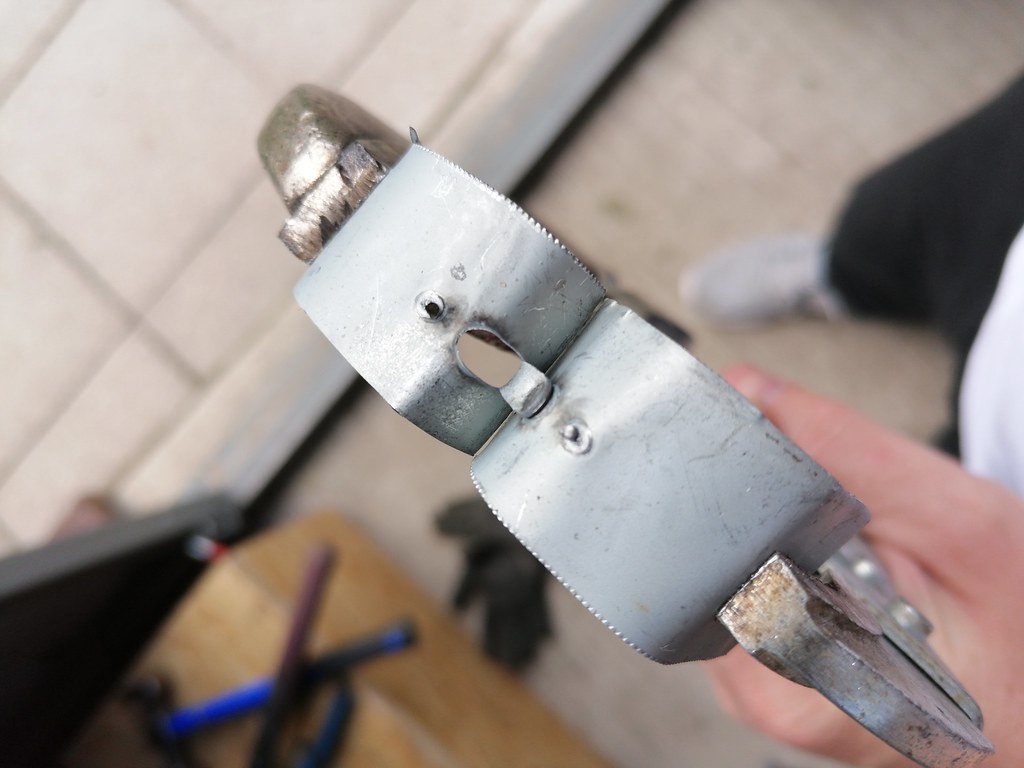
Still to finish off the butt welds, will have to bend the electrodes to try and give it more clearance to do along the rear panel edge.

I was thinking of drilling a hole at an angle to pass the electrodes through on the opposite end (the end thats currently clamped into the machine) then that would give clearance, but would that work?
Image
User avatar
colinf1
NON Member
Posts: 421
Joined: Mon Aug 24, 2020 10:27 am
Whats your location?: Dundalk
Region: Eastern
What Minis have you?: 1983 Mini City 1000
Contact:

Re: 1983 Mini City

Post by colinf1 »

Machined 2 holes at 20degrees to allow the electrodes to protrude past the end of the arms, done them at the opposite end to the existing straight holes. Milling machine is an 50year old bridgeport that has play in every axis and movable part so pretty chuffed to get them both machined within half a mil!

Tested them out this evening, works pretty good, although with the longer arms you lose a lot of the clamping force compared to the short arms, so spot welding vise grips will be needed. Had to use the longer electrodes in both arms to get them to touch.

Got spot welds about every 20mm along the back panel seam, even got some on the small closing panel in front of the rear wheel arch/quarter panel/boot floor area that had some zinc primer that wasnt spot weldable - using the pulse mode.

Arms were a bit warm, but not hot, doing around 3 spots per minute.

Image

Image
Image
Post Reply

Who is online

Users browsing this forum: Ahrefs [Bot] and 1 guest