
Welcome to the Irish Mini Owners Club Forum. Keep an eye out of on coming events!!!!
1983 Mini City
Moderators: spud1979, The Marcos Graveyard, Moderators
-
woody

- IMOC Paid Member
- Posts: 2819
- Joined: Mon Feb 07, 2005 11:55 pm
- Whats your location?: Drogheda
- Region: Eastern
- What Minis have you?: Traveller
Turbo
Hornet
Equinox
MINI Clubman - Location: LOUTH
- Contact:
Re: 1983 Mini City
Your roof looks strong enough to do what I did.I made 4 rollers about 100mm long and fitted them to the roof about 150mm inside the two windscreens. I then feed a long rachet load strap through them and under the car and joined the ends. car rotated easy enough.
TECHNICAL MODERATOR

-
colinf1

- NON Member
- Posts: 419
- Joined: Mon Aug 24, 2020 10:27 am
- Whats your location?: Dundalk
- Region: Eastern
- What Minis have you?: 1983 Mini City 1000
- Contact:
Re: 1983 Mini City
Took a bit of a break from worrying about the welding, managed to finish a small clean-up on the steering rack, new tie rod ends, new boots, fresh grease and a paint.
Tried to remove the tie rods to disassemble the entire rack, but they wouldn't budge and I didn't want to put too much force on it and end up breaking something else.

Tried to remove the tie rods to disassemble the entire rack, but they wouldn't budge and I didn't want to put too much force on it and end up breaking something else.

-
ctwomey
- NON Member
- Posts: 296
- Joined: Thu Jan 03, 2019 9:44 am
- Whats your location?: Ballybrittas, Co. Laois
- Region: Eastern
- What Minis have you?: I owned a 1978 Mini 850 when I was in my late teens. I owned a 1986 Mini Chelsea that I imported from the UK. Also owned a 1982 MG Metro that was bored out to 1293. Restoring a 1981 Dublin Mini City.
- Contact:
Re: 1983 Mini City
That came up like new. Nice one.
-
colinf1
- NON Member
- Posts: 419
- Joined: Mon Aug 24, 2020 10:27 am
- Whats your location?: Dundalk
- Region: Eastern
- What Minis have you?: 1983 Mini City 1000
- Contact:
Re: 1983 Mini City
Finally got round to running a heavier cable from house to shed, just over 10 meters. It was running on an old extension lead, 1.5mm2, but I've upped it to 2.5mm2 armoured as it was running along bottom of fence panels.
Also put in a distribution panel with separate trip switches for welder and sockets/light.
Changed plug on welder to 16A blue plug and have a 16A outlet directly from distribution panel, so hopefully that will stop any voltage drops.
Also picked up a 20L argon cylinder and regulator, get it rigged up tomorrow and see how some welding goes!
-
colinf1
- NON Member
- Posts: 419
- Joined: Mon Aug 24, 2020 10:27 am
- Whats your location?: Dundalk
- Region: Eastern
- What Minis have you?: 1983 Mini City 1000
- Contact:
Re: 1983 Mini City
I may shorten the uprights of the jig to 850mm, from 1050mm as thats what I have calculated the minimum rotational height to be, with a bit of clearance.
A quick solidworks sketch, blue line is the side of the shell rotated to about 50degress to give 812mm,,

This will make it much easier to get onto the jig also as currently its a 30cm lift.
Once the upstands are done, I can then look at shortening the pipes at the front and rear, I think I can get at least 100mm off each of these, plus I have a 30mm overhang on the sleeve that I can trim off.
I got the last of the wiring to the shed sorted, done some test welding on some off-cuts, seems to be much better, better penetration and not blowing through.
Havent had a chance to change over to gas yet, but I'm hoping the voltage drop was more to blame than the user!
A quick solidworks sketch, blue line is the side of the shell rotated to about 50degress to give 812mm,,
This will make it much easier to get onto the jig also as currently its a 30cm lift.
Once the upstands are done, I can then look at shortening the pipes at the front and rear, I think I can get at least 100mm off each of these, plus I have a 30mm overhang on the sleeve that I can trim off.
I got the last of the wiring to the shed sorted, done some test welding on some off-cuts, seems to be much better, better penetration and not blowing through.
Havent had a chance to change over to gas yet, but I'm hoping the voltage drop was more to blame than the user!
-
colinf1
- NON Member
- Posts: 419
- Joined: Mon Aug 24, 2020 10:27 am
- Whats your location?: Dundalk
- Region: Eastern
- What Minis have you?: 1983 Mini City 1000
- Contact:
Re: 1983 Mini City
Got my gas hooked up, but noticed a hiss coming from the barbed connector. Had to open the welder to fix the loose fitting inside, a combination of a fitting with no ptfe tape and a plastic tube that wasn't cut square.
I guess I figured out why I used a small hobby bottle so quickly then! <10mins! Opened the valve on cylinder and set it to 10L/min, closed the valve and let it sit for an hour or so, checked it again and it was still at 10L/min so hopefully thats the leak sorted.
Also attached the welder to a trolley, much easier to move it around now.
Put in the new wire reel but of course it got tangled so had to disassemble the feed guide. The small clamp that holds the liner in place wasn't holding it at all, so a dab of superglue should sort it.
Now to figure out the settings needed for gas welding...more practice, practice, practice...
-
colinf1
- NON Member
- Posts: 419
- Joined: Mon Aug 24, 2020 10:27 am
- Whats your location?: Dundalk
- Region: Eastern
- What Minis have you?: 1983 Mini City 1000
- Contact:
Re: 1983 Mini City
No much time spent on the mini over the last few weeks, bad welding and lack of time is causing me to get very frustrated with the progress I'm making...
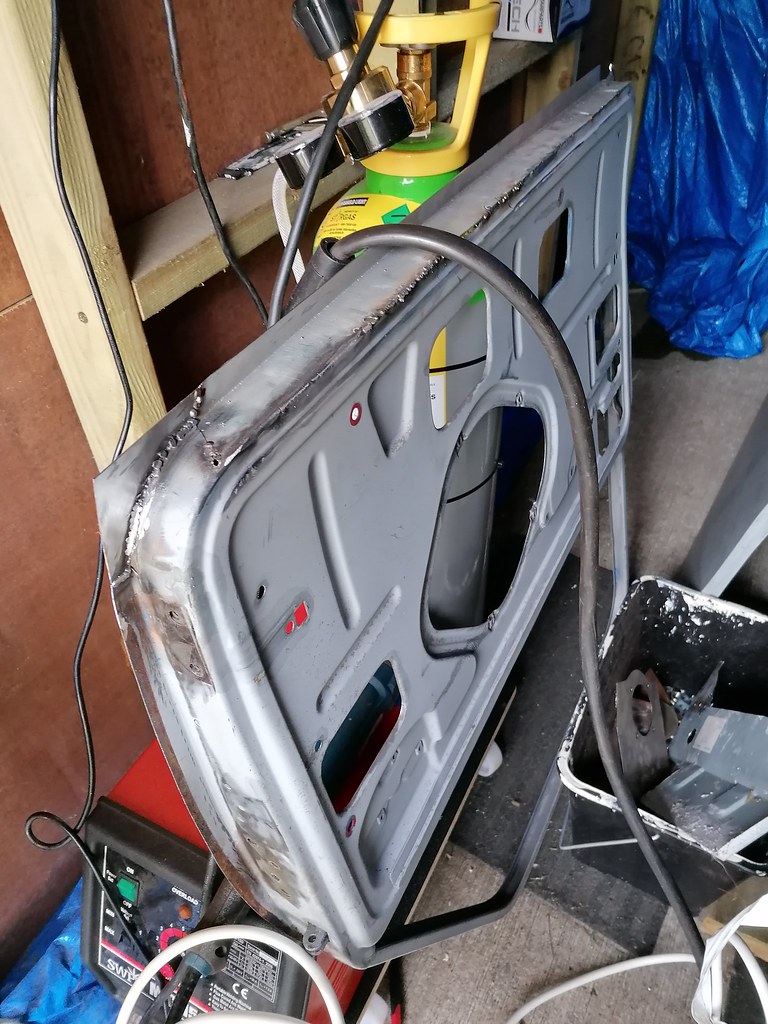
Wasn't happy with inner wing repair panel so I've opted to replace the entire inner wing, also have a lot of corrosion on upper door frame at the hinge holes so decide to replace that at the same time.
Made a start on repairing the doors, new skins and lower repair panel. Made some silly string with the welder and nearly lost a finger as I nicked my knuckle on my index finger with the back of a flappy disc so decided to call it a day...
-
ctwomey
- NON Member
- Posts: 296
- Joined: Thu Jan 03, 2019 9:44 am
- Whats your location?: Ballybrittas, Co. Laois
- Region: Eastern
- What Minis have you?: I owned a 1978 Mini 850 when I was in my late teens. I owned a 1986 Mini Chelsea that I imported from the UK. Also owned a 1982 MG Metro that was bored out to 1293. Restoring a 1981 Dublin Mini City.
- Contact:
Re: 1983 Mini City
Same here, I have been tipping away doing a small bit of patch panel welding on the rear floor in each of the corners and at the seam which meets the rear panel. Slow and steady as they say.
At least the plug welds can be run hotter than butt welding thus reducing the risk of blowing a hole.
Looking at the welding on the door there is a lot of weld building up on your tacks which could mean that the wire speed is quite high. I am no expert but it does seem like a lot to have to grind down. Are you on the lowest setting for that welder?
-
colinf1
- NON Member
- Posts: 419
- Joined: Mon Aug 24, 2020 10:27 am
- Whats your location?: Dundalk
- Region: Eastern
- What Minis have you?: 1983 Mini City 1000
- Contact:
Re: 1983 Mini City
Got my inner wing delivered today, along with some door frame panels and bonnet moulding panel.
Some parts will need to be salvaged from old inner wing, bonnet strut locator and the washer bottle mount.
Door frame repair will need to be slightly adjusted to match the step repair panel but fit looks good.
Ordered from Limora, not sure if they make them themselves.
I've everything I need panel wise to complete from door step forward including the sills, just need to find time, patience and practice now...
-
colinf1
- NON Member
- Posts: 419
- Joined: Mon Aug 24, 2020 10:27 am
- Whats your location?: Dundalk
- Region: Eastern
- What Minis have you?: 1983 Mini City 1000
- Contact:
Re: 1983 Mini City
I'm going to take the welder to work to test it in the workshop, that way I see if I've issues with the power going to my shed.
I've been trying to do some practice welds on scrap material, get it going good but then when I move to do something on the car it doesn't weld as good, then frustration gets the better of me and I call it a day...
-
colinf1
- NON Member
- Posts: 419
- Joined: Mon Aug 24, 2020 10:27 am
- Whats your location?: Dundalk
- Region: Eastern
- What Minis have you?: 1983 Mini City 1000
- Contact:
Re: 1983 Mini City
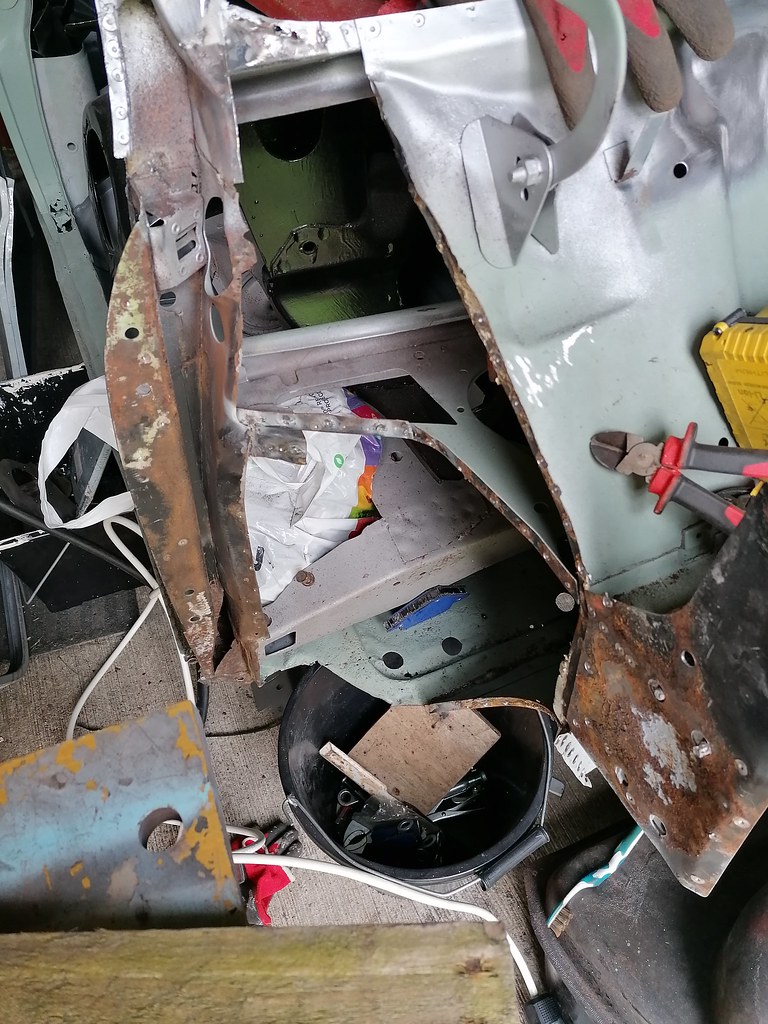
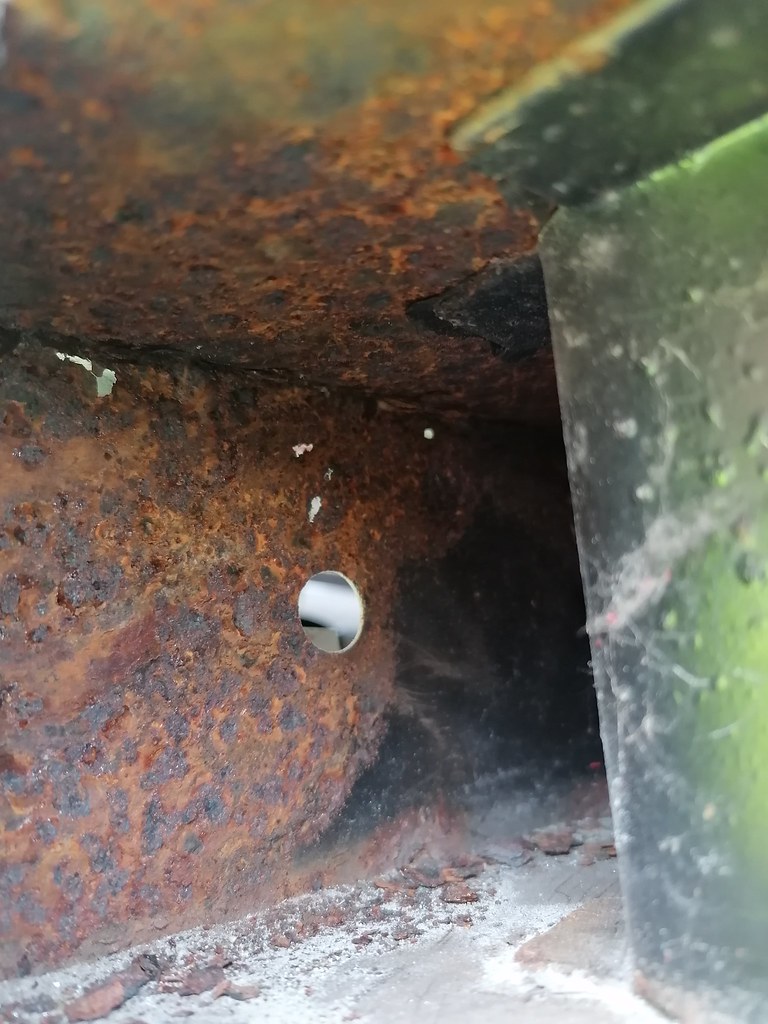
Some more cleaning done around mating faces for the inner wing. Cleaned up around the upper shock mount then cut out the rust from the middle.

Once I could see into the crossbeam I noticed some rust on the upper bulkhead just below dash shelf.
Cut out the rust and made a patch. Tried to butt weld it, but thinking now I should have made the patch bigger and toggled it.
Also tried to drill out the snapped bolts in the shock mount, got 1 drilled then dril bit broken inside the 2nd one. Managed to pop the entire piece off, I'll make up a replacement
Taking some annual leave next week, hopefully get something productive done!
-
colinf1
- NON Member
- Posts: 419
- Joined: Mon Aug 24, 2020 10:27 am
- Whats your location?: Dundalk
- Region: Eastern
- What Minis have you?: 1983 Mini City 1000
- Contact:
Re: 1983 Mini City
First day of annual leave...
Started by looking at the door frame and step. Welded in a support bar, cross member to A pillar, then started chopping. Step didn't give too much trouble, hinge panel wasn't too bad either. Had a replacement A post stiffener so left it attached to hinge panel.
Chopped up the inner wing repair panel and clamped that in place to use as a guide for the hinge holes.
Once I'd the step off I could see what was left of the cross beam closing panel, not much at all...


Also noticed that the sill was partially replaced, from step to start of the lower section and then had some patch repairs in parts. Surely would have made more sense to replace the entire sill, but at least I know it's being fully replaced now.
Had to make up a panel for the inner sill from front of crossbeam to about 4inches into the rear floor pan. I had bought inner sill covers, but decided against using them so have been used for patching material.
I offered up the sill, step and full inner wing and everything looks to line up, some tweaking needed around toe board to inner wing but just thankful I didn't put anything out of alignment (I hope)...
Plan for tomorrow is to make the crossbeam closing panel, then set about welding step and sill on.
Started by looking at the door frame and step. Welded in a support bar, cross member to A pillar, then started chopping. Step didn't give too much trouble, hinge panel wasn't too bad either. Had a replacement A post stiffener so left it attached to hinge panel.
Chopped up the inner wing repair panel and clamped that in place to use as a guide for the hinge holes.
Once I'd the step off I could see what was left of the cross beam closing panel, not much at all...
Also noticed that the sill was partially replaced, from step to start of the lower section and then had some patch repairs in parts. Surely would have made more sense to replace the entire sill, but at least I know it's being fully replaced now.
Had to make up a panel for the inner sill from front of crossbeam to about 4inches into the rear floor pan. I had bought inner sill covers, but decided against using them so have been used for patching material.
I offered up the sill, step and full inner wing and everything looks to line up, some tweaking needed around toe board to inner wing but just thankful I didn't put anything out of alignment (I hope)...
Plan for tomorrow is to make the crossbeam closing panel, then set about welding step and sill on.
-
colinf1
- NON Member
- Posts: 419
- Joined: Mon Aug 24, 2020 10:27 am
- Whats your location?: Dundalk
- Region: Eastern
- What Minis have you?: 1983 Mini City 1000
- Contact:
Re: 1983 Mini City
Day 2 of annual leave, didn't go as good as yesterday and feeling a little less motivated now...plus it was scorchingly hot especially when welding!
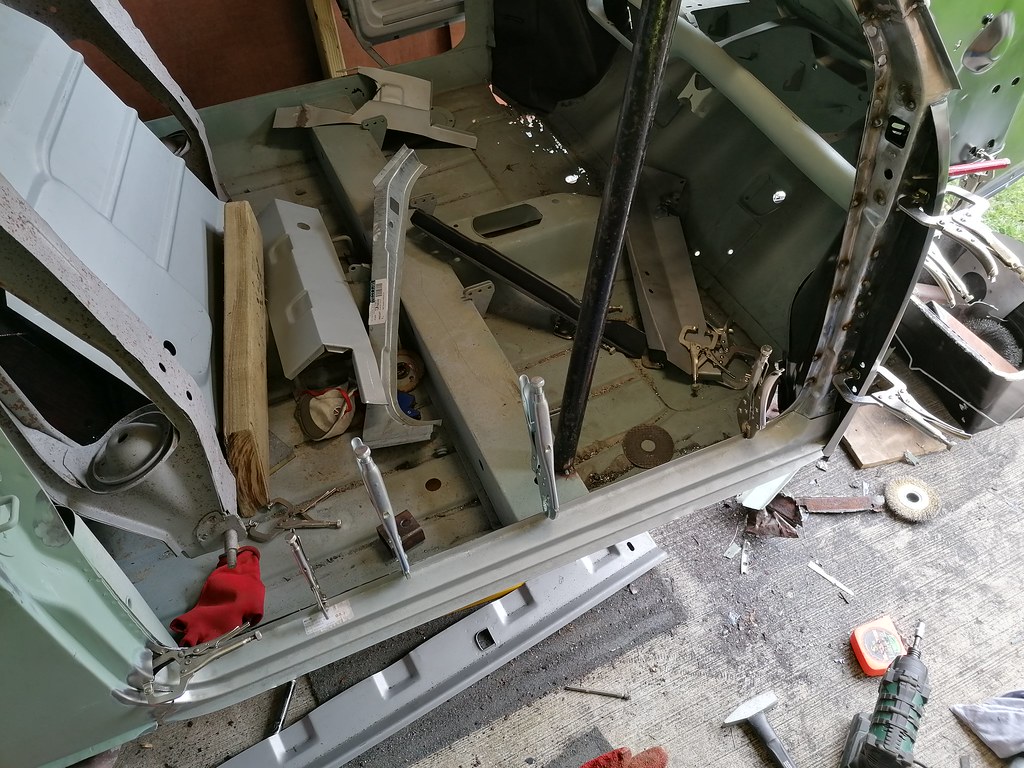
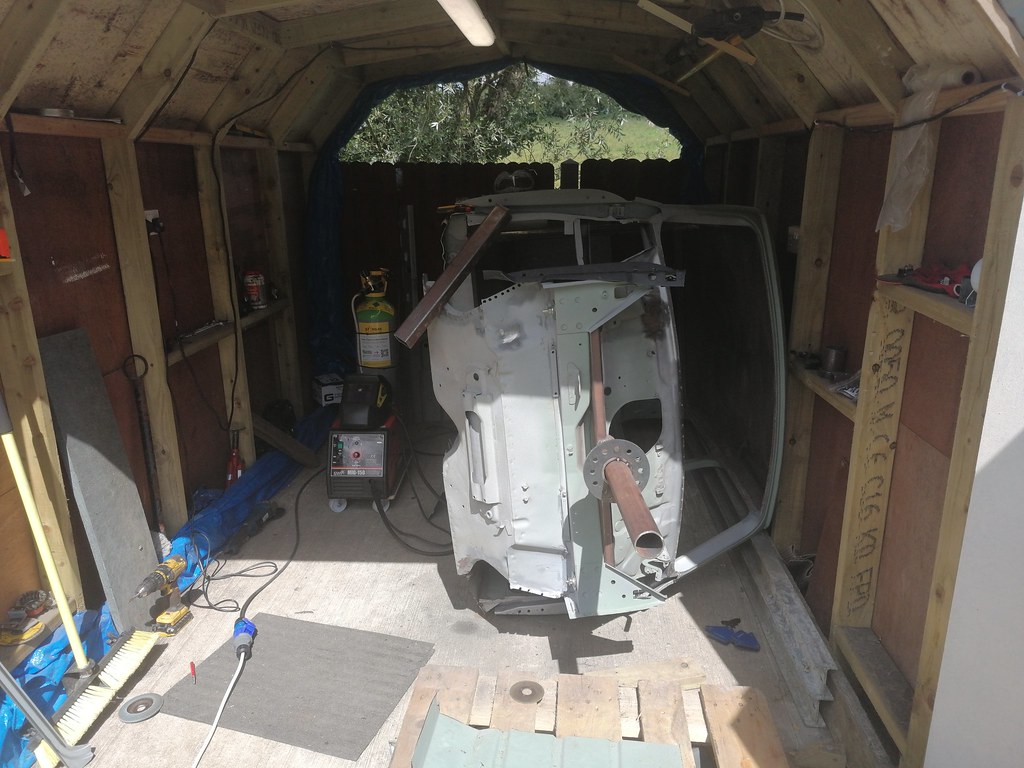
Started by getting the car into its side...but that meant emptying the shell as it was full of all the panels, doors, boot, 2 bonnets, front and rear subframe. Guess the lawnmower won't be moving for a while...

So much for the rotisserie I built, I just tipped it over and let it sit on sill seam on the floor then on some metal beam along its roof gutter.
Then set about removing the driver's side floor pan. Added some bracing to keep A post in place. It was a real struggle to find all the spot welds as the floor was very corroded, but not corroded enough that it would just fall out.

Some rust along lower edge of cross member, cut that out and patched it up. Then set about cutting the floor, lots of lining up, checking, lining up again and finally cutting.
The flutes along the floor and repair panel don't line up, so will need to sort that, then front section along sill went out of line by about 5mm, only realised once I had welded most of it in.
Think I should be able to make a relief cut to pull it back it without having to remove it all...

Started by getting the car into its side...but that meant emptying the shell as it was full of all the panels, doors, boot, 2 bonnets, front and rear subframe. Guess the lawnmower won't be moving for a while...
So much for the rotisserie I built, I just tipped it over and let it sit on sill seam on the floor then on some metal beam along its roof gutter.
Then set about removing the driver's side floor pan. Added some bracing to keep A post in place. It was a real struggle to find all the spot welds as the floor was very corroded, but not corroded enough that it would just fall out.
Some rust along lower edge of cross member, cut that out and patched it up. Then set about cutting the floor, lots of lining up, checking, lining up again and finally cutting.
The flutes along the floor and repair panel don't line up, so will need to sort that, then front section along sill went out of line by about 5mm, only realised once I had welded most of it in.
Think I should be able to make a relief cut to pull it back it without having to remove it all...
-
colinf1
- NON Member
- Posts: 419
- Joined: Mon Aug 24, 2020 10:27 am
- Whats your location?: Dundalk
- Region: Eastern
- What Minis have you?: 1983 Mini City 1000
- Contact:
Re: 1983 Mini City
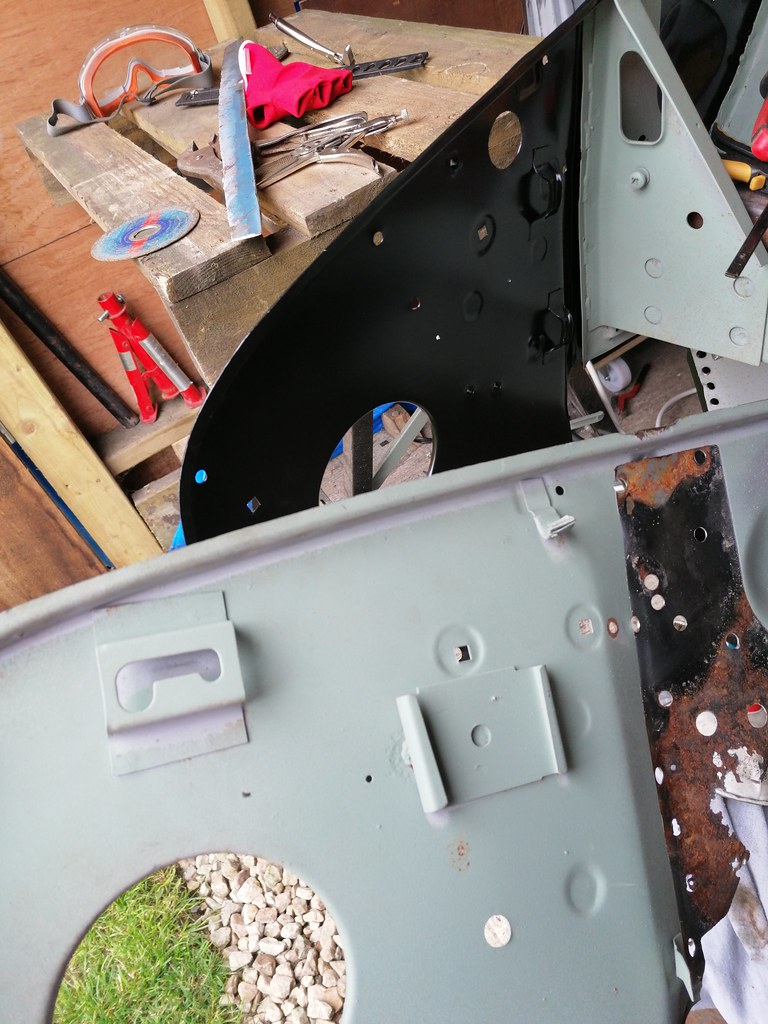
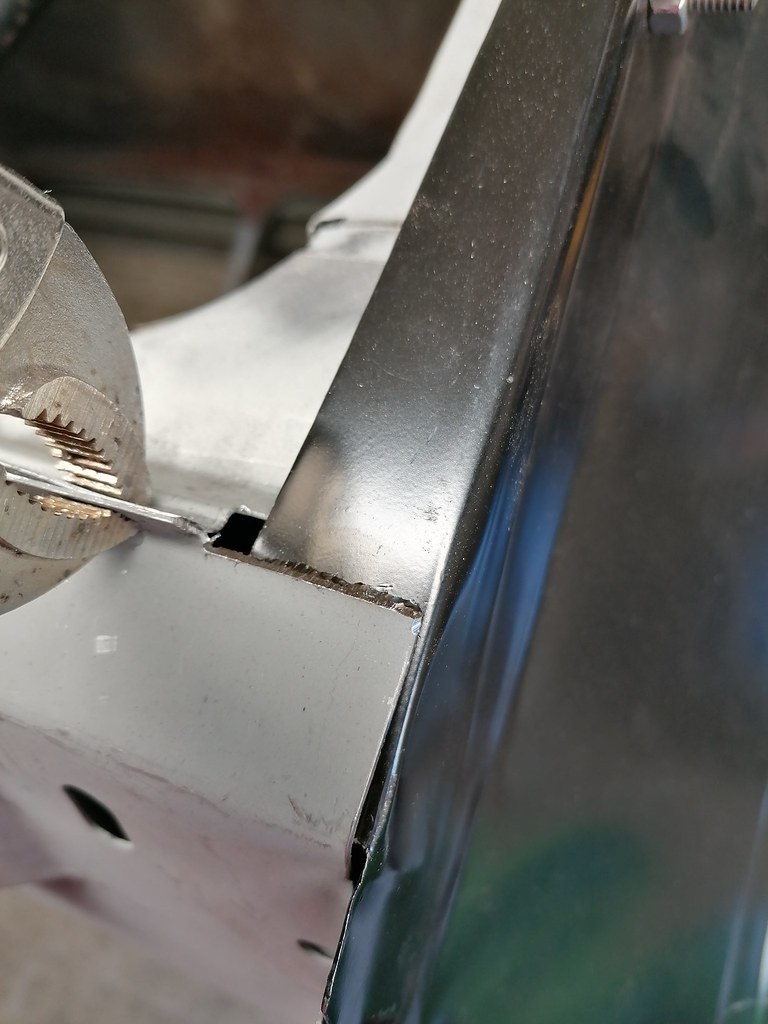
Quick question regarding the inner wing and outer sill. I had thought it went behind the inner wing as I cut off a bit of the lip, but now realise it goes on the outside of the inner wing and the step goes on the inside??
Like this?
Like this?
-
ctwomey
- NON Member
- Posts: 296
- Joined: Thu Jan 03, 2019 9:44 am
- Whats your location?: Ballybrittas, Co. Laois
- Region: Eastern
- What Minis have you?: I owned a 1978 Mini 850 when I was in my late teens. I owned a 1986 Mini Chelsea that I imported from the UK. Also owned a 1982 MG Metro that was bored out to 1293. Restoring a 1981 Dublin Mini City.
- Contact:
Re: 1983 Mini City
Correct and the A panel I believe joins up with the outer sill on that lip that you trimmed off. You should be able to weld back on a new lip.
-
woody
- IMOC Paid Member
- Posts: 2819
- Joined: Mon Feb 07, 2005 11:55 pm
- Whats your location?: Drogheda
- Region: Eastern
- What Minis have you?: Traveller
Turbo
Hornet
Equinox
MINI Clubman - Location: LOUTH
- Contact:
Re: 1983 Mini City
Yes , you need to replace the lip as the A panel is only welded at the top and bottom ( to the missing lip) with a fold along the end of the inner wing.
TECHNICAL MODERATOR
-
colinf1
- NON Member
- Posts: 419
- Joined: Mon Aug 24, 2020 10:27 am
- Whats your location?: Dundalk
- Region: Eastern
- What Minis have you?: 1983 Mini City 1000
- Contact:
Re: 1983 Mini City
Not much done the last few weeks, ordered a new steel workshed, 6m X 3m, so should have more room for workbench, storage and more importantly, room to work.
But quite a long lead time of 15weeks!
Plan is to get a bit more done on the shell over the next few weeks, then start emptying the garden shed into crates, then on the day that the new shed arrives - move the mini car-port and hopefully they can erect shed around the shell.
Now if it would only stop raining I might be able to muster up some motivation to do something...
-
colinf1
- NON Member
- Posts: 419
- Joined: Mon Aug 24, 2020 10:27 am
- Whats your location?: Dundalk
- Region: Eastern
- What Minis have you?: 1983 Mini City 1000
- Contact:
Re: 1983 Mini City
Back at it today after not having much motivation to do much.
Decided to try and get inner wing full fitted, but first had to close off end of bulkhead cross member.

Once that was done I offered up the inner wing and clamped it all in position. Then scribed the inside to mark where I needed to drill for plug welds, the got on with drilling.
Didn't feel right drilling into a new panel

I went 8mm for the holes, but think I could have done them 6mm, would have been quicker to fill.
Took it nice and slow with the dressing down as to not put too much heat into the welds, a few pin holes here and there but overall I'm happy, feels like it's fully secured. Ran out of time to dress off the last of the welds, so cleaned them up and gave them a coat of zinc primer til I can finish them.

I took a look at the engine during the week, took off clutch cover, lots and lots of clutch dust build up, lots of crud lying at the bottom of the housing too so will need a good clear out before digging deeper. Stripped down the head ready for cleaning, very pitted around thermostat housing, I have a spare head of the same CAM4810 so will use that as it looks in better condition.
Valves have F and H stamped on them, any ideas?
Decided to try and get inner wing full fitted, but first had to close off end of bulkhead cross member.
Once that was done I offered up the inner wing and clamped it all in position. Then scribed the inside to mark where I needed to drill for plug welds, the got on with drilling.
Didn't feel right drilling into a new panel
I went 8mm for the holes, but think I could have done them 6mm, would have been quicker to fill.
Took it nice and slow with the dressing down as to not put too much heat into the welds, a few pin holes here and there but overall I'm happy, feels like it's fully secured. Ran out of time to dress off the last of the welds, so cleaned them up and gave them a coat of zinc primer til I can finish them.
I took a look at the engine during the week, took off clutch cover, lots and lots of clutch dust build up, lots of crud lying at the bottom of the housing too so will need a good clear out before digging deeper. Stripped down the head ready for cleaning, very pitted around thermostat housing, I have a spare head of the same CAM4810 so will use that as it looks in better condition.
Valves have F and H stamped on them, any ideas?
-
colinf1
- NON Member
- Posts: 419
- Joined: Mon Aug 24, 2020 10:27 am
- Whats your location?: Dundalk
- Region: Eastern
- What Minis have you?: 1983 Mini City 1000
- Contact:
Re: 1983 Mini City
Finished dressing off the plug welds, then went over any pin holes. Also welded on the bonnet support bracket. Still have to weld on the washer bottle bracket and plug weld along floor and toe board but nearly there with that side. I definitely will be increasing the distance between the plug welds, don't think I needed as many.

Still a bit of dressing off a filled hole on the top of the bracket where I accidentally drilled through when removing it from old wing.
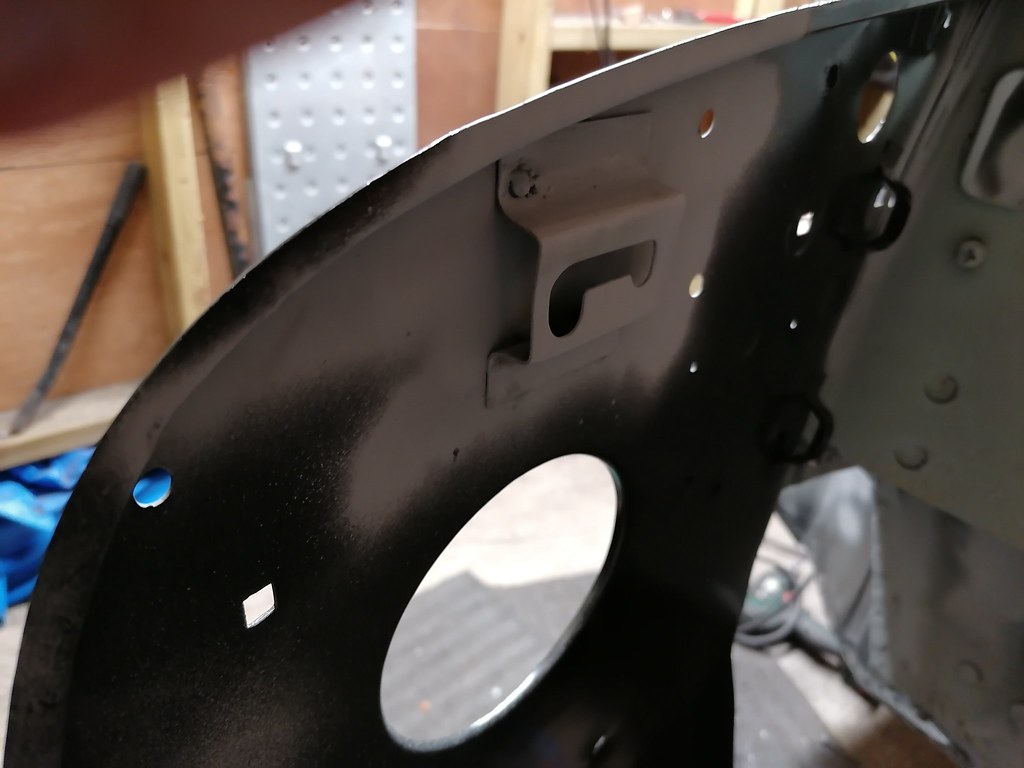
Still a bit of dressing off a filled hole on the top of the bracket where I accidentally drilled through when removing it from old wing.
-
colinf1
- NON Member
- Posts: 419
- Joined: Mon Aug 24, 2020 10:27 am
- Whats your location?: Dundalk
- Region: Eastern
- What Minis have you?: 1983 Mini City 1000
- Contact:
Re: 1983 Mini City
Made up a flywheel puller today, M16 center bolt and drilled with holes based on a pre-verto flywheel  redrilled to suit whatever pcd is on mine, maybe 90/95?
A bit of faffing about but eventually got it off, didn't make too much of a bang when it let go.
Small bit of damage on the crankshaft taper, so will need to dress it down.

 redrilled to suit whatever pcd is on mine, maybe 90/95?
A bit of faffing about but eventually got it off, didn't make too much of a bang when it let go.
Small bit of damage on the crankshaft taper, so will need to dress it down.
-
colinf1
- NON Member
- Posts: 419
- Joined: Mon Aug 24, 2020 10:27 am
- Whats your location?: Dundalk
- Region: Eastern
- What Minis have you?: 1983 Mini City 1000
- Contact:
Re: 1983 Mini City
Got my engine stand made up during the week, and got the engine mounted onto it today.
Started taking apart the gearbox, bagging each part with the required nuts bolts and washers so I don't get anything mixed up.
On 1st inspection the gears look good, no sign of any grinding wear.
Gearbox exhaust hanger bracket needs replacing as it's been welded same as lower engine steady.
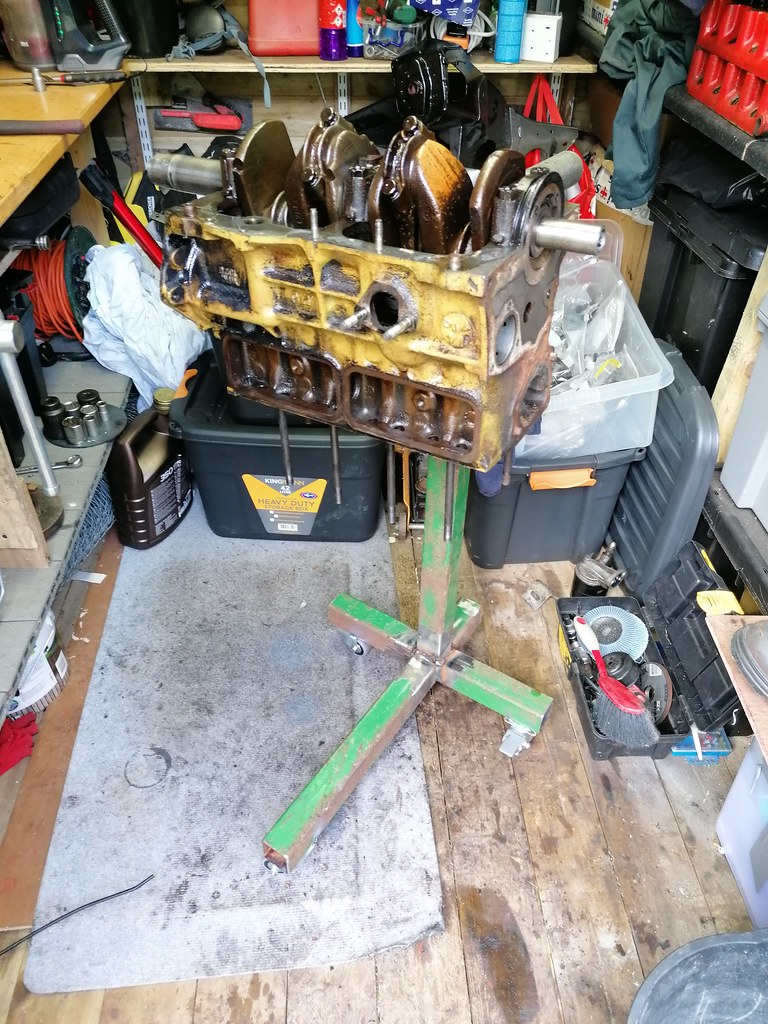
Still waiting for my new shed to arrive, hopefully be within the next few weeks!
Started taking apart the gearbox, bagging each part with the required nuts bolts and washers so I don't get anything mixed up.
On 1st inspection the gears look good, no sign of any grinding wear.
Gearbox exhaust hanger bracket needs replacing as it's been welded same as lower engine steady.
Still waiting for my new shed to arrive, hopefully be within the next few weeks!
-
colinf1
- NON Member
- Posts: 419
- Joined: Mon Aug 24, 2020 10:27 am
- Whats your location?: Dundalk
- Region: Eastern
- What Minis have you?: 1983 Mini City 1000
- Contact:
Re: 1983 Mini City
It's been a while since I've updated on here, nothing much done welding wise, move onto engine disassembly whole I was waiting for my new shed to arrive.
It arrived a few weeks back, so lots of things to move from old shed, pack and unpack, lights and sockets installed, new workbench and storage system and finally the mini is inside protected from the elements. Mini shed was disassembled and mostly disposed of as most of the plywood had started to rot. Can't complain as it done its job and kept the shell completely dry for a year. Old shed was also sold, but lots of foot traffic across the garden has left it look worse for wear, hopefully it bounces back come spring time.
Got my latest minispare order for engine and gearbox refresh, and thanks to Brexit and DHL it cost me an extra €45! So much for the savings from ordering during the black Friday sale!
Finished stripping the engine by removing the studs for head, fuel pump & 2 studs to gearbox then dropped it off engine stand into a plastic storage box for cleaning.
Came up pretty good with just oven cleaner and a toothbrush.


Dried it all off then sprayed liberal amounts of wd-40 everywhere I could. Still need to clean out threaded holes and flush water jacket, but for the initial clean I think it's fine. Left it covered in a oily rag til I get back to it.
I then set about removing the main gears from the gearbox. Carefully drifted out the 1st motion shaft bearing, it came out nice and easy, I'll be reusing this as it looks good and no play in it.
Was a different story with the double roller bearing on the main shaft. It looks different to the new RHP bearing, as in the inner row was partially exposed where as the casing on the new one is full width of both rows.
I tapped the main shaft to open up some space to push bearing out, but bearing cage broke and sent bits flying everywhere! All detents popped out at the same, luckily they dropped into the casing, all springs and ball bearings accounted for!
Managed to wiggle the main shaft free and remove it without too much fuss.
All baulk rings look in perfect condition, these weren't in stock at minispares until end of January so was hoping that they would be fine.
Ready for another cleaning session...


I've been using the bill sollis video on YouTube as a guide for disassembly, very detailed explanations on what to look for and how to take things apart, hopefully it's just as handy for reassembly
It arrived a few weeks back, so lots of things to move from old shed, pack and unpack, lights and sockets installed, new workbench and storage system and finally the mini is inside protected from the elements. Mini shed was disassembled and mostly disposed of as most of the plywood had started to rot. Can't complain as it done its job and kept the shell completely dry for a year. Old shed was also sold, but lots of foot traffic across the garden has left it look worse for wear, hopefully it bounces back come spring time.
Got my latest minispare order for engine and gearbox refresh, and thanks to Brexit and DHL it cost me an extra €45! So much for the savings from ordering during the black Friday sale!
Finished stripping the engine by removing the studs for head, fuel pump & 2 studs to gearbox then dropped it off engine stand into a plastic storage box for cleaning.
Came up pretty good with just oven cleaner and a toothbrush.
Dried it all off then sprayed liberal amounts of wd-40 everywhere I could. Still need to clean out threaded holes and flush water jacket, but for the initial clean I think it's fine. Left it covered in a oily rag til I get back to it.
I then set about removing the main gears from the gearbox. Carefully drifted out the 1st motion shaft bearing, it came out nice and easy, I'll be reusing this as it looks good and no play in it.
Was a different story with the double roller bearing on the main shaft. It looks different to the new RHP bearing, as in the inner row was partially exposed where as the casing on the new one is full width of both rows.
I tapped the main shaft to open up some space to push bearing out, but bearing cage broke and sent bits flying everywhere! All detents popped out at the same, luckily they dropped into the casing, all springs and ball bearings accounted for!
Managed to wiggle the main shaft free and remove it without too much fuss.
All baulk rings look in perfect condition, these weren't in stock at minispares until end of January so was hoping that they would be fine.
Ready for another cleaning session...
I've been using the bill sollis video on YouTube as a guide for disassembly, very detailed explanations on what to look for and how to take things apart, hopefully it's just as handy for reassembly

-
woody
- IMOC Paid Member
- Posts: 2819
- Joined: Mon Feb 07, 2005 11:55 pm
- Whats your location?: Drogheda
- Region: Eastern
- What Minis have you?: Traveller
Turbo
Hornet
Equinox
MINI Clubman - Location: LOUTH
- Contact:
Re: 1983 Mini City
Great work done there. Usually its second gear that takes the most abuse so if the syncro and balkring good there its a good sign. The Videos are good and also the early Haynes manuals have a good chapter on gearboxes.
TECHNICAL MODERATOR
-
ctwomey
- NON Member
- Posts: 296
- Joined: Thu Jan 03, 2019 9:44 am
- Whats your location?: Ballybrittas, Co. Laois
- Region: Eastern
- What Minis have you?: I owned a 1978 Mini 850 when I was in my late teens. I owned a 1986 Mini Chelsea that I imported from the UK. Also owned a 1982 MG Metro that was bored out to 1293. Restoring a 1981 Dublin Mini City.
- Contact:
Re: 1983 Mini City
When ordering bearings, make sure they are quality ones RHP, Koyo, Timkin and INA. There are lots of cheap ones around that could cause the gearbox to fail prematurely.
-
colinf1
- NON Member
- Posts: 419
- Joined: Mon Aug 24, 2020 10:27 am
- Whats your location?: Dundalk
- Region: Eastern
- What Minis have you?: 1983 Mini City 1000
- Contact:
Who is online
Users browsing this forum: No registered users and 2 guests
